
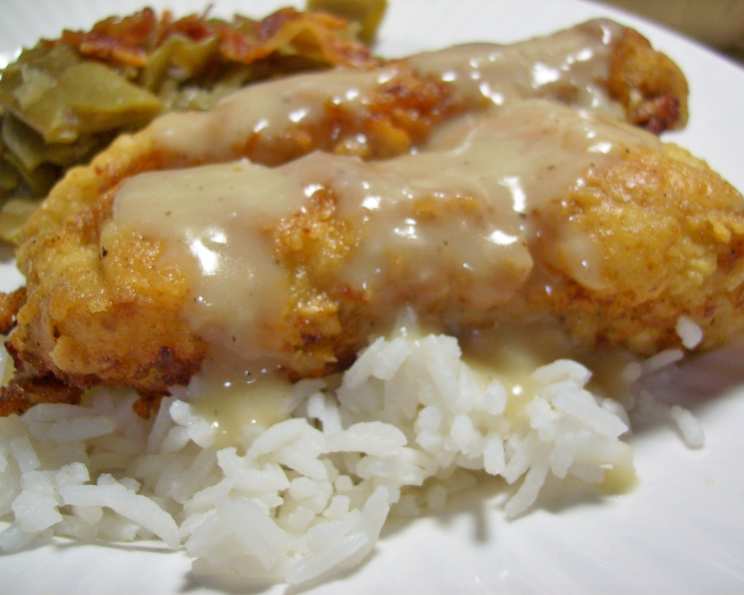
Double Dipped Chicken Fingers: A Crispy, Golden Delight
I still remember the first time I tasted chicken fingers that were truly extraordinary. It was at a local county fair, a place brimming with greasy goodness, but these stood out. They weren’t just fried chicken; they were encased in a shatteringly crisp, perfectly seasoned shell that gave way to tender, juicy chicken within. I watched in fascination as the vendor explained his secret: a double dip in egg and flour. That memory has stayed with me, inspiring me to perfect my own version of this irresistible treat. Now, I’m excited to share my take on Double Dipped Chicken Fingers, a recipe guaranteed to bring a smile to everyone’s face.
Recipe Overview:
- Prep Time: 35 minutes
- Cook Time: 15 minutes
- Total Time: 50 minutes
- Servings: 2-4
- Dietary Type: Comfort Food
Ingredients:
- 6-8 boneless, skinless chicken tenders
- 2 cups water
- 1 tablespoon salt
- 2 cups all-purpose flour
- 2 teaspoons seasoning salt (such as Penzey’s Spicy 4/S Special Seasoned Sea Salt)
- 2 eggs
- 2 cups peanut oil
Equipment Needed:
- Medium-sized bowl
- Shallow bowls (2)
- Baking sheet
- Large heavy skillet
- Paper towels
Instructions:
-
Begin by preparing the chicken. Place the chicken tenders in a medium-sized bowl.
-
Add the water and salt to the bowl with the chicken. Stir to ensure the salt dissolves.
-
Cover the bowl and place it in the refrigerator for at least 30 minutes. This brining process helps to keep the chicken moist and flavorful.
-
While the chicken is brining, prepare the dredging stations. In a shallow bowl, combine the flour and seasoning salt. Mix well to ensure the seasoning is evenly distributed throughout the flour.
-
In another shallow bowl, whisk the eggs until they are well combined and slightly frothy. This will help the flour adhere to the chicken.
-
Once the chicken has brined for at least 30 minutes, remove it from the refrigerator and drain the salt water. Pat the chicken tenders dry with paper towels.
-
Now, it’s time for the first dip. Take each chicken tender and dip it completely into the egg mixture, making sure it’s fully coated.
-
Immediately after the egg dip, dredge the chicken tender in the flour mixture. Press the chicken into the flour to ensure it’s completely coated on all sides.
-
Place the dredged chicken tenders on a floured baking sheet. This will prevent them from sticking.
-
Pour the peanut oil into a large heavy skillet. The amount of oil should be deep enough to submerge the chicken tenders about halfway.
-
Heat the peanut oil over medium-high heat. To test if the oil is hot enough, you can carefully drop a small amount of flour into the oil. If it sizzles and browns quickly, the oil is ready. Be careful not to overheat the oil, as it can burn the chicken before it cooks through.
-
This is where the magic happens: the double dip! Take each chicken tender and dip it again in the egg mixture, ensuring it’s completely coated.
-
Immediately after the second egg dip, dredge the chicken tender again in the flour mixture. This double coating is what gives these chicken fingers their signature crispy texture.
-
Carefully place the chicken tenders into the hot peanut oil. Do not overcrowd the pan. If necessary, cook the chicken in two batches to maintain the oil temperature and prevent the chicken from sticking together.
-
Cook the chicken tenders, turning occasionally, until both sides are golden brown and the chicken is cooked through. This should take about 6-8 minutes per batch. The internal temperature of the chicken should reach 165°F (74°C).
-
Remove the cooked chicken tenders from the skillet and place them on paper towels to drain off any excess oil.
-
Serve immediately and enjoy the crispy, golden deliciousness of your Double Dipped Chicken Fingers!
Expert Tips & Tricks:
- Brining is Key: Don’t skip the brining step! It makes a huge difference in the tenderness and juiciness of the chicken.
- Temperature Control: Maintaining the correct oil temperature is crucial. Too low, and the chicken will be greasy; too high, and it will burn before cooking through. Use a thermometer to monitor the oil temperature if possible.
- Seasoning Salt Options: Experiment with different seasoning salts to find your favorite flavor profile. Garlic salt, onion salt, or even a touch of cayenne pepper can add a unique twist.
- Crispy Coating Secret: Make sure the chicken is completely coated in flour after each dip for maximum crispiness.
- Prevent Sticking: Use a non-stick skillet, or ensure there’s enough oil in the pan. Don’t overcrowd the pan, either.
Serving & Storage Suggestions:
Serve these Double Dipped Chicken Fingers immediately for the best flavor and texture. They pair perfectly with a variety of dipping sauces, such as honey mustard, barbecue sauce, ranch dressing, or even a spicy aioli.
Leftovers can be stored in an airtight container in the refrigerator for up to 3 days. To reheat, bake them in a preheated oven at 350°F (175°C) for about 10-15 minutes, or until heated through. You can also reheat them in an air fryer for a crispier result. While you can freeze the cooked chicken fingers, the texture may change upon thawing, becoming less crispy.
Nutritional Information:
| Nutrient | Amount per Serving | % Daily Value |
|---|---|---|
| Calories | 1218 kcal | N/A |
| Calories from Fat | 998 g | 82% |
| Total Fat | 111 g | 170% |
| Saturated Fat | 19.1 g | 95% |
| Cholesterol | 93 mg | 31% |
| Sodium | 1784.4 mg | 74% |
| Total Carbohydrate | 47.9 g | 15% |
| Dietary Fiber | 1.7 g | 6% |
| Sugars | 0.3 g | 1% |
| Protein | 9.6 g | 19% |
Note: Nutritional information is an estimate and may vary based on specific ingredients and portion sizes.
Variations & Substitutions:
- Gluten-Free: Use gluten-free all-purpose flour for a gluten-free version. You may need to add a binder like xanthan gum for better texture.
- Spicy: Add a pinch of cayenne pepper or a dash of hot sauce to the egg mixture or flour mixture for a spicy kick.
- Herb-Infused: Add dried herbs like thyme, rosemary, or oregano to the flour mixture for a more complex flavor.
- Different Oils: While peanut oil is recommended for its high smoke point, you can also use canola oil or vegetable oil.
- Air Fryer: For a healthier option, you can cook these in an air fryer. Preheat the air fryer to 400°F (200°C) and cook for about 10-12 minutes, flipping halfway through, until golden brown and cooked through.
FAQs (Frequently Asked Questions):
Q: Why do you brine the chicken?
A: Brining the chicken in salt water helps to tenderize the meat and keep it moist during cooking, resulting in juicier chicken fingers.
Q: Can I use different types of flour?
A: While all-purpose flour is recommended, you can experiment with other types of flour like whole wheat flour or almond flour, but the texture may vary.
Q: How do I know when the chicken is cooked through?
A: The chicken is cooked through when it reaches an internal temperature of 165°F (74°C). You can use a meat thermometer to check the temperature.
Q: Can I make these ahead of time?
A: While they are best served fresh, you can prepare the chicken up to the point of frying and store them in the refrigerator for a few hours. Fry them just before serving.
Q: What dipping sauces go well with these chicken fingers?
A: Honey mustard, barbecue sauce, ranch dressing, spicy aioli, and even ketchup are all great options for dipping.
Final Thoughts:
There you have it – my take on the unforgettable Double Dipped Chicken Fingers! I encourage you to try this recipe and experience the joy of biting into a perfectly crispy, golden, and juicy chicken finger. Don’t be afraid to experiment with different seasonings and dipping sauces to create your own unique version. And most importantly, share your culinary creations with friends and family. After all, food is best enjoyed when shared! Let me know what you think in the comments below, and happy cooking!