
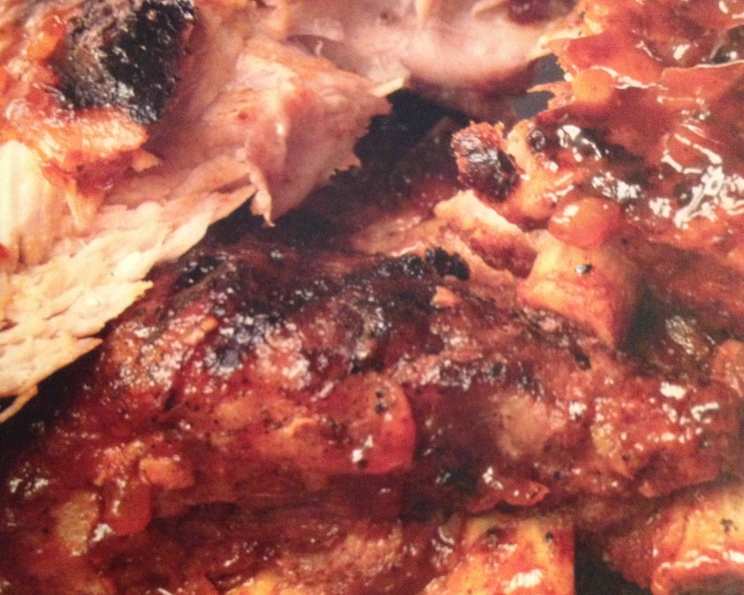
Dr. Pepper Ribs: A Sweet and Savory Delight
The aroma of slow-cooked ribs always transports me back to summer barbecues with my family. I remember my grandfather, a man of few words but masterful on the grill, carefully tending to his ribs, basting them with his secret sauce. While his recipe was a closely guarded secret, the sweet and smoky flavor profile of these Dr. Pepper Ribs reminds me so much of those cherished moments. They’re a delightful twist on a classic, and I know my grandpa would have approved.
Recipe Overview
- Prep Time: 2 hours 15 minutes (includes chilling time)
- Cook Time: 2 hours 25 minutes
- Total Time: 4 hours 40 minutes (includes chilling time)
- Servings: 4
- Yield: 2 racks
- Dietary Type: Not specified (contains meat, gluten and potentially high sugar content)
Ingredients
- 2 racks baby back ribs
- 1 (2 liter) bottle Dr. Pepper cola, divided
- 1⁄4 cup salt
- 1 tablespoon chili powder
- 1 tablespoon canola oil
- 1⁄2 medium onion, minced
- 1 garlic clove, minced
- 1⁄2 cup ketchup
- 2 tablespoons Worcestershire sauce
- 2 tablespoons cider vinegar
- 1⁄8 teaspoon cayenne pepper
- 1 cup water
Equipment Needed
- Large baking dish
- Baking dish
- Aluminum foil
- Saucepan
- Grill
Instructions
-
Begin by preparing the ribs. Place the ribs in a large baking dish. Pour in most of the Dr. Pepper, ensuring that the ribs are covered. Reserve at least 1/2 cup of Dr. Pepper for the sauce. Add the salt and soak the ribs in the refrigerator overnight, or for a minimum of 2 hours. This process helps tenderize the meat and infuse it with the Dr. Pepper flavor.
-
Preheat your oven to 350°F (175°C). This moderate temperature ensures even cooking and prevents the ribs from drying out.
-
Remove the ribs from the Dr. Pepper marinade and pat them dry with paper towels. This step is crucial for allowing the chili powder to adhere properly and create a flavorful crust.
-
Rub the ribs generously with the chili powder, ensuring every surface is coated. This spice will add a depth of flavor that complements the sweetness of the Dr. Pepper.
-
Place the seasoned ribs on a baking dish and add 1 cup of water to the bottom of the dish. The water will create steam, keeping the ribs moist and tender during the baking process.
-
Cover the baking dish tightly with aluminum foil. Make sure the foil is securely sealed to trap the steam.
-
Cook in the preheated oven for 2 hours, or until the meat is nearly falling off the bone. This indicates that the collagen has broken down, resulting in incredibly tender ribs. Check for doneness by inserting a fork between the bones; if it slides in easily, the ribs are ready.
-
While the ribs are baking, prepare the BBQ sauce. Heat the canola oil in a saucepan over medium heat.
-
Sauté the minced onion and garlic until they are soft and fragrant. This step typically takes about 5-7 minutes. Be careful not to burn the garlic, as it can become bitter.
-
Add the ketchup, Worcestershire sauce, cider vinegar, cayenne pepper, and the reserved 1/2 cup of Dr. Pepper to the saucepan.
-
Simmer the sauce for 15 to 20 minutes, or until it thickens to your desired consistency. Stir occasionally to prevent sticking and burning. The sauce should coat the back of a spoon easily when it’s ready.
-
Once the ribs are cooked, fire up your grill. Make sure the grates are clean and lightly oiled to prevent sticking.
-
Generously brush the cooked ribs with the prepared BBQ sauce.
-
Place the ribs bone side down on a cooler part of the grill, away from direct heat. This prevents flare-ups and allows the sauce to caramelize without burning. Cook for 10 to 15 minutes.
-
Flip the ribs and cook until they are lightly charred and smoky, about another 10 to 15 minutes. Watch carefully to prevent burning, and adjust the heat as needed.
-
Remove the ribs from the grill and brush on more sauce before serving. This final layer of sauce adds extra flavor and a beautiful sheen.
Expert Tips & Tricks
- For a more intense Dr. Pepper flavor, you can reduce the marinade in a separate saucepan until it thickens slightly, then use it as a glaze during the last few minutes of grilling.
- If you don’t have a grill, you can broil the ribs in the oven for the final step. Place them on a baking sheet lined with foil and broil for a few minutes per side, watching carefully to prevent burning.
- To prevent the ribs from drying out during baking, ensure the foil is tightly sealed around the baking dish. You can also add a little more water to the dish if needed.
- Don’t be afraid to experiment with the sauce! Add a dash of your favorite hot sauce for extra heat, or a spoonful of honey for added sweetness.
- For easier cleanup, line your baking dish with foil before adding the ribs and marinade.
Serving & Storage Suggestions
Serve these Dr. Pepper Ribs hot off the grill with your favorite barbecue sides, such as coleslaw, potato salad, corn on the cob, or baked beans. Garnish with fresh chopped parsley or green onions for a pop of color.
Leftover ribs can be stored in an airtight container in the refrigerator for up to 3-4 days. For longer storage, wrap the ribs tightly in freezer-safe wrap and freeze for up to 2-3 months.
To reheat, thaw the ribs in the refrigerator overnight. You can reheat them in the oven at 300°F (150°C) until warmed through, or on the grill over low heat. You can also reheat individual portions in the microwave. Add a little extra BBQ sauce to keep them moist during reheating.
Nutritional Information
| Nutrient | Amount per Serving | % Daily Value (approximate) |
|---|---|---|
| Calories | 763 kcal | Not available |
| Total Fat | 49g | Not available |
| Saturated Fat | 17g | Not available |
| Cholesterol | 184mg | Not available |
| Sodium | 3979mg | Not available |
| Total Carbohydrate | 30g | Not available |
| Dietary Fiber | 0.5g | Not available |
| Sugars | 27g | Not available |
| Protein | 51g | Not available |
Please note: This nutritional information is an estimate and can vary based on specific ingredients and portion sizes.
Variations & Substitutions
- Spicier Ribs: Add a pinch of red pepper flakes or a dash of your favorite hot sauce to the BBQ sauce for an extra kick.
- Smoked Ribs: If you have a smoker, smoke the ribs for a few hours before finishing them on the grill. This will add a delicious smoky flavor.
- Different Cola: While Dr. Pepper is the star of this recipe, you can experiment with other cola flavors, such as Coca-Cola or Pepsi.
- Honey Garlic Ribs: Omit the ketchup and cayenne pepper from the BBQ sauce and add 2 tablespoons of honey and 2 cloves of minced garlic.
- Slow Cooker Ribs: Place the marinated ribs in a slow cooker with the 1 cup of water. Cook on low for 6-8 hours, or until the meat is very tender. Finish them on the grill or under the broiler with the BBQ sauce.
FAQs (Frequently Asked Questions)
Q: Can I use a different cut of ribs?
A: Yes, you can use spare ribs instead of baby back ribs, but you may need to adjust the cooking time. Spare ribs are typically meatier and require longer cooking to become tender.
Q: Can I marinate the ribs for longer than overnight?
A: While overnight is ideal, you can marinate the ribs for up to 24 hours for even more flavor. Just be sure to keep them refrigerated during the marinating process.
Q: What if I don’t have cider vinegar?
A: You can substitute white vinegar or apple cider vinegar in the BBQ sauce. The vinegar adds tanginess and helps balance the sweetness of the Dr. Pepper.
Q: How do I prevent the ribs from burning on the grill?
A: Grill the ribs over indirect heat on a cooler part of the grill. This prevents flare-ups and allows the sauce to caramelize without burning. Also, be sure to brush the ribs with sauce frequently and watch them carefully.
Q: Can I make the BBQ sauce ahead of time?
A: Yes, the BBQ sauce can be made ahead of time and stored in the refrigerator for up to a week. This is a great way to save time on the day you plan to cook the ribs.
Final Thoughts
These Dr. Pepper Ribs are a guaranteed crowd-pleaser, offering a unique and delicious twist on a classic barbecue favorite. The combination of sweet and savory flavors, along with the tender, fall-off-the-bone texture, will leave everyone wanting more. So fire up the grill, gather your friends and family, and give this recipe a try. I’m confident it will become a new staple in your culinary repertoire. And, as always, I’d love to hear your feedback and see your creations, so don’t hesitate to share your experience! Enjoy!