
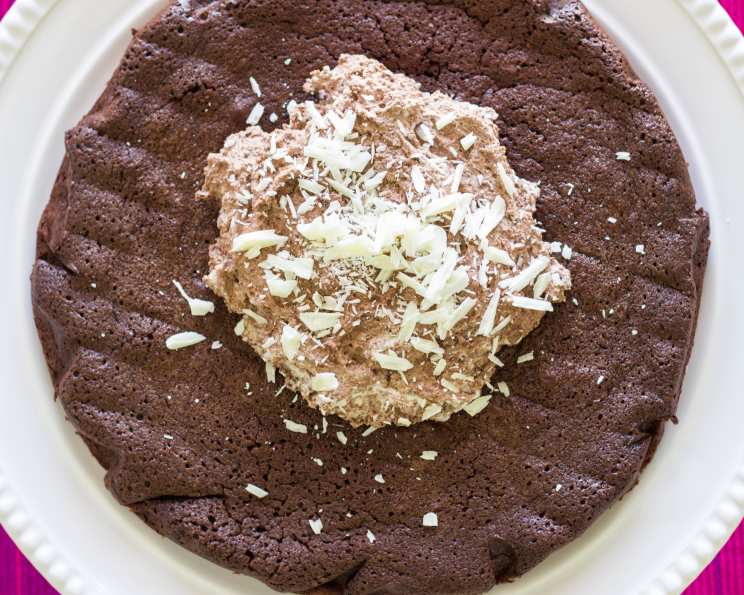
Dreamy Double Chocolate Torte
I still remember the day my grandmother taught me to make this torte. I was maybe ten years old, perched on a stool in her sun-drenched kitchen, mesmerized as she melted chocolate in a battered saucepan, the rich aroma filling the air. It wasn’t just about the recipe; it was about the love she poured into every step, the stories she told as we whisked and stirred. That torte, with its decadent layers of chocolate and cream, became a symbol of our shared joy, a memory I cherish with every bite. Now, I’m so excited to share this experience with you!
Recipe Overview
- Prep Time: 30 minutes
- Cook Time: 25-30 minutes
- Total Time: 1 hour (plus 30 minutes chilling)
- Servings: 20
- Yield: 1 torte
- Dietary Type: Not Gluten-Free
Ingredients
- 4 ounces bittersweet chocolate or 4 ounces dark chocolate, chopped
- 7 ounces milk chocolate, chopped, divided
- 3/4 cup salted butter
- 1 3/4 cups granulated sugar
- 1/2 teaspoon salt
- 4 large eggs
- 1 tablespoon vanilla extract
- 3/4 cup cocoa powder
- 1 1/2 cups heavy whipping cream
Equipment Needed
- 10-inch springform pan
- Parchment paper
- Large, heavy saucepan
- Whisk
- Mixing bowls
- Cooling rack
- Small saucepan
- Electric mixer
Instructions
- Preheat your oven to 375°F (190°C). This temperature is crucial for achieving the perfect texture – a slightly crisp exterior with a fudgy, moist interior.
- Prepare your 10-inch springform pan. Generously butter the inside of the pan. Cut a circle of parchment paper to fit the bottom of the pan and line it. This ensures easy release of the torte after baking.
- In a large, heavy saucepan set over low heat, combine the 4 ounces of bittersweet chocolate (or dark chocolate) with 2 ounces of the milk chocolate and the butter. Stir constantly until the chocolate and butter are completely melted and smooth. The heavy saucepan is important to prevent scorching the chocolate.
- Remove the saucepan from the heat. Using a whisk, incorporate the granulated sugar and salt into the melted chocolate mixture. Whisk until well combined and the sugar is mostly dissolved.
- Add the eggs, one at a time, whisking well after each addition. Ensure each egg is fully incorporated before adding the next. This helps create a smooth batter.
- Stir in the vanilla extract. This enhances the overall flavor profile of the torte.
- Sift the cocoa powder over the chocolate mixture. Sifting prevents lumps and ensures the cocoa powder is evenly distributed. Gently stir until everything is thoroughly combined, creating a rich, dark batter.
- Scrape the batter into the prepared springform pan, spreading it evenly.
- Bake for 25-30 minutes, or until the top of the torte has a thin crust and the edges begin to pull away from the sides of the pan. To test for doneness, gently insert a toothpick into the center; it should come out with moist crumbs clinging to it. Be careful not to overbake, as this will result in a dry torte.
- Remove the pan from the oven and place it on a cooling rack. Allow the torte to cool in the pan for 10 minutes.
- Carefully invert the torte onto a serving plate. Remove the parchment paper from the bottom. Allow the torte to cool completely to room temperature.
- While the torte is cooling, prepare the chocolate cream. In a small saucepan set over low heat, heat 1/4 cup of the heavy whipping cream. Be careful not to let it boil.
- Add the remaining 5 ounces of milk chocolate to the warm cream. Cook, stirring constantly, until the chocolate is melted and smooth. Remove from heat and allow to cool to room temperature.
- In a separate bowl, beat the remaining 1 1/4 cups of heavy whipping cream with an electric mixer until very stiff peaks form. Be careful not to overwhip the cream, as it can turn into butter.
- Gently fold the cooled chocolate mixture into the whipped cream until uniformly combined. Be gentle to avoid deflating the whipped cream.
- Cover the bowl and chill the chocolate cream in the refrigerator for at least 30 minutes. This allows the cream to firm up and the flavors to meld.
- Just before serving, mound the chocolate cream onto the center of the cooled torte. Garnish with chocolate curls or a dusting of cocoa powder for an elegant presentation.
Expert Tips & Tricks
- For an even richer flavor, use high-quality European-style butter.
- If you don’t have a springform pan, you can use a regular cake pan lined with parchment paper, leaving an overhang to help lift the torte out.
- To prevent the chocolate from seizing when melting, ensure the saucepan is completely dry and use low heat.
- For a deeper chocolate flavor, add a teaspoon of instant espresso powder to the batter.
- If the chocolate cream seems too thin after chilling, add a tablespoon of powdered sugar and beat until it thickens.
Serving & Storage Suggestions
Serve the Dreamy Double Chocolate Torte chilled or at room temperature, depending on your preference. It pairs beautifully with a scoop of vanilla ice cream, fresh berries, or a drizzle of raspberry sauce.
Leftovers can be stored in an airtight container in the refrigerator for up to 3 days. For longer storage, the torte can be frozen for up to 2 months. Thaw it in the refrigerator overnight before serving. The chocolate cream topping is best added fresh, but you can freeze the torte without the topping.
Nutritional Information
| Nutrient | Amount per Serving | % Daily Value |
|---|---|---|
| Calories | 267 kcal | N/A |
| Calories from Fat | 160 g | 60% |
| Total Fat | 17.9 g | 27% |
| Saturated Fat | 10.9 g | 54% |
| Cholesterol | 82.2 mg | 27% |
| Sodium | 148.7 mg | 6% |
| Total Carbohydrate | 25.9 g | 8% |
| Dietary Fiber | 1.4 g | 5% |
| Sugars | 22.8 g | 91% |
| Protein | 3.1 g | 6% |
Variations & Substitutions
- Gluten-Free Version: Substitute the cocoa powder with an equal amount of gluten-free cocoa powder. Use a gluten-free chocolate cookie crumb base for the crust instead of baking a torte.
- Dairy-Free Version: Use dairy-free chocolate, substitute the butter with a plant-based butter alternative, and use coconut cream instead of heavy whipping cream.
- Nutty Delight: Add 1/2 cup of chopped toasted nuts (such as pecans or walnuts) to the batter for added texture and flavor.
- Mint Chocolate Torte: Add 1/2 teaspoon of peppermint extract to the batter for a refreshing twist.
- Espresso Chocolate Torte: Dissolve 1 tablespoon of instant espresso powder in 1 tablespoon of hot water and add it to the melted chocolate mixture for an intense coffee flavor.
FAQs (Frequently Asked Questions)
Q: Can I make this torte ahead of time?
A: Absolutely! The torte can be baked and cooled a day in advance. Store it tightly wrapped at room temperature or in the refrigerator. Add the chocolate cream topping just before serving.
Q: What can I do if my chocolate cream is too runny?
A: If your chocolate cream is too thin, chill it for a longer period or gently whisk in a tablespoon of powdered sugar until it reaches the desired consistency.
Q: Can I use a different type of chocolate?
A: Yes, you can experiment with different types of chocolate to suit your taste. However, keep in mind that using a higher percentage of cocoa solids will result in a more intense, less sweet flavor.
Q: How do I prevent the torte from sticking to the pan?
A: Buttering the pan thoroughly and lining it with parchment paper is crucial to prevent sticking. Make sure the parchment paper covers the bottom of the pan completely.
Q: Can I freeze the Dreamy Double Chocolate Torte?
A: Yes, you can freeze the torte without the chocolate cream topping. Wrap it tightly in plastic wrap and then foil, and freeze for up to 2 months. Thaw it in the refrigerator overnight before serving, and add the chocolate cream topping fresh.
Final Thoughts
I truly hope this Dreamy Double Chocolate Torte brings as much joy to your kitchen as it has to mine. It’s a versatile recipe that can be adapted to your preferences and enjoyed on any occasion. Don’t hesitate to experiment with different flavors and garnishes to make it your own. I encourage you to try this recipe and share your creations with me – I can’t wait to hear your thoughts! Perhaps you’ll even want to pair it with a robust cup of coffee or a sweet dessert wine for the ultimate indulgence. Happy baking!