
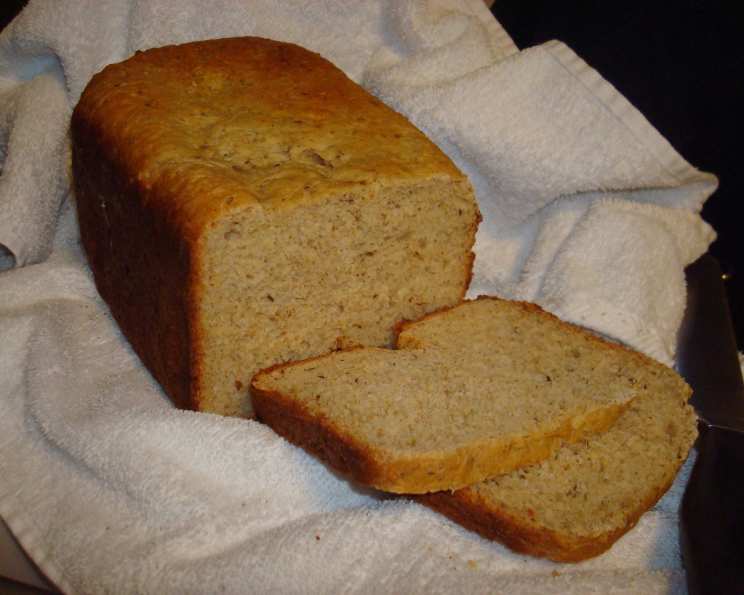
Drew’s Famous Onion Dill Bread
The aroma of dill and onion baking in the oven… it’s a scent that instantly transports me back to my grandmother’s kitchen. She always seemed to be pulling a loaf of something delicious from her old, faithful oven. While she baked many styles of bread, her onion dill loaf was always a favorite of mine, its savory flavor calling for simple accompaniments like butter, cheese, or a hearty soup. This recipe reminds me so much of hers.
Recipe Overview
- Prep Time: 20 minutes
- Cook Time: varies by method
- Total Time: 4 hours
- Servings: varies by slice size
- Yield: 1-2 loaves (1 bread machine or 2 loaf pans)
- Dietary Type: Not specified; contains egg and dairy
Ingredients
Dry Ingredients:
- 1 (1/4 ounce) package yeast
- 3 1/3 cups flour
- 1/4 teaspoon baking soda
- 1 1/2 teaspoons salt
- 1 unbeaten egg (at room temperature)
Non-Dry Ingredients:
- 1/4 cup water
- 3/4 cup cottage cheese
- 3/4 cup sour cream
- 3 tablespoons sugar
- 3 tablespoons minced dried onion
- 2 tablespoons dill seeds
- 1 1/2 tablespoons butter
Equipment Needed
- Bread machine or 2 loaf pans
- Mixing bowls (if kneading by hand)
- Measuring cups and spoons
- Spatula
- Cooling rack
Instructions
This savory bread is surprisingly easy to make, whether you’re using a bread machine or opting for the more traditional hand-kneading method. Either way, the result is a flavorful loaf that’s perfect for sandwiches, toast, or simply enjoying on its own.
-
Combine Dry Ingredients: If using a bread machine, add the yeast, flour, baking soda, salt, and unbeaten egg to the machine’s bread pan in the order recommended by your machine’s manufacturer. This is crucial for proper mixing and rising. If kneading by hand, combine the flour, baking soda, and salt in a large mixing bowl. Create a well in the center and set aside.
-
Prepare Wet Ingredients: In a separate microwave-safe bowl or saucepan, gently warm the water, cottage cheese, and sour cream. The mixture should be lukewarm, not hot, to avoid killing the yeast. Stir in the sugar, dried minced onion, dill seeds, and butter.
-
Combine Wet and Dry: If using a bread machine, pour the warmed wet ingredients into the bread machine pan on top of the dry ingredients. If kneading by hand, add the wet ingredients and the egg to the well in the center of the dry ingredients.
-
Bread Machine Instructions: Select the “white bread” setting on your bread machine and press start. Most machines will handle the kneading, rising, and baking automatically. Follow your bread machine’s specific instructions. Some machines offer crust color settings; a medium crust usually works well for this bread.
-
Hand-Kneading Instructions: If kneading by hand, gradually incorporate the wet ingredients into the dry ingredients until a shaggy dough forms. Turn the dough out onto a lightly floured surface and knead for 8-10 minutes, or until the dough is smooth and elastic. Place the dough in a lightly oiled bowl, turning to coat. Cover with plastic wrap or a damp towel and let rise in a warm place for 1-1.5 hours, or until doubled in size.
-
Shaping and Second Rise: Punch down the risen dough. Divide the dough in half if making two loaves. Shape each portion into a loaf and place in greased loaf pans. Cover and let rise again for 30-45 minutes, or until almost doubled.
-
Baking: Preheat your oven to 350°F (175°C). Bake for 30-35 minutes, or until the loaves are golden brown and sound hollow when tapped on the bottom.
-
Optional Butter Glaze: If desired, brush the top of the bread lightly with a little melted butter when the bread machine enters the bake cycle (for bread machine method) or during the last 10 minutes of baking (for oven method). This will give the crust a beautiful shine and extra flavor.
-
Cooling: Remove the bread from the bread machine or loaf pans and place on a wire cooling rack to cool completely before slicing. This prevents the bread from becoming soggy.
Expert Tips & Tricks
- Yeast Proofing: To ensure your yeast is active, you can “proof” it by dissolving it in a small amount of warm water (from the 1/4 cup) with a pinch of sugar before adding it to the other ingredients. If it foams up within 5-10 minutes, the yeast is good to go.
- Room Temperature Egg: Using a room temperature egg helps the dough rise more evenly. If you forgot to take it out of the fridge, place the egg in a bowl of warm water for a few minutes.
- Dough Consistency: The dough may seem a bit sticky, especially when kneading by hand. Resist the urge to add too much extra flour, as this can make the bread dry. A little stickiness is okay.
- Oven Temperature: Ovens can vary, so keep an eye on the bread while it’s baking. If the top is browning too quickly, tent it with foil.
- Even Baking: For more even baking in the oven, rotate the loaf pans halfway through the baking time.
Serving & Storage Suggestions
This onion dill bread is delicious served warm with a generous pat of butter. It’s also excellent for sandwiches, especially with corned beef or other deli meats. It pairs well with soups, stews, and salads.
Storage: Store the cooled bread in an airtight container at room temperature for up to 3 days, in the refrigerator for up to a week, or in the freezer for up to 3 months. To freeze, slice the bread first and wrap it tightly in plastic wrap and then foil or place it in a freezer bag.
Reheating: To reheat, wrap the bread (or individual slices) in foil and bake in a preheated oven at 350°F (175°C) for 10-15 minutes, or until warmed through. You can also toast individual slices.
Nutritional Information
Note: Nutritional information is an estimate and can vary based on specific ingredients and serving sizes.
| Nutrient | Amount per Serving | % Daily Value |
|---|---|---|
| Calories | 2490.8 kcal | N/A |
| Calories from Fat | 625 g | 25% |
| Total Fat | 69.5 g | 106% |
| Saturated Fat | 35.9 g | 179% |
| Cholesterol | 348.3 mg | 116% |
| Sodium | 4755.7 mg | 198% |
| Total Carbohydrate | 389.2 g | 129% |
| Dietary Fiber | 17.4 g | 69% |
| Sugars | 54.9 g | 219% |
| Protein | 77 g | 154% |
Variations & Substitutions
- Gluten-Free: Substitute a gluten-free flour blend designed for bread making. You may need to add a binding agent like xanthan gum.
- Dairy-Free: Replace the cottage cheese and sour cream with dairy-free alternatives like silken tofu (blended until smooth) and plant-based sour cream. Use a dairy-free butter substitute.
- Vegan: In addition to the dairy-free substitutions, replace the egg with a flax egg (1 tablespoon ground flaxseed mixed with 3 tablespoons water, let sit for 5 minutes to thicken).
- Herb Variations: Experiment with different herbs, such as rosemary, thyme, or chives, in addition to or instead of the dill.
- Cheese Variations: Add shredded cheddar, Swiss, or parmesan cheese to the dough for an extra cheesy flavor.
FAQs (Frequently Asked Questions)
Q: Can I use fresh dill instead of dried dill seeds?
A: Yes, you can. Use about 1/4 cup of chopped fresh dill. Keep in mind that fresh dill has a milder flavor than dill seeds, so you may want to adjust the amount to your preference.
Q: Why is my bread dense and not rising properly?
A: Several factors can contribute to dense bread. Make sure your yeast is fresh and active. Also, ensure that your wet ingredients aren’t too hot, as this can kill the yeast. Over-kneading or not enough rising time can also result in a dense loaf.
Q: Can I make this dough ahead of time and bake it later?
A: Yes, you can prepare the dough through the first rise, then refrigerate it overnight. When ready to bake, punch down the dough, shape it, let it rise again, and bake as directed.
Q: How do I prevent the bread from sticking to the loaf pan?
A: Grease the loaf pan thoroughly with butter, shortening, or cooking spray. You can also line the bottom of the pan with parchment paper.
Q: The top of my bread is browning too quickly. What should I do?
A: Tent the bread loosely with foil during the last 10-15 minutes of baking to prevent it from burning.
Final Thoughts
Drew’s Famous Onion Dill Bread is a testament to the power of simple ingredients and cherished family recipes. Whether you’re a seasoned baker or a kitchen novice, I encourage you to give this recipe a try. The delightful aroma and savory flavor will fill your home with warmth and comfort. Don’t hesitate to share your creations and feedback – I’d love to hear how it turns out! Serve it alongside a hearty bowl of potato soup or a crisp green salad for a complete and satisfying meal.