
The Secret’s Out: DIY Dry Shampoo for Effortless Beauty
I’ll never forget my first ever cooking job at Chez Antoine. I was so nervous on my first shift that I forgot to shower, so I was grateful that the head chef showed me this quick beauty tip to use a kitchen staple to help my oily hair before service began. While I’ve hung up my apron to share my love of cuisine through writing, I find myself just as busy as ever, often racing between meetings and deadlines. On days when washing my hair feels like a luxury I can’t afford, I reach for this simple, effective, and all-natural dry shampoo. It’s a time-saver that leaves my hair feeling fresh and clean, and I’m excited to share it with you!
Recipe Overview:
- Prep Time: 5 minutes
- Cook Time: 0 minutes
- Total Time: 5 minutes
- Yields: 1/4 cup
- Dietary Type: Vegan, Gluten-Free, Cruelty-Free
Ingredients:
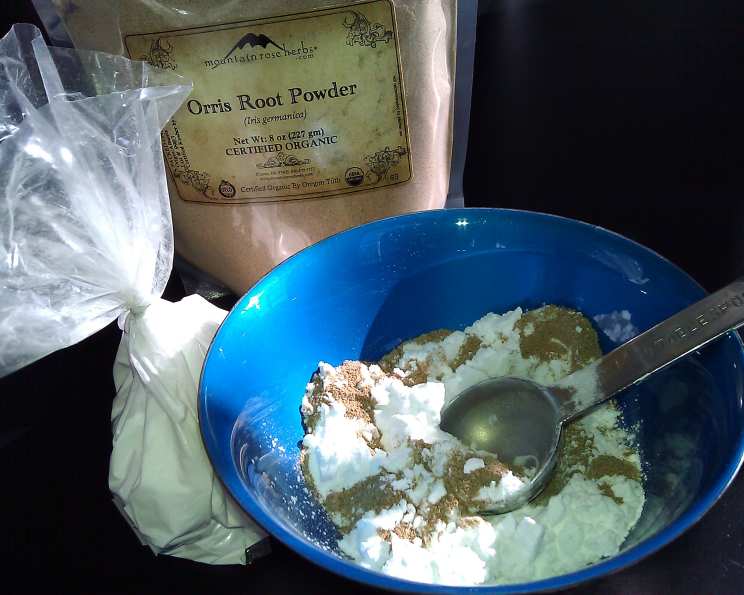
- 2 tablespoons orrisroot powder
- 2 tablespoons arrowroot
Equipment Needed:
- Small mixing bowl
- Spoon or whisk
- Makeup brush (optional, for application)
- Small container for storage (e.g., jar, shaker)
Instructions:
- In a small mixing bowl, combine the orrisroot powder and arrowroot.
- Using a spoon or whisk, mix the ingredients together thoroughly until evenly distributed. Ensure there are no clumps.
- To use, part your hair and sprinkle a little of the powder along each row of your scalp. For shorter hair, apply the powder around your face and work it back through your hair using your fingertips.
- Leave the dry shampoo on for at least 10 minutes to allow it to absorb excess oil.
- Brush your hair thoroughly to remove as much of the powder as possible. You may want to do this outside or over a sink to minimize mess.
Expert Tips & Tricks:
- Adjust the ratio: If you have very dark hair, start with a smaller amount of orrisroot powder and gradually increase until you achieve the desired effect. You can also add a tablespoon of cocoa powder for darker shades to avoid a white cast.
- Application is key: Don’t dump the powder directly onto your scalp. Instead, use a makeup brush (like a large powder brush) to apply the dry shampoo precisely where you need it. This prevents buildup and ensures even distribution.
- Scent it up: Add a few drops of your favorite essential oil to the mixture for a pleasant fragrance. Lavender, rosemary, and tea tree oil are great choices. Be sure to test for sensitivities first.
- Nighttime application: For best results, apply the dry shampoo before bed. This allows the powder to absorb oil overnight, leaving your hair refreshed by morning.
- Don’t overdo it: Using too much dry shampoo can make your hair look dull and feel gritty. Start with a small amount and add more as needed.
- Consider your hair type: Fine hair may benefit from using a lighter hand with the application, while thicker hair can typically handle a bit more product.
Serving & Storage Suggestions:
This dry shampoo doesn’t require refrigeration and is best stored in a cool, dry place away from direct sunlight to prevent clumping. A small, airtight container, such as a glass jar or a spice shaker, works perfectly. The dry shampoo will keep for up to a year, as long as it’s stored properly and free from moisture. It’s a perfect on-the-go beauty essential!
Nutritional Information:
While dry shampoo isn’t ingested, it’s still relevant to understand its composition. This information is based on typical orrisroot and arrowroot powders.
| Nutrient | Amount per Serving (estimated) |
|---|---|
| Calories | ~15 kcal |
| Total Fat | ~0g |
| Saturated Fat | ~0g |
| Cholesterol | ~0mg |
| Sodium | ~0mg |
| Total Carbohydrate | ~4g |
| Dietary Fiber | ~1g |
| Sugars | ~0g |
| Protein | ~0g |
Note: This is an estimated nutritional profile as dry shampoo is not consumed.
Variations & Substitutions:
- Cornstarch: If you don’t have arrowroot, cornstarch can be used as a substitute. However, be aware that cornstarch can sometimes leave a slight white cast on darker hair.
- Rice Flour: Another great alternative to arrowroot, rice flour is finely milled and absorbs oil effectively.
- Cocoa Powder: For dark hair, add 1-2 tablespoons of unsweetened cocoa powder to the mixture to tint the dry shampoo and prevent a white cast.
- Bentonite Clay: For extra oil absorption, add a teaspoon of bentonite clay to the mixture. Be sure to mix it well to avoid clumping.
- Essential Oil Blends: Experiment with different essential oil blends to create a unique scent and add therapeutic benefits. For example, a blend of lavender and chamomile can be calming, while a blend of peppermint and rosemary can be invigorating.
FAQs (Frequently Asked Questions):
Q: Is this dry shampoo suitable for all hair colors?
A: Yes, but those with very dark hair may need to add cocoa powder or adjust the ratio of orrisroot to arrowroot to avoid a white cast.
Q: How often can I use this dry shampoo?
A: While convenient, using dry shampoo too frequently can dry out your scalp. Aim to use it no more than 2-3 times per week and continue to wash your hair regularly.
Q: Can I use this on color-treated hair?
A: Yes, this dry shampoo is generally safe for color-treated hair, as it doesn’t contain harsh chemicals that can strip color. However, always do a patch test first to ensure compatibility.
Q: Does this dry shampoo work on oily hair?
A: Yes, the arrowroot and orrisroot powder are effective at absorbing excess oil, leaving your hair feeling refreshed.
Q: Can I use this dry shampoo if I have a sensitive scalp?
A: It’s always best to do a patch test first to ensure you don’t have any sensitivities to the ingredients. If you experience any irritation, discontinue use.
Final Thoughts:
Embrace the simplicity and effectiveness of this DIY dry shampoo! It’s a quick, natural, and budget-friendly solution for those days when you need a little extra boost. Don’t be afraid to experiment with variations and find what works best for your hair type and preferences. Try adding a few drops of rose water or lavender for a refreshing spa day feel. And remember, feeling good is always the best recipe! I encourage you to try this recipe and share your feedback, and perhaps pair it with a relaxing face mask for a complete at-home spa experience.