
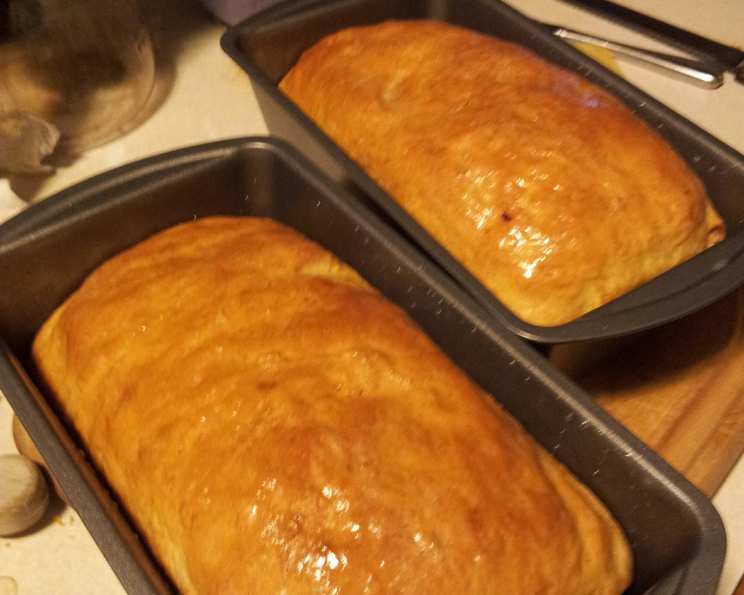
Earl’s Homemade Bread for the KitchenAid
The smell of freshly baked bread is a powerful memory trigger for me. I remember spending countless afternoons at my grandmother’s, the aroma of yeast and warm dough filling her cozy kitchen. She always made her bread with a well-loved KitchenAid mixer, its steady hum a constant background note to our conversations. This recipe, though discovered online, brings me right back to those cherished moments, a testament to the enduring magic of homemade bread.
Recipe Overview
- Prep Time: 20 minutes
- Cook Time: 30-35 minutes
- Total Time: 2 hours 35-40 minutes (including rise times)
- Servings: Variable, depending on slice thickness
- Yield: 2 loaves
- Dietary Type: Vegetarian
Ingredients
- 5 1/2 cups bread flour
- 1 tablespoon salt
- 2 1/2 teaspoons fast rising yeast
- 16 ounces (2 cups) very warm water
- 1 tablespoon olive oil
- 2 tablespoons honey
- Optional: Additional olive oil for brushing
Equipment Needed
- KitchenAid stand mixer with dough hook attachment
- Measuring cups and spoons
- Two loaf pans
- Oven
- Wire rack
- Mixing bowl (for proofing, optional)
Instructions
-
The key to consistent bread lies in accurate flour measurement. Avoid packing the flour into your measuring cup. Instead, fluff the bread flour with a spoon and then spoon it into the measuring cup, leveling it off. This ensures you don’t use too much flour, which can lead to dry, dense bread.
-
In the bowl of your KitchenAid mixer, combine the bread flour, salt, and fast rising yeast. Do not turn on the mixer yet.
-
In a separate container, combine the very warm water, olive oil, and honey. It’s helpful to add the olive oil first, then the honey, using the same measuring spoon. The oil will help the honey slide right off the spoon, ensuring you get every last bit.
-
Stir the liquid ingredients together.
-
Attach the dough hook to your KitchenAid mixer. Turn the mixer to its lowest speed and run it for 15 seconds.
-
With the mixer still on low, add the liquid mixture all at once. Continue mixing on the lowest speed for about a minute and a half, or until the ingredients are pretty well combined. Don’t worry if it looks a little shaggy at this point.
-
Shut off the mixer and let the dough rest for 10 minutes. This allows the flour to fully absorb the water, which develops gluten and improves the bread’s texture. This step is sometimes called the “autolyse.”
-
Turn the mixer to the second speed and let it run for 3 minutes. The dough should come together into a smoother, more elastic mass.
-
Remove the dough hook from the mixer and turn the dough out onto a lightly floured board or table.
-
Knead the dough 3 or 4 times to get rid of any large air bubbles.
-
Lightly oil a bowl (you can use the mixer bowl if you prefer). Place the dough in the bowl, turning to coat all sides with oil. This prevents the dough from drying out as it rises.
-
Cover the bowl with a clean cloth and place it in a warm place to rise for 1 hour. A slightly warm oven (turned off!) works well, or even just a spot away from drafts.
-
After an hour, punch down the dough to release the air. Turn it out onto the floured surface and knead it another three or four times.
-
Divide the dough in half and form each half into a loaf shape. Place the loaves into two greased loaf pans.
-
Cover the loaf pans with a cloth and put them in the same warm place to rise for 45 minutes. The dough should nearly double in size.
-
Preheat your oven to 375 degrees Fahrenheit.
-
Bake the bread for 30 to 35 minutes, or until the crust is the color you like. For a softer, chewier crust, place a small pan of water on the rack below the bread during baking.
-
Remove the loaves from the pans and let them cool for at least 30 minutes on a wire rack before slicing.
-
Optionally, brush the tops of the loaves with olive oil while they are still warm to soften the crust and give them a nice sheen.
Expert Tips & Tricks
- Humidity matters: On humid days, you may need slightly less water. Start with slightly less and add more only if the dough seems very dry.
- Oven temperature: Every oven is different. Use an oven thermometer to ensure your oven is accurately calibrated. If your bread is browning too quickly, tent it with foil during the last 15 minutes of baking.
- Dough Consistency: The dough should be slightly sticky but manageable. If it’s too wet and unworkable, add flour a tablespoon at a time.
- Yeast activity: Always check the expiration date on your yeast. If you’re unsure if your yeast is active, proof it by mixing it with a teaspoon of sugar and a quarter cup of warm water. If it foams within 5-10 minutes, it’s good to go.
Serving & Storage Suggestions
This bread is delicious served warm with butter, as toast, or used for sandwiches. Store leftover bread in an airtight container at room temperature for up to 3 days, or in the refrigerator for up to a week. For longer storage, wrap the bread tightly and freeze it for up to 3 months. To reheat, thaw completely and then warm in a low oven or toaster.
Nutritional Information
(Values are approximate and will vary based on specific ingredients and slice size)
| Nutrient | Amount per Serving | % Daily Value |
|---|---|---|
| Calories | 210 kcal | 11% |
| Total Fat | 3g | 4% |
| Saturated Fat | 0.5g | 3% |
| Cholesterol | 0mg | 0% |
| Sodium | 320mg | 14% |
| Total Carbohydrate | 40g | 15% |
| Dietary Fiber | 2g | 7% |
| Sugars | 2g | 4% |
| Protein | 6g | 12% |
Variations & Substitutions
- Whole Wheat Bread: Substitute up to half of the bread flour with whole wheat flour for a nuttier flavor and added fiber.
- Herb Bread: Add 1-2 tablespoons of dried herbs, such as rosemary, thyme, or oregano, to the flour mixture.
- Garlic Bread: Mix minced garlic into the dough during the kneading process. Brush the baked loaf with garlic butter before serving.
- Sweet Bread: Increase the honey to 4 tablespoons and add a teaspoon of cinnamon to the flour mixture for a sweeter loaf.
FAQs (Frequently Asked Questions)
Q: Can I use active dry yeast instead of fast-rising yeast?
A: Yes, but you’ll need to proof the active dry yeast first. Mix it with warm water and a pinch of sugar and let it sit for 5-10 minutes until foamy before adding it to the flour.
Q: My bread is sinking in the middle. What did I do wrong?
A: This usually indicates that the dough has over-proofed. Reduce the rising time slightly next time.
Q: Can I make this dough ahead of time and bake it later?
A: Yes, you can let the dough rise in the refrigerator overnight. Just punch it down and let it come to room temperature before shaping and baking.
Q: My bread is too dense. What can I do?
A: Make sure you are not packing the flour when measuring. Over-kneading can also result in dense bread, so be careful not to knead for too long.
Q: Can I freeze the baked bread?
A: Absolutely! Wrap the cooled bread tightly in plastic wrap and then foil. It will keep in the freezer for up to 3 months.
Final Thoughts
I hope this recipe for Earl’s Homemade Bread becomes a cherished part of your kitchen routine, just as it has become a staple in mine. The simple act of baking bread can be incredibly rewarding, filling your home with warmth and a sense of accomplishment. Don’t be afraid to experiment with variations and make it your own. Share your creations with friends and family, and let the aroma of freshly baked bread create lasting memories. I encourage you to give this recipe a try – let me know how it goes!