
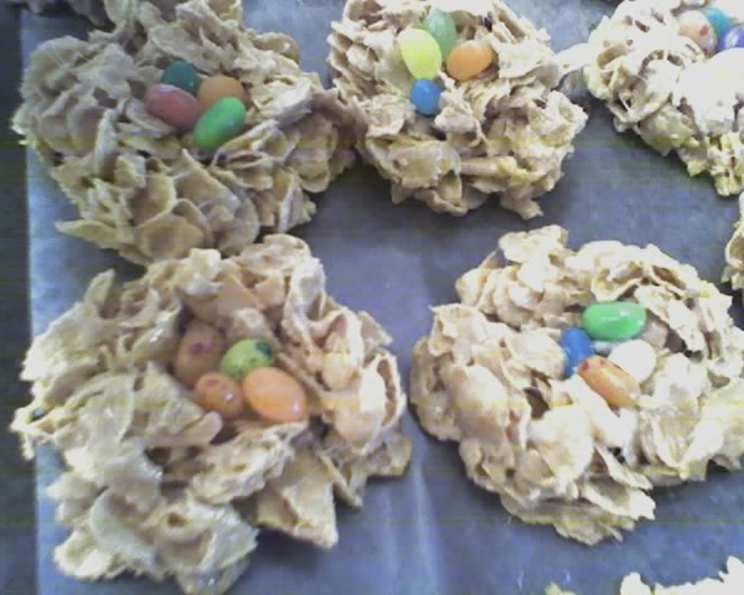
Easter Bird’s Nests (Peanut Butter Free!)
I can still picture it: sunlight streaming through the kitchen window, my little sister meticulously arranging jelly beans in a nest of crispy, golden goodness. It wasn’t just about the treat, but the shared anticipation of Easter morning. The sticky fingers, the excited chatter, and the pure joy on her face as she proudly presented her edible creation – these are the memories that flood back every time I make these adorable bird’s nests. This peanut-butter-free version ensures everyone can partake in the fun, no matter their allergies!
Recipe Overview
- Prep Time: 15 minutes
- Cook Time: 5 minutes
- Total Time: 20 minutes
- Servings: 18
- Yield: 18 nests
- Dietary Type: Peanut-Free
Ingredients
- 5 cups unsugared corn flakes
- 6 tablespoons salted butter
- 1 teaspoon vanilla extract
- 1 (10 1/2 ounce) bag marshmallows
- 54 jelly beans (or more, for extra eggs!)
Equipment Needed
- Large pot
- Wax paper
- Spoon
- Baking spray (Baker’s Joy or similar) or butter
Instructions
-
Begin by melting the butter in a large pot over medium-low heat. Keep a close eye on it to prevent burning.
-
Once the butter is completely melted, remove the pot from the heat and stir in the vanilla extract. The residual heat will allow the vanilla to infuse the melted butter beautifully.
-
Now, add the entire bag of marshmallows to the pot. Return the pot to low heat, stirring constantly. The marshmallows will gradually melt, forming a smooth, gooey mixture. Be patient and continue stirring until the mixture is completely melted and homogenous. This usually takes about 3-5 minutes.
-
Remove the marshmallow mixture from the heat and immediately add the corn flakes. Gently fold the corn flakes into the melted marshmallow mixture, ensuring that all the flakes are evenly coated. Be careful not to crush the flakes during this process.
-
Prepare your workspace by laying out sheets of wax paper. Lightly spray your fingers with Baker’s Joy or grease them with butter. This prevents the mixture from sticking to your hands, making it easier to shape the nests.
-
Using a spoon, scoop out generous portions (about the size of a tennis ball) of the corn flake mixture. Place each portion onto the wax paper.
-
While the mixture is still warm and pliable, use your greased fingers to gently flatten each portion into a circular shape. Then, create a well or indentation (a “sulcus”) in the center of each circle. This will serve as the nest for your “eggs.”
-
While the nests are still slightly soft, carefully place three jelly beans into the center of each nest, representing the eggs. Gently press the jelly beans into the mixture to secure them.
-
Allow the bird’s nests to cool and set completely at room temperature. This usually takes about 30 minutes. Once they are firm, they are ready to serve and enjoy!
Expert Tips & Tricks
-
Marshmallow Melt Mastery: For a perfectly smooth marshmallow mixture, use fresh marshmallows. Older marshmallows tend to be drier and may not melt as evenly. Low and slow is the key! Patience is crucial when melting marshmallows. Rushing the process by cranking up the heat can result in a scorched, lumpy mess.
-
Flavor Boost: While this recipe is delicious as is, you can enhance the flavor by adding a pinch of salt to the melted butter. The salt will balance the sweetness of the marshmallows and bring out the subtle flavors of the corn flakes.
-
Nest Shaping Success: If the corn flake mixture becomes too sticky to handle, try wetting your fingers slightly with cold water. This will help prevent the mixture from sticking without adding extra grease. Also, work quickly while the mixture is still warm and pliable.
-
Jelly Bean Placement Perfection: For a more visually appealing nest, choose jelly beans in a variety of colors and sizes. Arrange them artfully in the center of each nest to create a charming and realistic look.
-
Make-Ahead Magic: These bird’s nests can be made a day or two in advance. Store them in an airtight container at room temperature to maintain their crispness.
Serving & Storage Suggestions
These Easter Bird’s Nests are best served at room temperature. They make a delightful addition to any Easter dessert table or can be enjoyed as a fun and festive snack.
To store leftovers, place them in an airtight container at room temperature. They will stay fresh for up to 3 days. The corn flakes may lose some of their crispness over time, but the nests will still be delicious. Avoid storing them in the refrigerator, as this will make them sticky.
Nutritional Information
| Nutrient | Amount per Serving | % Daily Value |
|---|---|---|
| Calories | 147 kcal | 7% |
| Total Fat | 3.9 g | 5% |
| Saturated Fat | 2.5 g | 13% |
| Cholesterol | 10 mg | 3% |
| Sodium | 101 mg | 4% |
| Total Carbohydrate | 28.2 g | 10% |
| Dietary Fiber | 0.2 g | 1% |
| Sugars | 16.3 g | – |
| Protein | 0.8 g | 2% |
Note: Nutritional information is an estimate and may vary based on specific ingredients and portion sizes.
Variations & Substitutions
-
Gluten-Free Nests: Use gluten-free crispy rice cereal instead of corn flakes to make this recipe gluten-free. Ensure all other ingredients are also gluten-free.
-
Vegan Nests: Use vegan marshmallows and a plant-based butter alternative to make this recipe vegan.
-
Chocolate Chip Nests: Add a handful of mini chocolate chips to the corn flake mixture for a chocolatey twist.
-
Sprinkle Surprise: Decorate the nests with colorful sprinkles before the mixture sets for an extra touch of Easter fun.
-
Coconut Flake Nests: Substitute half of the corn flakes with shredded coconut for a tropical flavor.
FAQs (Frequently Asked Questions)
Q: Can I use different types of cereal?
A: While corn flakes provide the classic texture, you can experiment with other crispy cereals like rice krispies for a slightly different result. Just be mindful of the cereal’s sweetness level and adjust the amount of marshmallows accordingly.
Q: My marshmallow mixture is too thick. What can I do?
A: Add a tablespoon of milk or water to the mixture and stir over low heat until it thins out slightly. Be careful not to add too much liquid, as this can make the nests soggy.
Q: Can I use a microwave to melt the marshmallows?
A: Yes, you can melt the marshmallows in the microwave in 30-second intervals, stirring in between, until completely melted. However, melting them on the stovetop allows for more control and prevents burning.
Q: How do I prevent the nests from sticking to the wax paper?
A: Make sure to grease your fingers and the wax paper well. You can use baking spray, butter, or even a little bit of vegetable oil.
Q: Can I freeze these bird’s nests?
A: Freezing is not recommended as it can affect the texture of the corn flakes. They are best enjoyed fresh.
Final Thoughts
Now it’s your turn to create some sweet memories with these simple, delicious Easter Bird’s Nests! This recipe is so easy and fun, it’s perfect for getting the kids involved. Don’t be afraid to get creative with the decorations and make them your own. I hope these little nests bring as much joy to your family as they have to mine. So gather your ingredients, preheat that pot (metaphorically speaking!), and let the Easter baking adventure begin! I’d love to hear about your experiences and any fun variations you come up with – please share your feedback in the comments below!