
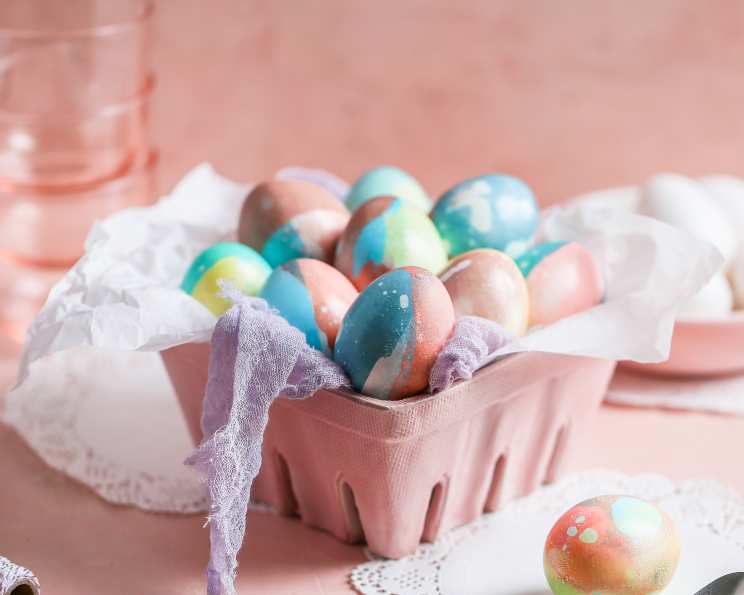
Easter Egg Dye: A Chef’s Guide to Colorful Creations
Easter morning was always a kaleidoscope of color in my childhood home. Not just from the spring flowers blooming in the garden, but from the vibrant eggs nestled in our Easter baskets. My grandmother, a woman who believed in the magic of simple things, always eschewed store-bought kits. Instead, she’d gather us around the kitchen table with bowls of steaming water, vinegar, and little bottles of food coloring. The air would fill with the gentle scent of vinegar and the excited chatter of children mixing colors and creating masterpieces, a memory I cherish every spring.
Recipe Overview
- Prep Time: 10 minutes
- Cook Time: Drying time
- Total Time: Varies based on drying time
- Yields: 1 egg bath
- Dietary Type: Vegetarian, Gluten-Free, Dairy-Free
Ingredients
- 10 drops food coloring
- 1 teaspoon white vinegar
- ½ cup boiling water
- 1 tablespoon olive oil (optional)
- Glitter (optional)
- White craft glue (optional)
Equipment Needed
- Bowls
- Tongs or slotted spoon
- Wax paper
- Paper towels
- Fork (for tie-dye effect)
- Paintbrush (for glitter application)
- Masking tape or stickers (optional, for decorating)
Instructions
-
For each dye bath, combine ½ cup of boiling water with 1 teaspoon of vinegar and 10 drops of food coloring in a bowl. Remember, you can get creative with color combinations! Start with 5 drops of red and 5 drops of yellow for orange, or 6 drops of blue and 4 drops of green for turquoise.
-
Gently dip your hard-cooked eggs into the dye bath. For a standard color, submerge the egg completely. Leave it in the dye for 3-5 minutes, extending the time if you desire a richer, more vibrant color.
-
Experiment with different dipping techniques! Use tongs to dip only half of an egg in one color, and then the other half in a different color. This creates a striking, two-toned effect.
-
Once the egg has reached your desired color intensity, use tongs or a slotted spoon to carefully remove it from the dye bath.
-
Place the dyed egg on wax paper to dry. Gently blot any excess dye with a paper towel to prevent drips and ensure an even finish.
-
For a tie-dyed effect, add 1 tablespoon of olive oil to the dye mixture and stir with a fork. The oil will create a marbled, streaky effect on the eggshell.
-
Gently roll the egg in the oily dye bath to pick up streaks of color. Remove the egg and blot off the excess oil with a paper towel before placing it on wax paper to dry.
-
Once the tie-dyed egg is dry, you can lightly dip it in another color to add depth and dimension to the design.
-
If you’re feeling festive, decorate your eggs with glitter! Once the dyed egg is completely dry, brush a thin layer of craft glue onto the surface.
-
Spoon glitter generously over the glued area, making sure to cover it completely. Place the glittered egg on wax paper and allow the glue to dry thoroughly.
-
For more intricate glitter designs, use masking tape or stickers to create patterns. Apply the tape or stickers to the egg before adding glue and glitter. Once the glue is dry, carefully remove the tape or stickers to reveal the underlying color.
-
You can also use vinyl stickers (available at office or hardware stores) to create letters, numbers, or shapes. Place the stickers on the egg before dyeing. Once the egg is slightly dry after dyeing, peel off the stickers gently to reveal the original eggshell underneath.
-
For a more subtle effect, use a white crayon to write names or draw pictures on the egg before dyeing. The wax from the crayon will resist the dye, creating a contrasting design.
-
Important Food Safety Note: If you plan to eat your Easter eggs, never leave them unrefrigerated for more than 2 hours at any point. Bacteria can grow rapidly at room temperature.
Expert Tips & Tricks
- Color Intensity: For deeper, more saturated colors, allow the eggs to soak in the dye bath for a longer period. You can even refrigerate the eggs in the dye bath overnight for maximum color absorption.
- Natural Dyes: Explore using natural dyes from fruits, vegetables, and spices. For example, beet juice creates a beautiful pink hue, while turmeric powder yields a warm yellow.
- Even Coloring: To ensure even coloring, gently turn the eggs in the dye bath periodically. This prevents them from resting on the bottom and developing uneven patches.
- Drying Rack Alternative: If you don’t have wax paper, you can use a cooling rack to dry the eggs. This allows for better air circulation and faster drying.
- Shiny Finish: After the eggs are completely dry, you can rub them with a small amount of vegetable oil to give them a shiny, polished finish.
- Fixing Mistakes: If you make a mistake, you can try wiping the egg with a damp paper towel immediately after dyeing. However, this may lighten the overall color.
Serving & Storage Suggestions
Serve your beautifully dyed Easter eggs as a centerpiece on your Easter table or nestled in Easter baskets. They can also be used in egg salad, deviled eggs, or simply enjoyed as a snack.
Store hard-boiled eggs in the refrigerator within two hours of dyeing. They will keep for up to one week. Discard any eggs that have been left at room temperature for more than two hours. Do not freeze hard-boiled eggs, as the texture will become rubbery.
Nutritional Information
(Note: Nutritional information is approximate and will vary based on the size of the egg and the type of food coloring used.)
| Nutrient | Amount per Serving | % Daily Value |
|---|---|---|
| Calories | 70 kcal | 3% |
| Total Fat | 5g | 8% |
| Saturated Fat | 1.5g | 8% |
| Cholesterol | 186mg | 62% |
| Sodium | 70mg | 3% |
| Total Carbohydrate | 1g | 0% |
| Dietary Fiber | 0g | 0% |
| Sugars | 0g | 0% |
| Protein | 6g | 12% |
Variations & Substitutions
- Natural Dyes: Substitute food coloring with natural dyes derived from beets (pink), turmeric (yellow), red cabbage (blue), or spinach (green). Be aware that natural dyes often produce more muted and less vibrant colors.
- Brown Eggs: Use brown eggs for a more rustic, earthy look. The dye colors will appear darker and richer on brown shells.
- Ombre Eggs: Create ombre eggs by gradually dipping the egg in the dye bath multiple times, increasing the submersion depth each time.
- Shaving Cream Eggs: For a marbled effect, swirl shaving cream in a dish, add drops of food coloring, and gently roll the eggs in the mixture.
- Whipped Topping Eggs: Similar to shaving cream eggs, you can use whipped topping as a base for the dye.
FAQs (Frequently Asked Questions)
Q: Can I use distilled vinegar instead of white vinegar?
A: Yes, distilled vinegar is a suitable substitute for white vinegar. Both help the dye adhere to the eggshell.
Q: Is it safe to eat eggs that have been dyed with food coloring?
A: Yes, food coloring is generally considered safe for consumption in small quantities. However, it’s essential to use food-grade dyes and avoid leaving the eggs at room temperature for extended periods.
Q: How can I prevent the dye from cracking the eggshell?
A: Avoid sudden temperature changes by allowing the hard-cooked eggs to cool slightly before immersing them in the hot dye bath.
Q: What if I don’t have olive oil for the tie-dye effect?
A: You can use other vegetable oils, such as canola oil or sunflower oil, as a substitute for olive oil.
Q: Can I use gel food coloring instead of liquid food coloring?
A: Yes, you can use gel food coloring, but you may need to use slightly less, as it is more concentrated. Mix the gel food coloring with a small amount of water before adding it to the dye bath to ensure even distribution.
Final Thoughts
Dyeing Easter eggs is more than just a tradition; it’s an opportunity to connect with loved ones, unleash your creativity, and create beautiful, edible works of art. I encourage you to gather your family and friends, experiment with different colors and techniques, and create Easter memories that will last a lifetime. Don’t be afraid to get a little messy and have fun! And please, share your colorful creations – I’d love to see what you come up with!