
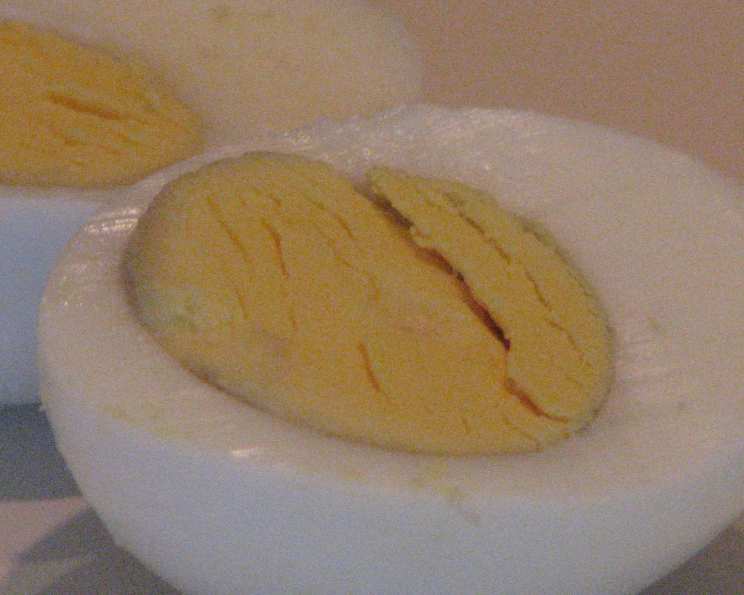
Mastering the Art of the Perfect Easter Hard Boiled Egg
The first time I celebrated Easter with the Gruszecki family, I was completely charmed by their egg-tapping tradition. Picture a table laden with spring colors, the aroma of roasted ham filling the air, and everyone armed with a brightly dyed egg. The clinking sounds as eggs collided, the bursts of laughter as shells cracked, and the good-natured competition to be the last one standing – it was pure joy. Now, years later, it’s a tradition I cherish and eagerly anticipate each spring, and the perfect hard boiled egg is central to it all.
Recipe Overview
- Prep Time: 5 minutes
- Cook Time: 15 minutes
- Total Time: 20 minutes
- Servings: 12
- Yield: 12 Eggs
- Dietary Type: Gluten-Free, Dairy-Free
Ingredients
- 1 dozen eggs, or 1 large egg per person, plus extras (to account for potential cracking!)
- Water, enough to cover the eggs in the pot
- Salt, about 1 tablespoon
Equipment Needed
- Large saucepan
- Slotted spoon or spider
- Bowl of ice water (optional)
- Egg dye kit (optional)
Instructions
- Gently place the eggs in a large saucepan. Make sure they are in a single layer to ensure even cooking.
- Add enough cold water to the pot to cover the eggs by at least an inch.
- Add about 1 tablespoon of salt to the water. This can help prevent cracking and make the eggs easier to peel later.
- Place the saucepan over high heat and bring the water to a rolling boil.
- Once the water is boiling, boil for 5 minutes only. Set a timer to ensure accuracy.
- After the 5 minutes of boiling, remove the pot from the heat and cover it tightly with a lid.
- Let the eggs sit in the hot water, covered, for an additional 10 minutes. This residual heat will finish cooking the eggs without causing the yolks to turn green.
- After 10 minutes, drain the hot water from the pot.
- Immediately run cold water over the eggs until they are cool to the touch. Alternatively, transfer the eggs to a bowl filled with ice water. This rapid cooling stops the cooking process and also helps to prevent that undesirable green ring from forming around the yolk. Cooling them off quickly also helps with peeling.
- Once the eggs are cool enough to handle, you can peel them. To peel, gently tap the egg all over to create cracks in the shell. Start peeling from the larger end of the egg, working your way around. Peeling under cool running water can help.
- Quarter the peeled eggs and arrange them on a plate.
- If you wish to dye the eggs, purchase a commercial egg dye kit such as “Paas” dyes or another edible dye version and follow the package directions. Dyeing is best done before peeling, of course!
- The cooked, peeled, and quartered eggs are ready to serve.
Expert Tips & Tricks
- Egg Freshness Matters (Sort Of): While it seems counterintuitive, fresher eggs are actually harder to peel. For best results, purchase your eggs about two weeks before you plan to cook them. This allows the air sac inside the egg to enlarge, which makes peeling easier.
- Yolk Centering: To encourage the yolk to be centered within the egg white, store the eggs on their side in the refrigerator. This helps relieve pressure on the membrane that suspends the yolk.
- Preventing the Green Ring: The dreaded green ring around the yolk is a sign of overcooking. By following the precise boiling and steeping times in this recipe, you can avoid this. The key is the residual heat method.
- Cracking Prevention: A little vinegar in the water can also help prevent cracking during boiling.
- Easy Peeling Hack: After boiling and cooling, try gently rolling the egg on a hard surface to create small cracks all over. Then submerge it in water and peel, starting from the larger end where there’s usually an air pocket. The water helps separate the shell from the egg.
- Don’t Overcrowd: Make sure there’s enough room in the pot to comfortably cover all the eggs with water. Overcrowding can lead to uneven cooking and cracking.
Serving & Storage Suggestions
These hard boiled eggs are perfect for Easter celebrations, picnics, or as a protein-packed snack. Serve them quartered as part of an Easter brunch, sliced on top of salads, or mashed into egg salad sandwiches.
- Serving: Arrange the quartered eggs attractively on a platter, garnished with fresh herbs like parsley or dill. For dyed eggs, present them in a decorative bowl or basket.
- Storage: Hard boiled eggs can be stored in the refrigerator for up to one week. Keep them in their shells until ready to eat for best results. Peeled eggs should be stored in an airtight container with a damp paper towel to prevent them from drying out.
- Room Temperature: Hard boiled eggs should not be left at room temperature for more than two hours.
- Freezing: Freezing hard boiled eggs is not recommended, as the egg whites become rubbery and unpleasant upon thawing.
Nutritional Information
Here’s an estimated breakdown of the nutritional content per egg:
| Nutrient | Amount per Serving | % Daily Value |
|---|---|---|
| Calories | 78 kcal | 4% |
| Total Fat | 5 g | 6% |
| Saturated Fat | 1.6 g | 8% |
| Cholesterol | 186 mg | 62% |
| Sodium | 62 mg | 3% |
| Total Carbohydrate | 0.6 g | 0% |
| Dietary Fiber | 0 g | 0% |
| Sugars | 0.6 g | 0% |
| Protein | 6 g | 12% |
Nutritional information is approximate and can vary based on egg size.
Variations & Substitutions
- Deviled Eggs: Transform your hard boiled eggs into classic deviled eggs by mashing the yolks with mayonnaise, mustard, paprika, and seasonings.
- Egg Salad: Create a delicious egg salad by chopping the hard boiled eggs and mixing them with mayonnaise, celery, onion, and seasonings. Serve on bread, crackers, or lettuce cups.
- Pickled Eggs: Preserve hard boiled eggs in a vinegar brine with spices for a tangy and flavorful snack.
- Scotch Eggs: Wrap hard boiled eggs in seasoned sausage meat, bread them, and deep-fry or bake them for a hearty and satisfying dish.
- Different Dyes: Experiment with natural dyes using ingredients like beet juice (pink), spinach (green), or turmeric (yellow).
FAQs (Frequently Asked Questions)
Q: Why are my hard boiled eggs difficult to peel?
A: Fresh eggs are notoriously difficult to peel. Use eggs that are a week or two old for easier peeling. Also, cooling the eggs rapidly after boiling helps separate the shell from the egg white.
Q: How do I prevent the green ring around the yolk?
A: The green ring is caused by overcooking. Follow the precise boiling and steeping times in this recipe. Rapidly cooling the eggs also helps prevent this.
Q: Can I hard boil eggs in the Instant Pot?
A: Yes, you can! Pressure cooking can be a faster and more consistent method. A common method is 5 minutes on high pressure, followed by a 5-minute natural pressure release and then an ice bath.
Q: How long can I store hard boiled eggs?
A: Hard boiled eggs can be stored in the refrigerator for up to one week. Store them in their shells for best results.
Q: What if my eggs crack while boiling?
A: Adding salt or vinegar to the water can help prevent cracking. Also, make sure the eggs are not bumping against each other in the pot.
Final Thoughts
Mastering the art of the perfect hard boiled egg is a simple yet rewarding culinary achievement. Whether you’re preparing them for a traditional Easter celebration, a quick and healthy snack, or a gourmet dish, these tips and tricks will help you achieve consistently perfect results. Gather your ingredients, follow the steps, and don’t be afraid to experiment with different variations. I encourage you to try this recipe, and to tweak it to your liking. Let the cracking begin and let me know how it turns out for you!