
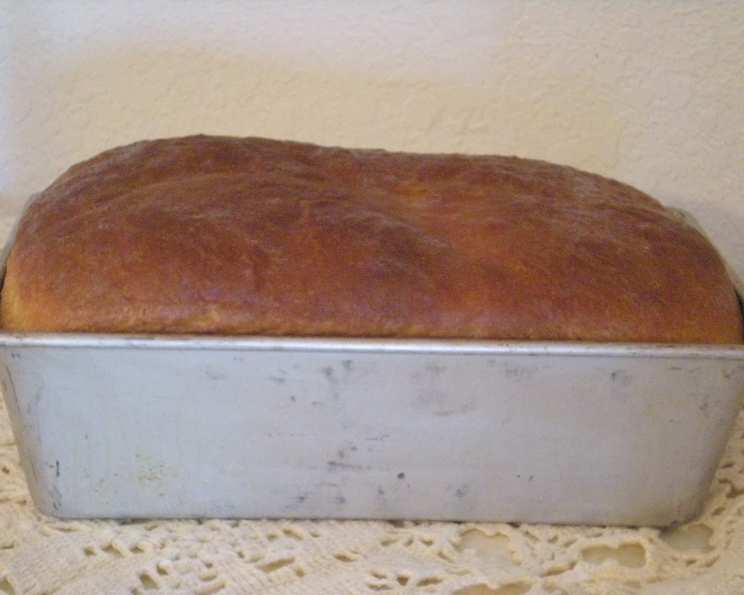
The Easiest Batter Bread: A Beginner’s Dream
There’s something so profoundly comforting about the smell of bread baking. I still remember the first time I ever attempted to make bread from scratch. I was a young, eager culinary student, intimidated by kneading and the seemingly endless rise times. Then, I stumbled upon a recipe for batter bread – a revelation! The simplicity of it, the “no-knead” promise, it was exactly the confidence boost I needed to dive into the world of bread-making. The aroma that filled my tiny apartment that day was intoxicating, and the taste of that first warm slice, slathered with butter, is a memory I still cherish.
Recipe Overview
- Prep Time: 20 minutes
- Cook Time: 45-50 minutes
- Total Time: 2 hours 15 minutes (including rising time)
- Servings: Approximately 12 slices
- Yield: 1 Loaf
- Dietary Type: Vegetarian
Ingredients
- 1 (1/4 ounce) package active dry yeast
- 1 1/4 cups warm water (110°-115°F)
- 3 cups all-purpose unbleached white flour (or unbleached white “bread flour”)
- 2 tablespoons soft unsalted butter
- 2 teaspoons salt
- 2 tablespoons sugar
- Unsalted butter, for brushing the top crust (optional)
Equipment Needed
- Large bowl
- Electric mixer
- Tea towel
- 8×3 or 9×4 inch loaf pan
- Wire rack
Instructions
- In a large bowl, dissolve the yeast in the warm water. It’s crucial that the water is within the specified temperature range. Too cold, and the yeast won’t activate; too hot, and you’ll kill it. A kitchen thermometer is your best friend here.
- Stir the sugar into the yeast/water mixture, then let the mixture sit for about 5-10 minutes, or until tiny bubbles start to form on the surface. This indicates that the yeast is active and ready to go. If no bubbles appear, your yeast may be old or the water may have been too hot; it’s best to start fresh with new yeast.
- Add the soft unsalted butter, salt, and half of the flour to the yeast mixture. Make sure the butter is truly soft to ensure it incorporates evenly into the batter.
- Using an electric mixer on medium speed, beat the batter for 2 minutes. This helps to develop the gluten and create a smooth, even texture.
- Add the remaining flour, stirring by hand (or on low speed with the mixer) until well blended and smooth. The batter will be very thick, almost like a very soft dough. It shouldn’t be dry or crumbly; it should be sticky and elastic.
- Cover the bowl with a clean tea towel and let the batter rise in a warm, draft-free place for 30-60 minutes, or until doubled in size. A warm oven (turned off) or a sunny windowsill are great spots. The rising time can vary depending on the temperature of your environment; warmer temperatures will accelerate the rise.
- After the first rise, beat the batter by hand, about 25 strokes. This deflates the dough, redistributes the yeast, and helps to create a more even texture in the finished loaf. Don’t be shy – really give it a good beating!
- Spread the batter evenly into a greased 8×3 or 9×4 inch loaf pan. Make sure the pan is well-greased to prevent the bread from sticking. You can use butter, shortening, or cooking spray.
- Smooth out the top of the loaf by patting it gently with your floured hand. This helps to create a more even surface for baking.
- Cover the pan and let the batter rise again (about 30-60 minutes) until the dough has reached the top of the pan. This second rise is crucial for achieving a light and airy texture.
- Bake in a preheated 375°F (190°C) oven for 45-50 minutes, or until the loaf sounds hollow when the top is lightly tapped. A hollow sound indicates that the bread is cooked through. If the top is browning too quickly, you can tent it with foil during the last 15 minutes of baking.
- Remove the bread from the pan immediately after baking and place it on a wire rack to cool.
- For a softer crust, brush the top of the hot loaf with melted butter. This is optional, but it adds a lovely richness and sheen to the crust.
- Let the bread cool completely on the wire rack before slicing. Bread slices best when it is completely cooled, as cutting it while it’s still warm can result in a gummy texture.
Expert Tips & Tricks
- Proofing the Yeast: Always proof your yeast before starting the recipe to ensure it’s active.
- Warm Environment: Providing a warm environment for rising is key to a successful loaf. If your kitchen is cold, try placing the dough in a slightly warmed oven (turned off) or near a warm appliance.
- Doneness Test: If you don’t have a good ear for the “hollow sound” test, you can use a thermometer. The internal temperature of the bread should be around 200-210°F (93-99°C).
- Even Baking: To ensure even baking, rotate the loaf pan halfway through the baking time.
- Sticky Dough: Don’t be tempted to add more flour if the dough seems too sticky. This batter bread is meant to have a slightly wetter consistency than traditional bread dough.
Serving & Storage Suggestions
This batter bread is incredibly versatile. Serve it warm with butter, jam, or honey. It makes excellent sandwiches, toast, and is perfect for dipping in soups or stews.
To store, wrap the cooled loaf tightly in plastic wrap or place it in an airtight container. It will keep at room temperature for 2-3 days, in the refrigerator for up to a week, or in the freezer for up to 2 months. To reheat, wrap the bread in foil and warm it in a 350°F (175°C) oven for about 10-15 minutes, or until heated through. You can also toast individual slices for a quick and easy snack.
Nutritional Information
| Nutrient | Amount per Serving (approximate) | % Daily Value (approximate) |
|---|---|---|
| Calories | 140 kcal | 7% |
| Total Fat | 3g | 4% |
| Saturated Fat | 2g | 10% |
| Cholesterol | 8mg | 3% |
| Sodium | 390mg | 16% |
| Total Carbohydrate | 25g | 8% |
| Dietary Fiber | 1g | 4% |
| Sugars | 2g | – |
| Protein | 4g | 8% |
Note: Nutritional information is an estimate and can vary based on specific ingredients and serving size.
Variations & Substitutions
- Whole Wheat Batter Bread: Substitute up to half of the all-purpose flour with whole wheat flour for a nuttier flavor and added fiber.
- Herb & Garlic Batter Bread: Add 1-2 tablespoons of chopped fresh herbs (such as rosemary, thyme, or oregano) and 1-2 cloves of minced garlic to the batter for a savory twist.
- Cheese Batter Bread: Stir in 1/2 cup of shredded cheese (such as cheddar, mozzarella, or parmesan) into the batter before the second rise.
- Sweet Batter Bread: Add 1/4 cup of dried fruit (such as raisins, cranberries, or chopped apricots) and 1/4 teaspoon of ground cinnamon to the batter for a sweeter loaf.
- Dairy-Free Option: Substitute the unsalted butter with a plant-based butter alternative.
FAQs (Frequently Asked Questions)
Q: Why is my bread dense and heavy?
A: This could be due to several factors, including using expired yeast, not letting the dough rise long enough, or not beating the dough enough after the first rise.
Q: Can I use bread flour instead of all-purpose flour?
A: Yes, you can use bread flour for a slightly chewier texture. However, all-purpose flour works perfectly well for this recipe.
Q: How do I know if my yeast is still good?
A: To test your yeast, dissolve a teaspoon of sugar and a teaspoon of yeast in 1/4 cup of warm water. If it foams up within 5-10 minutes, your yeast is active.
Q: Can I freeze this bread?
A: Yes, this bread freezes well. Wrap it tightly in plastic wrap and then in foil before freezing. Thaw it at room temperature before reheating.
Q: What if my bread is browning too quickly?
A: If the top of the bread is browning too quickly, tent it with foil during the last 15 minutes of baking.
Final Thoughts
This Easy Batter Bread recipe is a testament to the fact that baking doesn’t have to be complicated to be rewarding. It’s a simple, satisfying recipe that yields a delicious loaf of bread perfect for any occasion. So, gather your ingredients, preheat your oven, and embark on your own bread-baking adventure. Don’t hesitate to experiment with variations to create your own signature batter bread. And please, share your experiences – I’d love to hear how it turns out! Happy baking!