
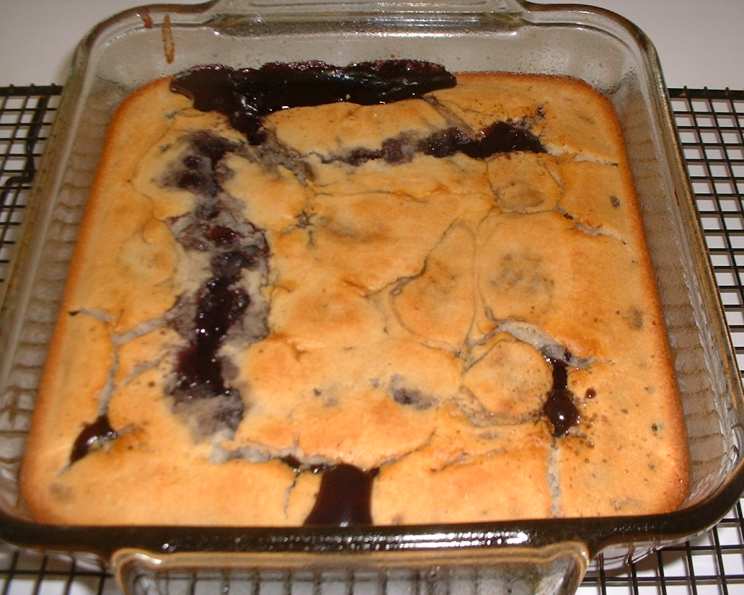
Easy Bisquick Cobbler: A Taste of Home
The aroma alone transports me back to childhood summers at my grandmother’s farm. I can almost feel the sun-drenched porch swing beneath me as the scent of bubbling, sweet fruit mingling with the distinct aroma of Bisquick baking in the oven filled the air. It was a signal that a simple, comforting dessert was on its way, a warm hug in edible form, and a reminder that family was gathered near. This cobbler, born from her ingenuity, was always a hit, vanishing in minutes, and is a testament to how the simplest ingredients can create the most cherished memories.
Recipe Overview
- Prep Time: 5 minutes
- Cook Time: 45 minutes
- Total Time: 50 minutes
- Servings: 6
- Yield: 1 (9×9 inch) cobbler
- Dietary Type: Varies (see Variations & Substitutions)
Ingredients
- 1 cup Bisquick
- 1/4 cup sugar
- 1 cup milk
- 21 ounces pie filling (any flavor)
Equipment Needed
- 9×9 inch baking pan
- Mixing bowl
- Measuring cups
- Measuring spoons
Instructions
- Preheat your oven to 375 degrees Fahrenheit (190 degrees Celsius). Make sure your oven rack is positioned in the center for even baking.
- In a mixing bowl, combine the Bisquick, sugar, and milk. Mix until just combined. Be careful not to overmix, as this can lead to a tough cobbler. A few lumps are perfectly fine.
- Pour the pie filling into an ungreased 9×9 inch baking pan. Spread the filling evenly across the bottom of the pan. If you prefer a thicker crust, consider using a slightly smaller pan, such as an 8×8 inch pan.
- Pour the Bisquick mixture evenly over the pie filling. You can gently spread the batter with a spoon or spatula to ensure it covers the entire surface of the filling. The batter will rise and create a golden crust as it bakes.
- Bake for 45 minutes, or until the crust is golden brown and a toothpick inserted into the center comes out clean. The baking time may vary slightly depending on your oven, so keep a close eye on the cobbler during the last 10-15 minutes of baking. If the crust starts to brown too quickly, you can tent it with foil to prevent it from burning.
- Remove the cobbler from the oven and let it cool slightly before serving. This allows the filling to thicken and the crust to set.
- Serve warm, optionally with a dollop of whipped cream, a scoop of vanilla ice cream, or a drizzle of caramel sauce.
Expert Tips & Tricks
- Don’t overmix the batter: Overmixing develops the gluten in the Bisquick, resulting in a tougher cobbler. Mix just until the ingredients are combined.
- Use room temperature milk: Room temperature milk will incorporate more easily into the batter, resulting in a smoother texture.
- Experiment with different pie fillings: This recipe is incredibly versatile! Try using different pie fillings, such as apple, blueberry, cherry, peach, or even a combination of fillings.
- Add a touch of spice: For a warmer flavor, add a pinch of cinnamon, nutmeg, or allspice to the Bisquick mixture.
- Make it ahead: You can prepare the cobbler ahead of time and bake it just before serving. Simply assemble the cobbler and store it in the refrigerator for up to 24 hours. Add an extra 5-10 minutes to the baking time if baking from cold.
- Crispy Crust Tip: For a crispier crust, lightly brush the top of the batter with melted butter before baking. You can also sprinkle a tablespoon of sugar over the top.
Serving & Storage Suggestions
Serve this cobbler warm for the best experience. A scoop of vanilla ice cream or a dollop of whipped cream complements the warm, fruity filling and golden crust perfectly. If you have any leftovers (which is rare!), store them in an airtight container in the refrigerator for up to 3 days. To reheat, you can microwave individual portions for 30-60 seconds, or bake the entire cobbler in a preheated oven at 350 degrees Fahrenheit (175 degrees Celsius) for 10-15 minutes, or until warmed through. The cobbler can also be frozen for up to 2 months. Thaw it in the refrigerator overnight before reheating.
Nutritional Information
| Nutrient | Amount per Serving | % Daily Value |
|---|---|---|
| Calories | 250 kcal | 13% |
| Total Fat | 8g | 12% |
| Saturated Fat | 3g | 15% |
| Cholesterol | 5mg | 2% |
| Sodium | 300mg | 13% |
| Total Carbohydrate | 40g | 15% |
| Dietary Fiber | 1g | 4% |
| Sugars | 20g | – |
| Protein | 3g | 6% |
Note: Nutritional information is an estimate and may vary based on specific ingredients and portion sizes.
Variations & Substitutions
- Gluten-Free: Use a gluten-free Bisquick mix or a blend of gluten-free flours. You may need to add a binding agent like xanthan gum for the best texture.
- Dairy-Free: Substitute the milk with almond milk, soy milk, oat milk, or any other non-dairy milk alternative. Ensure your pie filling is also dairy-free if needed.
- Vegan: Use a vegan-friendly pie filling and a non-dairy milk substitute. Ensure your Bisquick is vegan-friendly, as some varieties may contain animal products.
- Fruit Combinations: Mix and match different pie fillings to create your own unique flavor combinations. Apple-cranberry, peach-blueberry, or cherry-chocolate are all delicious options.
- Add Nuts: Sprinkle chopped nuts, such as pecans, walnuts, or almonds, over the top of the cobbler before baking for added flavor and texture.
- Spice it up: Add a pinch of cinnamon, nutmeg, or ginger to the Bisquick mixture for a warm, comforting flavor.
- Citrus Zest: Add a teaspoon of lemon or orange zest to the Bisquick mixture for a bright, citrusy flavor.
- Chocolate Chips: Sprinkle chocolate chips over the pie filling before adding the Bisquick batter for a decadent treat.
- Seasonal Variation: During the fall, use pumpkin pie filling and add a teaspoon of pumpkin pie spice to the batter.
FAQs (Frequently Asked Questions)
Q: Can I use fresh fruit instead of pie filling?
A: Yes, you can! You’ll need about 4 cups of chopped fresh fruit. Toss the fruit with 1/2 cup of sugar and 2 tablespoons of cornstarch before pouring it into the pan.
Q: Can I use a different size pan?
A: Yes, but the baking time may need to be adjusted. A larger pan will result in a thinner cobbler and may require less baking time, while a smaller pan will result in a thicker cobbler and may require more baking time.
Q: Can I make this in a cast iron skillet?
A: Absolutely! A cast iron skillet will give the crust a delicious crispy bottom. Just make sure the skillet is well-seasoned or lightly greased.
Q: My crust is browning too quickly. What should I do?
A: Tent the cobbler with foil during the last 15-20 minutes of baking to prevent the crust from burning.
Q: Can I add a crumble topping?
A: Yes, you can! Combine 1/2 cup of flour, 1/4 cup of sugar, and 1/4 cup of cold butter, cut into small pieces. Use a pastry blender or your fingers to cut the butter into the flour until the mixture resembles coarse crumbs. Sprinkle the crumble topping over the Bisquick batter before baking.
Final Thoughts
This Easy Bisquick Cobbler is more than just a dessert; it’s a symbol of home, comfort, and shared moments. I urge you to try this simple yet delightful recipe and create your own memories. Feel free to experiment with different fillings and variations to make it your own. Share your creations and feedback – I’d love to hear about your culinary adventures! Pair it with a steaming cup of coffee or a scoop of vanilla ice cream for the ultimate comforting treat. Enjoy!