
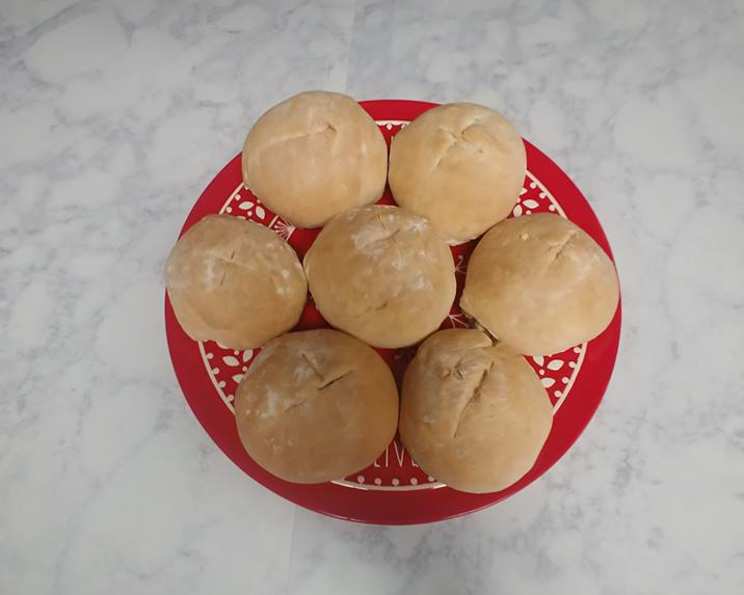
Easy Bread Bowls – High Altitude
The aroma of freshly baked bread is one of life’s greatest comforts, especially when the mountain winds are howling outside. Growing up in a small town nestled high in the Rockies, my grandmother’s bread bowls were a winter staple. They weren’t just vessels for hearty soups and stews; they were edible hugs, warming us from the inside out after a long day of sledding and building snow forts. To this day, the taste of that crusty exterior giving way to the soft, chewy interior brings me right back to her cozy kitchen, filled with laughter and the promise of a delicious meal.
Recipe Overview
- Prep Time: 1 hour 30 minutes
- Cook Time: 25-30 minutes
- Total Time: 3 hours 30 minutes
- Servings: 8
- Yield: 8 bread bowls
- Dietary Type: Vegetarian
Ingredients
- 8 1⁄3 cups all-purpose flour, plus extra for kneading and dusting
- 2 tablespoons kosher salt
- 3 cups warm water
- 4 1⁄2 tablespoons instant yeast
- 1⁄4 cup sugar
- Olive oil flavored cooking spray, for bowl
Equipment Needed
- Large mixing bowl
- Clean work surface
- Measuring cups and spoons
- Kitchen towel
- Sheet pan
- Parchment paper
- Sharp knife
- Paring knife
- Spoon
Instructions
- In a large bowl, whisk together the flour, instant yeast, and the salt. This ensures the yeast is evenly distributed throughout the dry ingredients, which is crucial for a good rise, especially at high altitude where yeast can be finicky.
- Add the warm water to the bowl and stir until combined. The dough will be shaggy at this point.
- Knead the dough in the bowl until it forms together in a ball. This initial knead helps to develop some of the gluten.
- Lightly dust a clean work surface with flour, and knead the dough for about 7 minutes until smooth and elastic. Don’t skimp on the kneading! This is what gives the bread its structure. The dough should feel supple and spring back when gently poked.
- Grease a clean bowl with oil, and place the dough in the bowl, turning to coat all sides. This prevents the dough from drying out and sticking as it rises.
- Cover the bowl with a towel and let rise in a warm spot until doubled in size, about 45 minutes. A warm environment encourages the yeast to work its magic.
- Gently deflate the dough by pressing in the center. This releases the built-up carbon dioxide and helps to create a more even texture.
- Let rise again for about 20-25 minutes. This second rise is especially important for high altitude baking, as it allows the dough to further develop flavor and structure in the thinner air.
- Once again gently deflate the dough by pressing in the center. This is the final punch down before shaping.
- Place the dough on a clean work surface and cut it into 8 equal pieces. I find it is easier to cut like a pizza so they end up the same size. Using a bench scraper helps ensure even portions.
- Shape the dough into balls. Pinch the seams underneath to create a smooth, round surface on top.
- Place the shaped bowls on a sheet pan lined with parchment paper and cover with a towel to rise for 40 minutes. This final proofing allows the dough to relax and puff up before baking.
- Preheat your oven to 435°F [Add 1 degree for every 500 ft above 6000]. High altitude often requires slightly higher baking temperatures to achieve proper browning and prevent a gummy interior. Adjust accordingly based on your elevation.
- Lightly dust the bowls with flour and use a sharp knife to slash the top of the bowls with an X pattern. This allows the steam to escape during baking, preventing the bowls from bursting.
- Bake at 435°F for 25-30 minutes, or until golden brown and crusty. The internal temperature should reach around 200-210°F. Keep a close eye on them in the last few minutes to prevent burning.
- Let the bread cool slightly. Use a paring knife to cut a circle out of the top of the bowls. Use a spoon to scoop out some of the extra bread so that you have enough room in the bowl for soup. Reserve the bread for dipping.
Expert Tips & Tricks
- High Altitude Adjustments: As mentioned above, adding 1 degree of oven temperature for every 500 feet above 6000 feet is a good starting point. You may also need to slightly decrease the amount of yeast or increase the amount of liquid to achieve the desired dough consistency.
- Dough Consistency: The dough should be slightly tacky but not sticky. If it’s too sticky, add a tablespoon of flour at a time until it reaches the right consistency.
- Warm Environment: A warm environment is crucial for proofing the dough. If your kitchen is cold, you can place the bowl in a slightly warmed oven (turned off!) or near a sunny window.
- Scoring the Bread: A sharp knife or lame is essential for scoring the bread cleanly. If you don’t have a lame, you can use a serrated knife. Make sure to score deeply enough to allow the steam to escape.
- Even Baking: To ensure even baking, rotate the sheet pan halfway through the baking time.
Serving & Storage Suggestions
Serve these bread bowls immediately after baking, filled with your favorite soup, stew, or chili. They are best enjoyed warm!
Leftover bread bowls can be stored at room temperature in an airtight container for up to 2 days. For longer storage, freeze them for up to 2 months. To reheat, thaw them completely and then bake in a preheated oven at 350°F for 10-15 minutes, or until warmed through. You can also reheat them in the microwave, but they may become slightly softer.
Nutritional Information
| Nutrient | Amount per Serving | % Daily Value |
|---|---|---|
| Calories | 520 kcal | N/A |
| Total Fat | 1.8g | 2% |
| Saturated Fat | 0.3g | 1% |
| Cholesterol | 0mg | 0% |
| Sodium | 1753mg | 73% |
| Total Carbohydrate | 108g | 36% |
| Dietary Fiber | 5.3g | 21% |
| Sugars | 6.6g | N/A |
| Protein | 16.2g | 32% |
Note: Nutritional information is an estimate and may vary based on specific ingredients and portion sizes.
Variations & Substitutions
- Gluten-Free: Substitute the all-purpose flour with a gluten-free bread flour blend. You may need to adjust the liquid slightly, as gluten-free flours tend to absorb more moisture.
- Whole Wheat: Replace up to half of the all-purpose flour with whole wheat flour for a nuttier flavor and added fiber.
- Flavored Bread Bowls: Add herbs, spices, or cheese to the dough for a customized flavor. Rosemary, garlic, or cheddar cheese would be delicious additions.
- Soup Pairing: Consider the type of soup you’ll be serving. A creamy tomato soup pairs well with a plain bread bowl, while a hearty chili might benefit from a cornbread bowl variation (add cornmeal to the dough).
FAQs (Frequently Asked Questions)
Q: Why is the second rise so important in high altitude?
A: The second rise allows the dough to fully develop its flavor and structure in the thinner air, preventing a dense, gummy bread bowl.
Q: Can I use active dry yeast instead of instant yeast?
A: Yes, but you’ll need to proof the active dry yeast in warm water with a teaspoon of sugar for about 5-10 minutes before adding it to the flour mixture.
Q: How do I know when the bread bowls are done baking?
A: The bread bowls should be golden brown and crusty. You can also check the internal temperature with a thermometer; it should reach around 200-210°F.
Q: My bread bowls are too dense. What did I do wrong?
A: Possible reasons include not kneading the dough enough, not proofing it in a warm enough environment, or using expired yeast.
Q: Can I make the dough ahead of time?
A: Yes, you can make the dough ahead of time and store it in the refrigerator for up to 24 hours. Let it come to room temperature before shaping and baking.
Final Thoughts
There’s something truly special about the aroma of freshly baked bread filling your home, especially when that bread is crafted into a rustic, edible bowl brimming with a comforting soup. Whether you’re battling the high-altitude chill or simply seeking a satisfying and unique meal, these easy bread bowls are sure to impress. So, gather your ingredients, preheat your oven, and prepare to experience the joy of homemade goodness. Don’t hesitate to experiment with different flavors and fillings to create your own signature bread bowl masterpiece. And please, share your baking adventures and any delicious variations you discover! Bon appétit!