
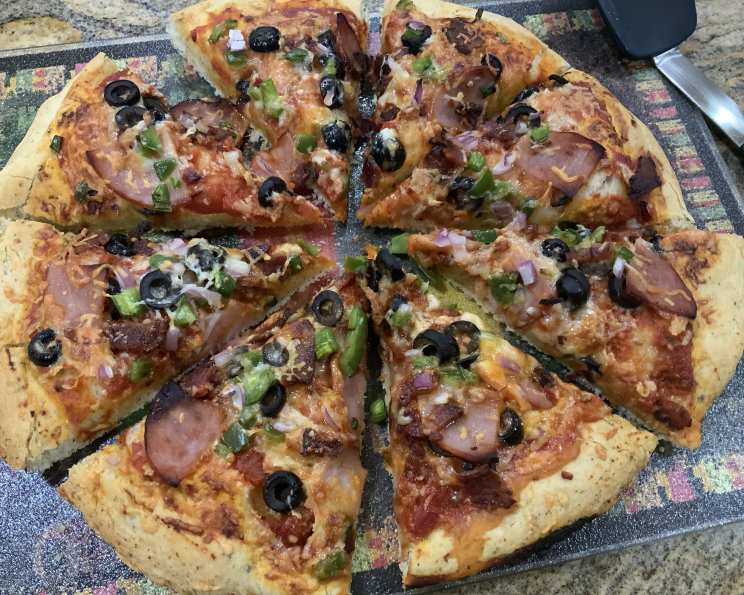
Easy Bread Machine Pizza Crust: From My Kitchen to Your Table
I’ll never forget the aroma that filled our tiny kitchen every Friday night growing up. It wasn’t just the scent of bubbling tomato sauce and melting mozzarella; it was the deeper, more comforting smell of freshly baked bread, the foundation of my mother’s famous homemade pizza. She always made the dough from scratch, a process that seemed both magical and daunting to my young eyes. Now, with my trusty bread machine, I can recreate that same delicious experience with a fraction of the effort, and I’m thrilled to share this simple yet satisfying recipe with you. It brings back a sense of nostalgia with every slice!
Recipe Overview
- Prep Time: 5 minutes
- Cook Time: 15-20 minutes
- Total Time: 25 minutes (plus bread machine cycle)
- Servings: 6-8
- Yield: 1 x 16-inch pizza crust
- Dietary Type: Vegetarian
Ingredients
- 1 1/2 cups warm water
- 2 tablespoons olive oil
- 4 cups flour (all-purpose or bread flour)
- 1 1/2 teaspoons salt
- 1/3 cup parmesan cheese
- 1 tablespoon Italian seasoning
- 2 1/2 teaspoons active dry yeast
Equipment Needed
- Bread machine
- Pizza pan (16-inch)
- Rolling pin or hands for stretching
- Measuring cups and spoons
Instructions
- Prepare the Bread Machine: Ensure your bread machine pan is clean and dry.
- Add Wet Ingredients: Pour 1 1/2 cups of warm water into the bread machine pan, followed by 2 tablespoons of olive oil.
- Add Dry Ingredients: Add 4 cups of flour (either all-purpose or bread flour works well), 1 1/2 teaspoons of salt, 1/3 cup of parmesan cheese, 1 tablespoon of Italian seasoning, and 2 1/2 teaspoons of active dry yeast. Make sure the yeast does not come into direct contact with the salt at this stage; a small well in the flour for the yeast is a good trick.
- Select Dough Cycle: Place the bread machine pan into the machine and select the dough cycle. This cycle typically mixes and proofs the dough, taking around 1 to 1.5 hours, depending on your machine.
- Adjust Consistency (If Needed): Keep an eye on the dough as it mixes. If it appears too dry, add water a little at a time until it forms a smooth, elastic ball. The dough should pull away from the sides of the pan.
- Prepare the Pizza Pan: While the dough is in the bread machine, prepare your pizza pan. Lightly grease it with olive oil or sprinkle it with cornmeal (cornmeal is optional but adds a nice texture).
- Shape the Dough: Once the dough cycle is complete, remove the dough from the bread machine pan. On a lightly floured surface, either roll the dough out with a rolling pin or stretch it by hand to fit your 16-inch pizza pan.
- Transfer to Pan: Carefully transfer the dough to the prepared pizza pan.
- Add Toppings: There is no need to let the dough rest again. Simply add your favorite pizza sauce, cheese, and toppings.
- Bake: Preheat your oven to 450°F (232°C). Bake the pizza for 15-20 minutes, or until the crust is golden brown and the cheese is melted and bubbly.
- Cool Slightly and Serve: Let the pizza cool for a few minutes before slicing and serving.
Expert Tips & Tricks
- Flour Choice: Bread flour will result in a chewier crust, while all-purpose flour will create a slightly softer crust. Experiment to see which you prefer.
- Cheese Options: While the recipe calls for parmesan cheese in the crust, feel free to experiment with other hard cheeses like pecorino romano or asiago.
- Herbs: For a bolder flavor, try adding fresh herbs like chopped basil, oregano, or rosemary to the dough.
- Dough Consistency: The dough should be slightly tacky but not sticky. If it’s too sticky, add a little more flour, one tablespoon at a time, until it reaches the right consistency.
- Pre-Baking: For a crispier crust, pre-bake the dough for 5-7 minutes before adding the toppings. This is especially helpful if you’re using a lot of wet toppings.
- Even Baking: To ensure even baking, rotate the pizza halfway through the baking time.
- Proofing: The dough cycle on the bread machine can vary. If you want to make the dough ahead, you can remove it after the initial mix, shape it into a ball, and let it rise in a lightly oiled bowl in the refrigerator for 8-24 hours. This slow fermentation will enhance the flavor of the crust. Bring to room temperature before shaping.
Serving & Storage Suggestions
Serve your freshly baked pizza hot, straight from the oven. Garnish with fresh basil or a drizzle of olive oil for an extra touch. Leftover pizza can be stored in the refrigerator for up to 3 days. Reheat in a preheated oven at 350°F (175°C) or in a skillet over medium heat for a crispy crust. For longer storage, wrap individual slices tightly in plastic wrap and freeze for up to 2 months. Reheat frozen pizza directly in the oven; no need to thaw.
Nutritional Information
Please note that these values are estimates and may vary based on specific ingredients and portion sizes.
| Nutrient | Amount per Serving | % Daily Value |
|---|---|---|
| Calories | 375 kcal | 19% |
| Total Fat | 12g | 18% |
| Saturated Fat | 4g | 20% |
| Cholesterol | 10mg | 3% |
| Sodium | 700mg | 30% |
| Total Carbohydrate | 55g | 18% |
| Dietary Fiber | 3g | 12% |
| Sugars | 2g | 4% |
| Protein | 14g | 28% |
Variations & Substitutions
- Gluten-Free: Use a gluten-free flour blend specifically formulated for bread making. You may need to adjust the amount of liquid.
- Vegan: Substitute the parmesan cheese with 1/4 cup of nutritional yeast for a cheesy flavor. Ensure your toppings are also vegan-friendly.
- Whole Wheat: Replace up to half of the all-purpose flour with whole wheat flour for a nuttier flavor and added fiber.
- Garlic Herb Crust: Add 1-2 cloves of minced garlic to the dough mixture along with the Italian seasoning.
- Spicy Crust: Add a pinch of red pepper flakes to the dough for a subtle kick.
- Sweet Crust: Add 1 tablespoon of sugar to the dough for a sweeter crust, which pairs well with dessert pizzas.
FAQs (Frequently Asked Questions)
Q: Can I use instant yeast instead of active dry yeast?
A: Yes, you can. The amount remains the same (2 1/2 teaspoons). You don’t need to proof instant yeast in water before adding it to the bread machine.
Q: My dough is too sticky. What should I do?
A: Add flour, one tablespoon at a time, until the dough forms a smooth ball and pulls away from the sides of the bread machine pan.
Q: Can I make the dough ahead of time?
A: Absolutely! After the dough cycle is complete, you can refrigerate the dough for up to 24 hours. Let it come to room temperature before shaping.
Q: My pizza crust is not crispy enough. What can I do?
A: Try pre-baking the crust for 5-7 minutes before adding the toppings. You can also bake the pizza on a preheated pizza stone for a crispier bottom.
Q: Can I freeze the pizza dough?
A: Yes, you can. After the dough cycle is complete, shape the dough into a ball, lightly oil it, and wrap it tightly in plastic wrap. Freeze for up to 2 months. Thaw overnight in the refrigerator before using.
Final Thoughts
This bread machine pizza crust recipe is more than just a simple way to make pizza dough; it’s an invitation to create memories in your own kitchen. Whether you’re gathering with family on a Friday night or simply craving a comforting slice, this recipe is sure to become a staple. So, gather your ingredients, fire up your bread machine, and let the delicious aroma of homemade pizza fill your home. Don’t forget to share your creations and feedback – I can’t wait to hear about your pizza adventures! Pair it with a crisp green salad and your favorite beverage for a complete and satisfying meal.