
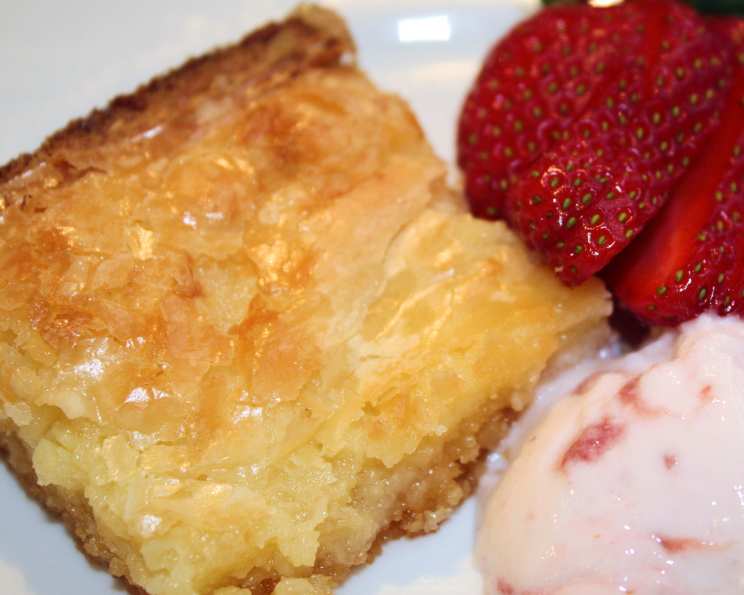
Effortless Elegance: Cake Mix Butter Bars
The scent of butter and vanilla still transports me back to childhood summers spent at my grandmother’s farmhouse. Her kitchen, always warm and welcoming, was the epicenter of family gatherings. While she was a master of intricate pies and sourdough loaves, I particularly remember her baking these simple, yet incredibly satisfying, butter bars. They were the perfect treat for a hot afternoon, a comforting square of sweetness that felt like a warm hug. There was a certain magic in how something so easy could taste so divinely rich and buttery. Today, I share her “secret” recipe, adapted ever so slightly, for a treat that’s sure to become a family favorite in your own home.
Recipe Overview
- Prep Time: 10 minutes
- Cook Time: 25-30 minutes
- Total Time: 35-40 minutes
- Yields: 36 Bars
- Serves: 36
- Dietary Type: Not Gluten-Free
Ingredients
- 1 (18 1/4 ounce) package yellow cake mix or (18 1/4 ounce) package white cake mix
- 1/2 cup (1 stick) butter, softened
- 1 egg
- 1 (8 ounce) package cream cheese, softened
- 2 eggs
- 1/2 – 1 teaspoon butter flavoring (optional)
- 4 cups powdered sugar, sifted
- Sugared cranberries (optional, for garnish)
- Fresh mint sprig (optional, for garnish)
Equipment Needed
- 15x10x1-inch baking pan
- Cooking spray
- Medium mixing bowl
- Electric mixer
- Wire rack
Instructions
-
Preheat your oven to 350 degrees F (175 degrees C). Coat a 15x10x1-inch baking pan generously with cooking spray. This will prevent the bars from sticking and make them easier to remove after baking.
-
Prepare the crust. In a medium mixing bowl, combine the cake mix, softened butter, and 1 egg. Use an electric mixer on low speed to beat the ingredients together until the mixture is crumbly. Don’t overmix; you want it to resemble coarse crumbs.
-
Press the crust mixture firmly into the bottom of the prepared pan. Ensure an even layer, as this forms the foundation of your butter bars. A flat-bottomed measuring cup or your fingertips can help to achieve a uniform thickness.
-
Create the creamy filling. In another medium mixing bowl, combine the softened cream cheese, 2 eggs, and butter flavoring (if using). Beat with an electric mixer until the mixture is smooth and completely lump-free. The cream cheese needs to be at room temperature to blend properly; otherwise, you may end up with small, stubborn lumps.
-
Gradually add the sifted powdered sugar to the cream cheese mixture. Beat on low speed until the powdered sugar is fully incorporated and the filling is smooth. Sifting the powdered sugar will prevent clumps and ensure a silky-smooth texture.
-
Spread the filling evenly over the prepared crust in the pan. Use an offset spatula or the back of a spoon to create a smooth, uniform layer. This will ensure that the butter bars bake evenly.
-
Bake in the preheated 350 degree F (175 degrees C) oven for 25 to 30 minutes, or until the filling is set and golden brown. The edges should be slightly firm, and the center should be mostly set with a slight jiggle. Keep a close eye on them; ovens vary, and you don’t want to overbake them, as this can result in a dry filling.
-
Cool the butter bars completely in the pan on a wire rack. As they cool, the filling will naturally settle and may slightly fall. Don’t worry; this is perfectly normal and doesn’t affect the taste.
-
Once completely cooled, cut the bars into squares. A sharp knife, preferably a long, thin one, will help you make clean cuts.
-
Garnish the bars with sugared cranberries and fresh mint sprigs (optional) for a festive touch. These garnishes add a pop of color and a hint of freshness to complement the rich, buttery flavor.
Expert Tips & Tricks
- Softened Butter is Key: Make sure your butter is truly softened (but not melted) for both the crust and the filling. This ensures everything mixes together smoothly and creates the right texture.
- Don’t Overbake: Overbaking will result in dry, crumbly bars. Bake just until the filling is set and lightly golden brown.
- Sift, Sift, Sift: Sifting the powdered sugar is crucial for a smooth, lump-free filling.
- Make Ahead: These bars are perfect for making ahead. You can bake them a day or two in advance and store them in the refrigerator.
- Clean Cuts: For clean cuts, use a warm knife. Run it under hot water and dry it before each cut.
- Upgrade the Crust: For an even richer crust, use a high-quality European-style butter.
- Flavor Boost: Add a teaspoon of vanilla extract to the filling for extra flavor complexity.
- Salted vs Unsalted Butter: If using salted butter, consider reducing the level of salt.
Serving & Storage Suggestions
These butter bars are best served at room temperature, allowing the buttery flavor to fully develop. They are delicious on their own, but also pair well with a scoop of vanilla ice cream or a dollop of whipped cream.
Store leftover butter bars in an airtight container at room temperature for up to 3 days, in the refrigerator for up to a week, or in the freezer for up to 2 months. To freeze, wrap the bars individually in plastic wrap and then place them in a freezer-safe container.
To reheat frozen bars, thaw them in the refrigerator overnight or at room temperature for a few hours. They will taste almost as good as freshly baked!
Nutritional Information
| Nutrient | Amount per Serving | % Daily Value |
|---|---|---|
| Calories | 164.2 kcal | N/A |
| Calories from Fat | N/A | 37% |
| Total Fat | 6.8 g | 10% |
| Saturated Fat | 3.2 g | 16% |
| Cholesterol | 29.5 mg | 9% |
| Sodium | 143.5 mg | 5% |
| Total Carbohydrate | 24.8 g | 8% |
| Dietary Fiber | 0.2 g | 0% |
| Sugars | 19.5 g | N/A |
| Protein | 1.6 g | 3% |
Note: Nutritional information is an estimate and may vary based on specific ingredients and preparation methods.
Variations & Substitutions
- Gluten-Free: Substitute the cake mix with a gluten-free cake mix. Ensure all other ingredients are also gluten-free.
- Lemon Butter Bars: Add the zest of one lemon to the filling for a bright, citrusy twist.
- Chocolate Chip Butter Bars: Sprinkle chocolate chips over the crust before adding the filling.
- Nutty Butter Bars: Add chopped nuts (pecans, walnuts, or almonds) to the crust or filling.
- Seasonal Flavors: Adjust the butter flavoring to match the season. Use almond extract in the spring, pumpkin spice in the fall, or peppermint extract during the holidays.
FAQs (Frequently Asked Questions)
Q: Why did my butter bars sink in the middle after cooling?
A: This is perfectly normal! The filling will settle as it cools. It doesn’t affect the taste or texture.
Q: Can I use a different size pan?
A: Yes, but you may need to adjust the baking time. A smaller pan will result in thicker bars and may require a longer baking time. A larger pan will result in thinner bars and may require a shorter baking time.
Q: Can I freeze these butter bars?
A: Absolutely! These butter bars freeze very well. Wrap them individually in plastic wrap and then place them in a freezer-safe container for up to 2 months.
Q: What if I don’t have butter flavoring?
A: The butter flavoring is optional. You can omit it or substitute it with vanilla extract.
Q: My crust is too crumbly and won’t stick together. What can I do?
A: Try adding a tablespoon or two of cold water to the crust mixture and mixing until it comes together.
Final Thoughts
I sincerely hope this recipe brings you as much joy as it has brought my family over the years. It is more than just a simple dessert; it’s a connection to cherished memories and a celebration of simple pleasures. I encourage you to try this recipe, personalize it with your own creative twists, and share it with those you love. Let me know what you think, and happy baking!