
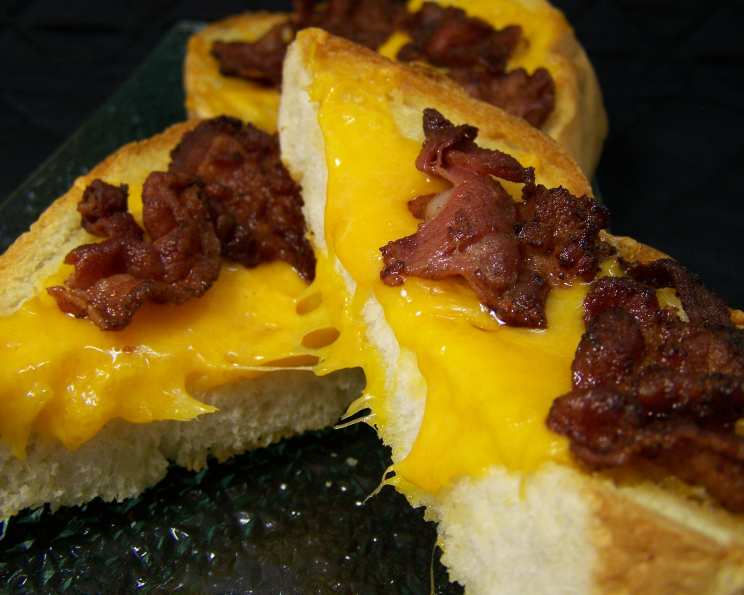
Easy Cheese Dreams: A Culinary Comfort Classic
I can still remember the sheer joy of coming home from school on a chilly afternoon, the scent of melting cheese and crispy bacon wafting from the kitchen. My grandmother, with her ever-present apron and a smile that could melt glaciers, would have a plate of these “Cheese Dreams” waiting for me. They weren’t just a snack; they were a warm hug on a plate, a little taste of pure, uncomplicated happiness that has stayed with me throughout my culinary journey.
Recipe Overview
- Prep Time: 5 minutes
- Cook Time: 5 minutes
- Total Time: 10 minutes
- Servings: 4
- Yield: 4 cheese dreams
- Dietary Type: Comfort Food
Ingredients
- 4 slices crusty bread (thick slices)
- 8 ounces cheddar cheese, sliced (medium or old)
- 4 slices bacon
- Butter or margarine, for spreading
Equipment Needed
- Broiler or George Foreman grill
- Baking sheet
- Paper towels
Instructions
- Begin by preparing the bacon. Cut each slice of bacon into 2 pieces.
- Cook the bacon under the broiler or on a George Foreman grill until crisp. Be sure to keep a close eye on it, as bacon can quickly go from perfectly cooked to burnt.
- Once the bacon is cooked to your liking, place the cooked bacon pieces on paper towels to remove excess fat. This step helps ensure the final Cheese Dream isn’t overly greasy.
- Next, prepare the bread. Spread butter or margarine evenly on one side of each slice of crusty bread. This adds flavor and helps the bread crisp up beautifully under the broiler.
- Now it’s time to assemble the Cheese Dreams. On top of the buttered side of each slice of bread, arrange slices of cheddar cheese. Use enough to generously cover the surface of the bread.
- Place 2 pieces of cooked bacon on top of the cheese on each slice.
- Transfer the assembled Cheese Dreams to a baking sheet.
- Place the baking sheet under the broiler. Broil until the cheese is melted and bubbly, watching carefully to prevent burning, about 2 minutes. The exact time will depend on the strength of your broiler, so keep a close eye on them.
- Remove from the broiler and let cool slightly before serving.
Expert Tips & Tricks
- Cheese Choice Matters: While cheddar is classic, don’t be afraid to experiment with other cheeses like Gruyere, Monterey Jack, or even a sharp provolone for a different flavor profile.
- Bread is Key: The sturdier the bread, the better it will hold up under the broiler. Sourdough, baguette, or even thick-cut challah work wonderfully.
- Crispy Bacon Secrets: For extra crispy bacon, try baking it in the oven at 400°F (200°C) for 15-20 minutes before adding it to the Cheese Dreams.
- Garlic Butter Boost: For a flavorful twist, mix minced garlic into the butter or margarine before spreading it on the bread.
- Don’t Overcrowd: When broiling, make sure the baking sheet isn’t overcrowded. This will ensure even melting and browning.
- Broiler Beware: Broilers vary significantly in their heat output. Start with the rack positioned further down from the broiler element and adjust as needed to prevent burning.
- Preheating is Optional: You don’t need to preheat the broiler, but if you do, reduce the broiling time slightly.
Serving & Storage Suggestions
Serve Cheese Dreams immediately while the cheese is melted and gooey. They are fantastic as a snack, a light lunch, or alongside a bowl of tomato soup or a simple green salad.
Leftovers can be stored in an airtight container in the refrigerator for up to 2 days. Reheat them under the broiler or in a toaster oven until the cheese is melted and bubbly again. While they are best fresh, reheating still offers a tasty experience. Freezing is not recommended, as the bread can become soggy upon thawing.
Nutritional Information
| Nutrient | Amount per Serving | % Daily Value |
|---|---|---|
| Calories | 508 kcal | 25% |
| Total Fat | 31g | 48% |
| Saturated Fat | 16g | 80% |
| Cholesterol | 75mg | 25% |
| Sodium | 931mg | 39% |
| Total Carbohydrate | 34g | 11% |
| Dietary Fiber | 2g | 8% |
| Sugars | 1g | 2% |
| Protein | 22g | 44% |
Variations & Substitutions
- Vegetarian Cheese Dreams: Omit the bacon and add sliced tomatoes, mushrooms, or roasted red peppers.
- Spicy Cheese Dreams: Add a pinch of red pepper flakes to the butter or sprinkle some jalapeños on top of the cheese.
- Deluxe Cheese Dreams: Top with a fried egg after broiling for an extra-rich and satisfying meal.
- Open-Faced Sandwich: Add a slice of ham or turkey under the cheese for a more substantial meal.
- Gluten-Free Option: Use gluten-free bread.
- Different Cheese Blend: Experiment with different cheese combinations like pepper jack and colby or Swiss and Gruyere.
FAQs (Frequently Asked Questions)
Q: Can I use pre-shredded cheese?
A: While you can use pre-shredded cheese, freshly sliced cheese melts more smoothly and evenly.
Q: How do I prevent the bread from burning under the broiler?
A: Keep a close eye on the Cheese Dreams and adjust the rack position in your oven. You can also lightly toast the bread before adding the cheese and bacon.
Q: Can I make these ahead of time?
A: You can assemble the Cheese Dreams ahead of time and store them in the refrigerator until ready to broil. Add a few minutes to the broiling time since the cheese will be cold.
Q: What if I don’t have a broiler?
A: You can bake the Cheese Dreams in a preheated oven at 350°F (175°C) until the cheese is melted and bubbly, about 8-10 minutes.
Q: Can I add other toppings?
A: Absolutely! Feel free to add your favorite toppings, such as sliced tomatoes, onions, or a sprinkle of herbs.
Final Thoughts
These Easy Cheese Dreams are more than just a simple snack; they’re a delicious reminder that the simplest things in life are often the most comforting. So, gather your ingredients, turn on your broiler, and create your own batch of cheesy, bacony bliss. I encourage you to experiment with different cheese and topping combinations to find your perfect Cheese Dream. Don’t be afraid to share your creations and feedback. Enjoy!