
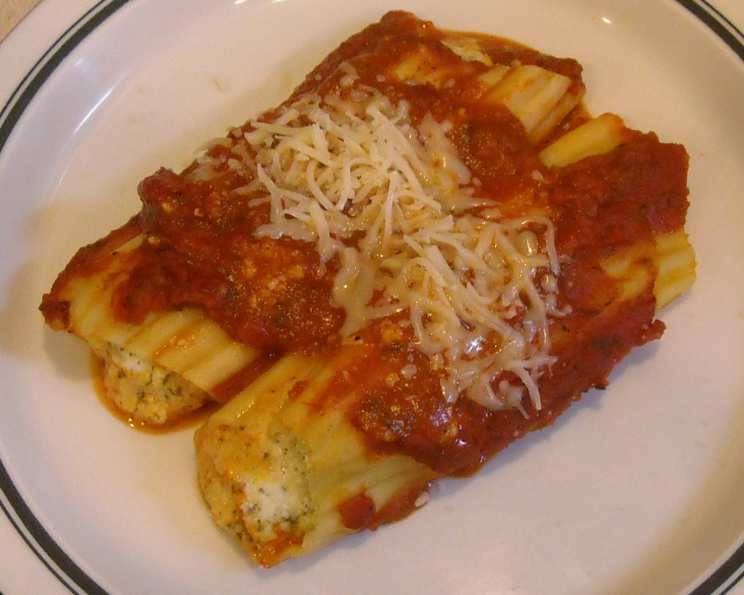
Easy Cheese-Stuffed Manicotti
I remember the first time I made manicotti. It was a chaotic Sunday afternoon, the kind where the aroma of simmering tomato sauce battled with the sound of my family’s laughter. My Nonna stood beside me, patiently guiding my clumsy hands as I struggled to fill the pasta tubes without tearing them. The resulting dish, slightly misshapen but overflowing with cheesy goodness, was a testament to our shared love for food and family. Every time I make manicotti now, I’m transported back to that warm kitchen, filled with the comforting scent of tradition.
Recipe Overview
- Prep Time: 20 minutes
- Cook Time: 55 minutes
- Total Time: 1 hour 15 minutes
- Servings: 6-8
- Yield: 1 baking dish
- Dietary Type: Vegetarian
Ingredients
- 1 (8 ounce) box manicotti shells
- 2 cups ricotta cheese
- 2 cups shredded mozzarella cheese
- ½ cup grated parmesan cheese
- 2 tablespoons fresh parsley, chopped (dried parsley can be substituted if fresh isn’t available, use about 2 teaspoons)
- ½ teaspoon salt
- ¼ teaspoon black pepper
- 3 ½ cups spaghetti sauce (store-bought or homemade)
Equipment Needed
- Large pot
- Colander
- Mixing bowl
- Spoon or piping bag
- 13×9 inch baking pan
- Aluminum foil
Instructions
- First, cook the manicotti shells according to the package directions. Be careful not to overcook them, as they need to be firm enough to hold their shape and the filling. Aim for al dente.
- Once cooked, drain the manicotti shells thoroughly in a colander and set aside to cool slightly. This will make them easier to handle.
- In a large mixing bowl, combine the ricotta cheese, mozzarella cheese, parmesan cheese, parsley, salt, and pepper. Mix well until all ingredients are evenly distributed. This is your delicious cheese filling.
- Now it’s time to fill the manicotti shells. You can use a spoon to carefully stuff each shell with the cheese mixture, or, for a less messy approach, transfer the cheese mixture to a piping bag (or a large zip-top bag with a corner snipped off) and pipe the filling into each shell. Be generous with the filling!
- Preheat your oven to 350°F (175°C).
- Spread a thin layer of spaghetti sauce (about 1 cup) on the bottom of a 13×9 inch baking pan. This will prevent the manicotti from sticking and add flavor to the bottom of the dish.
- Arrange the filled manicotti shells in a single layer over the sauce in the baking pan. Be sure not to overcrowd them.
- Pour the remaining spaghetti sauce (about 2 ½ cups) over the manicotti shells, ensuring they are evenly coated.
- Cover the baking pan tightly with aluminum foil. This will help to trap the moisture and prevent the manicotti from drying out during baking.
- Bake in the preheated oven for 40 minutes.
- After 40 minutes, remove the foil and bake for an additional 15 minutes, or until the cheese is melted and bubbly and the sauce is heated through. Keep a close eye on it to prevent burning. The top should be lightly golden.
- Let the manicotti rest for a few minutes before serving. This will allow the cheese to set slightly and make it easier to slice and serve.
Expert Tips & Tricks
- Don’t overcook the pasta: Slightly undercooking the manicotti shells ensures they don’t become mushy during baking. They should still have a bit of bite to them.
- Use good quality cheese: The flavor of the filling is crucial, so opt for good quality ricotta, mozzarella, and parmesan cheeses. Freshly grated parmesan will provide the best flavor.
- Add an egg to the cheese mixture: For a richer filling, beat one egg into the cheese mixture. This will also help to bind the ingredients together.
- Make it ahead: Assemble the manicotti ahead of time and store it in the refrigerator, covered, for up to 24 hours. Add a few minutes to the baking time if baking straight from the fridge.
- Spice it up: Add a pinch of red pepper flakes to the cheese filling or the sauce for a little heat.
Serving & Storage Suggestions
Serve the cheese-stuffed manicotti hot, straight from the oven. Garnish with a sprinkle of fresh parsley or a dollop of ricotta cheese for an extra touch. This dish pairs well with a simple side salad and some crusty bread for soaking up the delicious sauce.
Storage: Leftover manicotti can be stored in an airtight container in the refrigerator for up to 3 days. It can also be frozen for up to 2 months. Thaw completely in the refrigerator before reheating.
Reheating: Reheat the manicotti in the oven at 350°F (175°C) until heated through, or in the microwave on medium power. You may need to add a little extra sauce to prevent it from drying out.
Nutritional Information
| Nutrient | Amount per Serving | % Daily Value |
|---|---|---|
| Calories | 540 kcal | N/A |
| Calories from Fat | 228 g | 42% |
| Total Fat | 25.4 g | 39% |
| Saturated Fat | 13.7 g | 68% |
| Cholesterol | 78.7 mg | 26% |
| Sodium | 1328.2 mg | 55% |
| Total Carbohydrate | 48.5 g | 16% |
| Dietary Fiber | 1.8 g | 7% |
| Sugars | 14.3 g | N/A |
| Protein | 28.6 g | 57% |
Note: Nutritional information is an estimate and may vary based on specific ingredients and portion sizes.
Variations & Substitutions
- Meat Lovers: Add cooked ground beef or Italian sausage to the cheese filling for a heartier dish.
- Vegetable Boost: Mix in some sautéed spinach, mushrooms, or zucchini to the cheese filling for added nutrients and flavor.
- Different Cheese: Experiment with different cheeses in the filling, such as provolone, fontina, or asiago.
- Creamy Sauce: Add a splash of heavy cream or half-and-half to the spaghetti sauce for a richer, creamier sauce.
- Gluten-Free: Use gluten-free manicotti shells for a gluten-free option.
FAQs (Frequently Asked Questions)
Q: Can I use jarred sauce for this recipe?
A: Absolutely! Jarred sauce works perfectly fine. Look for a high-quality sauce that you enjoy the flavor of. You can also doctor up a jarred sauce by adding extra herbs, garlic, or a pinch of red pepper flakes.
Q: How do I prevent the manicotti shells from tearing when filling them?
A: Be gentle and use a small spoon or a piping bag to fill the shells. Make sure the shells are not too hot or too cold, as extreme temperatures can make them more brittle.
Q: Can I freeze this dish?
A: Yes, manicotti freezes well. Assemble the dish, but don’t bake it. Wrap it tightly in plastic wrap and then foil, and freeze for up to 2 months. Thaw completely in the refrigerator before baking.
Q: What if I don’t have a 13×9 inch baking pan?
A: You can use any oven-safe baking dish that is large enough to hold the manicotti in a single layer. You may need to adjust the baking time slightly depending on the size and shape of the dish.
Q: How do I know when the manicotti is done?
A: The manicotti is done when the cheese is melted and bubbly, the sauce is heated through, and the top is lightly golden. You can also insert a fork into a shell to check if it is heated through.
Final Thoughts
This easy cheese-stuffed manicotti recipe is a guaranteed crowd-pleaser, perfect for family dinners, potlucks, or any occasion that calls for comfort food. Don’t be intimidated by the process – it’s much simpler than it looks! So gather your ingredients, put on some music, and get ready to create a dish that will transport you to a cozy Italian kitchen. I encourage you to try this recipe and make it your own. Feel free to experiment with different cheeses, sauces, and fillings to create a variation that suits your taste. And most importantly, share your creations with loved ones and enjoy the deliciousness together!