
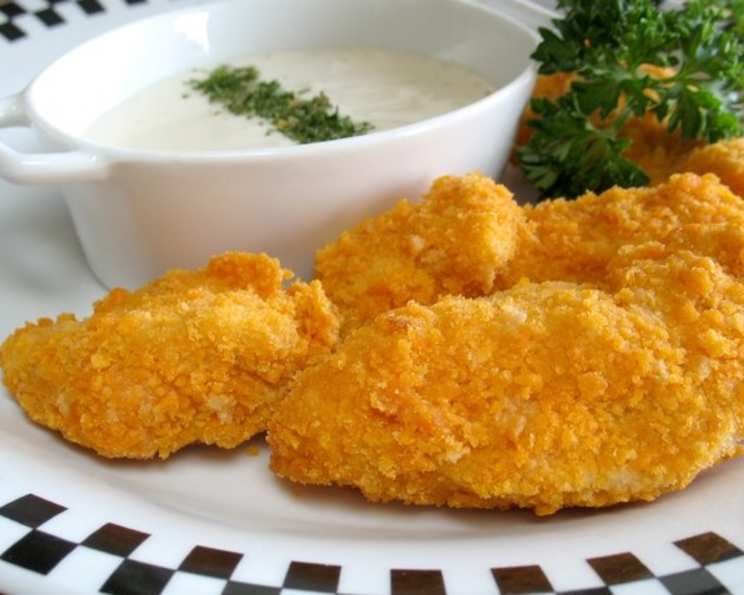
Easy Cheez-It Chicken Fingers: A Crunchy Comfort Food Classic
I still remember being a kid, rummaging through the pantry with my cousins, trying to find the perfect snack. The bright orange box of Cheez-Its always caught our eye, and we’d devour them by the handful. Now, years later, the satisfying crunch of those cheesy crackers still brings back those carefree days. Taking that nostalgic flavor and turning it into a crispy coating for juicy chicken fingers? Pure genius, and a guaranteed crowd-pleaser in my kitchen!
Recipe Overview
- Prep Time: 10 minutes
- Cook Time: 20-30 minutes
- Total Time: 30-40 minutes
- Servings: 4-5
- Yield: 8-10 chicken tenders
- Dietary Type: Not Gluten-Free
Ingredients
- 8-10 chicken breast tenders
- 1/2 – 1 cup Cheez-It crackers
- 1/2 cup milk
- 1 egg
- Salt
- Pepper
Equipment Needed
- Two shallow bowls or plates
- Ziploc bag
- Baking sheet
Instructions
-
Preheat your oven to 350 degrees Fahrenheit (175 degrees Celsius). This ensures the chicken cooks evenly and the Cheez-It coating gets beautifully golden brown and crispy.
-
In a shallow bowl, whisk together the milk, egg, a pinch of salt, and a pinch of pepper. This creates a simple egg wash that will help the crushed Cheez-Its adhere to the chicken. Set aside.
-
Place the Cheez-It crackers in a Ziploc bag. Seal the bag and crush the crackers into crumbs using a rolling pin or your hands. You want a fairly fine consistency, but it’s perfectly okay to have some small chunks for added texture. Pour the crushed Cheez-Its onto a separate shallow plate or bowl.
-
Take each chicken tender and dip it into the milk mixture, ensuring it’s fully coated. Let the excess drip off.
-
Immediately transfer the dipped chicken to the plate of crushed Cheez-Its. Roll the chicken around in the crumbs, pressing gently to ensure a generous and even coating.
-
Place the coated chicken tender onto a baking sheet. Repeat steps 4 and 5 until all the chicken is coated. For an extra-thick and crunchy crust, consider running each piece through the milk mixture and Cheez-Its twice, using up all of the mixture.
-
Bake in the preheated oven for 20-30 minutes, depending on the size and thickness of the chicken tenders. The chicken is done when it’s cooked through and the internal temperature reaches 165 degrees Fahrenheit (74 degrees Celsius). You can use a meat thermometer to check for doneness. The Cheez-It coating should be golden brown and crispy.
-
Remove the baking sheet from the oven and let the chicken fingers cool slightly on the baking sheet before serving. This allows the coating to set up and become even crispier.
-
Serve warm and enjoy!
Expert Tips & Tricks
- Don’t overcrowd the baking sheet: Give the chicken fingers enough space so they can bake evenly and the Cheez-It coating can get crispy. If needed, use two baking sheets.
- For extra flavor: Add a pinch of garlic powder, onion powder, or paprika to the crushed Cheez-Its.
- Prevent soggy bottoms: Place a wire rack on top of the baking sheet and bake the chicken on the rack. This will allow air to circulate and prevent the bottoms from getting soggy.
- Use parchment paper or a silicone baking mat: This will prevent the chicken from sticking to the baking sheet and make cleanup easier.
- If the Cheez-Its start to brown too quickly: Tent the baking sheet with aluminum foil to prevent burning.
- Broil for extra crispness: For the last minute of baking, you can broil the chicken fingers for extra crispness, but watch them closely to prevent burning.
Serving & Storage Suggestions
These Cheez-It chicken fingers are best served warm, straight from the oven, when they’re at their crispiest. They make a fantastic appetizer, snack, or main course. Serve them with your favorite dipping sauces, such as ranch dressing, honey mustard, barbecue sauce, or ketchup.
Leftover chicken fingers can be stored in an airtight container in the refrigerator for up to 3-4 days. To reheat, bake them in a preheated oven at 350 degrees Fahrenheit (175 degrees Celsius) for 10-15 minutes, or until heated through and crispy. You can also reheat them in an air fryer for a few minutes to restore their crispiness. Microwaving is not recommended, as it can make them soggy.
Freezing is possible, although the texture may change slightly. Allow the chicken fingers to cool completely before freezing them in a single layer on a baking sheet. Once frozen, transfer them to a freezer-safe bag or container. They can be stored in the freezer for up to 2-3 months. To reheat, bake them from frozen at 375 degrees Fahrenheit (190 degrees Celsius) for 20-25 minutes, or until heated through.
Nutritional Information
(Estimates will vary based on exact ingredient amounts and preparation methods.)
| Nutrient | Amount per Serving | % Daily Value |
|---|---|---|
| Calories | 350 kcal | 18% |
| Total Fat | 20g | 31% |
| Saturated Fat | 7g | 35% |
| Cholesterol | 90mg | 30% |
| Sodium | 700mg | 30% |
| Total Carbohydrate | 25g | 8% |
| Dietary Fiber | 1g | 4% |
| Sugars | 3g | – |
| Protein | 20g | 40% |
Variations & Substitutions
- Gluten-Free: Use gluten-free Cheez-It crackers or a similar gluten-free cheesy cracker.
- Spice It Up: Add a pinch of cayenne pepper or red pepper flakes to the crushed Cheez-Its for a spicy kick.
- Different Crackers: While Cheez-Its are the star, you could experiment with other crackers like Ritz, saltines (add some grated parmesan for cheesiness), or even crushed potato chips for a different flavor profile.
- Herbs: Add some dried herbs like Italian seasoning, parsley, or thyme to the crushed Cheez-Its for a more sophisticated flavor.
- Air Fryer: For a quicker and slightly healthier version, cook the chicken fingers in an air fryer at 375 degrees Fahrenheit (190 degrees Celsius) for 12-15 minutes, or until cooked through and crispy, flipping halfway through.
- Cheese Lovers: Mix some grated Parmesan cheese into the crushed Cheez-Its for an extra cheesy flavor.
FAQs (Frequently Asked Questions)
Q: Can I use chicken breasts instead of tenders?
A: Yes, you can. Just cut the chicken breasts into strips about the same size as tenders.
Q: Can I make these ahead of time?
A: You can prepare the chicken fingers up to the point of baking and store them in the refrigerator for a few hours. However, it’s best to bake them fresh for the best texture.
Q: My Cheez-Its are too salty. What can I do?
A: Try adding some unsalted breadcrumbs or panko to the crushed Cheez-Its to balance the saltiness.
Q: The Cheez-It coating is falling off. What am I doing wrong?
A: Make sure the chicken is well-coated in the milk mixture before rolling it in the Cheez-Its. Press gently to help the crumbs adhere.
Q: Can I use this recipe for other types of protein?
A: Absolutely! This recipe works well with pork cutlets or even firm tofu slices.
Final Thoughts
These Easy Cheez-It Chicken Fingers are a fun and delicious twist on a classic comfort food. They’re incredibly easy to make, require minimal ingredients, and are always a hit with both kids and adults. Whether you’re looking for a quick weeknight dinner, a crowd-pleasing appetizer, or a nostalgic snack, this recipe is sure to deliver. So go ahead, grab that box of Cheez-Its, and get cooking! And don’t forget to share your creations and any fun variations you come up with!