
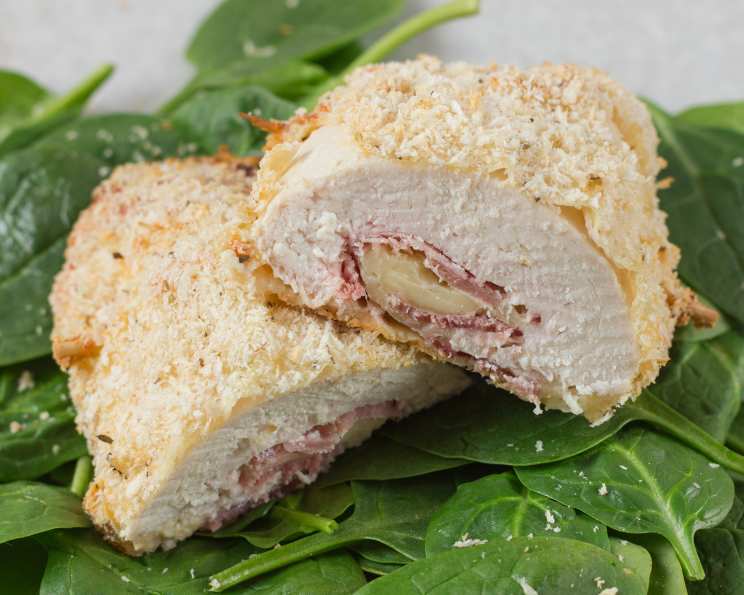
Easy Chicken Cordon Bleu: A Culinary Classic Made Simple
The first time I ever tasted Chicken Cordon Bleu, I was a wide-eyed culinary student. It seemed so elegant, so impossibly French, that I immediately assumed it was beyond my skill level. The chef instructor, a gruff but kind-hearted man with flour permanently dusted on his apron, chuckled when I said that. He then proceeded to teach us a simplified, approachable version – one that tasted just as decadent but didn’t require hours of fussy prep. This recipe reminds me of that moment, a reminder that even the most impressive dishes can be surprisingly easy to create at home.
Recipe Overview
- Prep Time: 15 minutes
- Cook Time: 30-45 minutes
- Total Time: 45-60 minutes
- Servings: 4
- Dietary Type: Not Gluten-Free
Ingredients
- 2 large boneless, skinless chicken breasts
- 4 slices deli ham
- 4 slices Swiss cheese
- 1/4 cup flour, in a bowl
- 1-2 eggs, beaten, in a bowl
- 1/2 cup Italian seasoned breadcrumbs, in a bowl
- Toothpicks
Equipment Needed
- Large cutting board
- Wax paper or plastic wrap
- Heavy pan or mallet
- Bowls for flour, egg, and breadcrumbs
- Baking dish
Instructions
-
Begin by preparing your chicken breasts. Place one breast on a large cutting board. Cover it with a sheet of wax paper or plastic wrap. This prevents the chicken from sticking to your mallet and makes the flattening process much easier.
-
Using a heavy pan (like a cast-iron skillet) or a mallet, gently but firmly pound the chicken breast until it spreads out to approximately twice its original size. The goal is to create a thin, even layer that’s easier to roll. Repeat with the second chicken breast. Be careful not to pound so hard that you tear the chicken.
-
Now it’s time to assemble the Cordon Bleu. On each flattened chicken breast, arrange two slices of deli ham, followed by two slices of Swiss cheese. Make sure the ham and cheese are centered on the chicken, leaving a small border around the edges.
-
Carefully roll up each chicken breast into a tight log, starting from one end. If the roll isn’t holding together securely, use a couple of toothpicks to fasten it in place. Insert the toothpicks at an angle to help keep the filling inside during cooking.
-
Set up your breading station. In three separate bowls, place the flour, the beaten egg, and the Italian seasoned breadcrumbs. Ensure each bowl is wide enough to easily coat the chicken rolls.
-
Now, bread the chicken. Take each rolled chicken breast and roll it first in the flour, making sure to coat all sides. Shake off any excess flour.
-
Next, dip the floured chicken into the beaten egg, again ensuring complete coverage. Let any excess egg drip off before moving to the next step.
-
Finally, roll the egg-coated chicken in the breadcrumbs, pressing gently to help the breadcrumbs adhere. Make sure the entire surface is evenly coated.
-
Place the breaded chicken breasts in a baking dish. You can lightly grease the baking dish with cooking spray if desired, though it isn’t strictly necessary.
-
Bake in a preheated oven at 375°F (190°C) for 30-45 minutes, or until the chicken is cooked through. The internal temperature should reach 165°F (74°C) using a meat thermometer. The exact cooking time will depend on the thickness of the chicken breasts.
-
Once cooked through, remove the chicken from the oven and let it rest for a few minutes before serving.
-
Before serving, carefully remove the toothpicks. Cut each piece in half on a diagonal for an attractive presentation.
Expert Tips & Tricks
- Pounding the chicken evenly is key to ensuring it cooks uniformly. If some parts are thicker than others, they’ll take longer to cook, potentially leading to dry or overcooked areas.
- Don’t overfill the chicken rolls. Too much ham and cheese will make them difficult to roll and can cause the filling to leak out during baking.
- For a richer flavor, try using smoked ham instead of regular deli ham.
- To ensure the breadcrumbs stay crisp, consider briefly chilling the breaded chicken in the refrigerator for about 15-20 minutes before baking.
- If you want a golden-brown color, melt a tablespoon of butter and drizzle it over the breaded chicken before baking.
- If you’re short on time, you can buy pre-cut chicken cutlets to save yourself the step of pounding the chicken breasts.
Serving & Storage Suggestions
Chicken Cordon Bleu is delicious served with a variety of side dishes. Roasted vegetables like asparagus, broccoli, or green beans are excellent choices. It also pairs well with mashed potatoes, rice pilaf, or a simple green salad. For a more elegant touch, consider serving it with a creamy Dijon mustard sauce.
Leftover Chicken Cordon Bleu can be stored in an airtight container in the refrigerator for up to 3-4 days. To reheat, you can bake it in a preheated oven at 350°F (175°C) until warmed through, or microwave it for a quicker option. Microwaving might make the breading a bit soggy, so baking is preferred for the best texture. It’s not recommended to leave Chicken Cordon Bleu at room temperature for more than 2 hours. Freezing is possible, but the texture may change slightly upon thawing. Wrap individual portions tightly in plastic wrap and then foil, and freeze for up to 2 months. Thaw in the refrigerator overnight before reheating.
Nutritional Information
| Nutrient | Amount per Serving | % Daily Value |
|---|---|---|
| Calories | 323 kcal | N/A |
| Calories from Fat | 124g | 38% |
| Total Fat | 13.8 g | 21% |
| Saturated Fat | 6.8 g | 33% |
| Cholesterol | 126.1 mg | 42% |
| Sodium | 769.1 mg | 32% |
| Total Carbohydrate | 18.9 g | 6% |
| Dietary Fiber | 1.3 g | 5% |
| Sugars | 1.3 g | N/A |
| Protein | 29.2 g | 58% |
Note: Nutritional information is an estimate and may vary based on specific ingredients and portion sizes.
Variations & Substitutions
- Gluten-Free: Substitute gluten-free flour and gluten-free breadcrumbs for a gluten-free version.
- Cheese Variations: Experiment with different types of cheese, such as Gruyere, provolone, or mozzarella.
- Ham Alternatives: Use thinly sliced turkey, prosciutto, or even cooked bacon instead of ham.
- Spice It Up: Add a pinch of cayenne pepper to the breadcrumbs for a touch of heat.
- Herb Infusion: Mix some dried herbs, such as thyme or rosemary, into the breadcrumbs for added flavor.
FAQs (Frequently Asked Questions)
Q: Can I make this ahead of time?
A: Yes, you can assemble the Chicken Cordon Bleu a few hours in advance. Store the breaded chicken rolls in the refrigerator until ready to bake. Add a few minutes to the cooking time if baking directly from the fridge.
Q: How do I know when the chicken is cooked through?
A: The best way is to use a meat thermometer. Insert it into the thickest part of the chicken; it should register 165°F (74°C).
Q: Can I use different types of breadcrumbs?
A: Absolutely! Panko breadcrumbs will provide a crispier coating, while seasoned breadcrumbs offer more flavor. You can also use plain breadcrumbs and add your own seasonings.
Q: What if the cheese melts out while baking?
A: Ensure you’ve rolled the chicken tightly and secured it well with toothpicks. Also, avoid overfilling the rolls with too much cheese. If some cheese does escape, it’s not a major issue; it will still taste delicious!
Q: Can I air fry this instead of baking?
A: Yes, you can air fry Chicken Cordon Bleu. Preheat your air fryer to 375°F (190°C). Place the breaded chicken rolls in the air fryer basket, making sure they are not overcrowded. Cook for about 15-20 minutes, or until the chicken is cooked through and the breading is golden brown, flipping halfway through.
Final Thoughts
Chicken Cordon Bleu, once a dish I considered daunting, is now a staple in my home cooking repertoire. This simplified version brings all the classic flavors to your table without the fuss, making it perfect for a weeknight meal or a special occasion. Don’t hesitate to experiment with different cheeses, hams, and spices to create your own signature twist. So, roll up your sleeves, gather your ingredients, and give this easy Chicken Cordon Bleu recipe a try. I’m confident you’ll be pleasantly surprised by how simple and delicious it is! Serve it with a glass of crisp white wine and enjoy the compliments that are sure to follow. Bon appétit!