
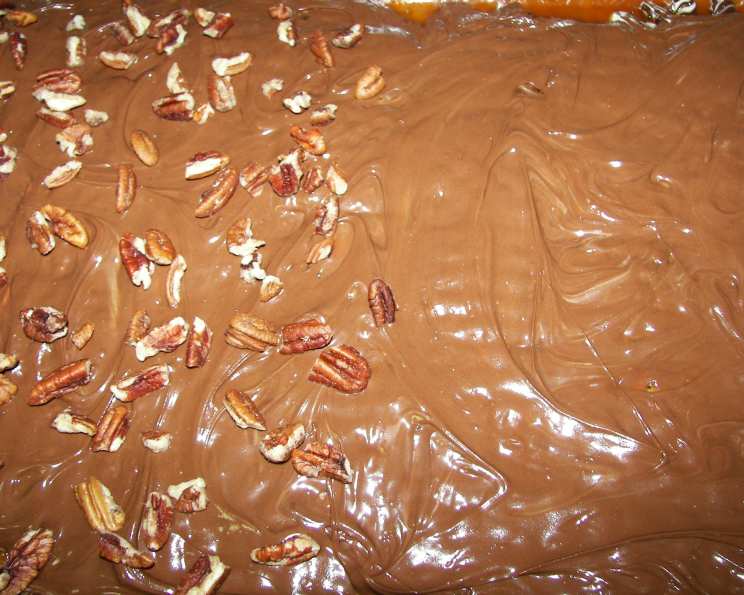
Easy Cracker Candy: A Sweet & Salty Delight
The first time I tasted Cracker Candy was at a neighborhood holiday party. A friend, known for her elaborate desserts, casually set out a platter of these unassuming, yet utterly addictive squares. I remember thinking, “Saltines and chocolate? Really?” But one bite erased all doubt. The combination of salty, crunchy cracker, buttery caramel, and rich chocolate was pure magic. That night, I devoured far more than my fair share, and immediately begged for the recipe. Now, it’s a holiday staple in my own home, and I love sharing the joy with others.
Recipe Overview
- Prep Time: 10 minutes
- Cook Time: 8 minutes
- Total Time: 18 minutes + Chilling Time
- Servings: Varies depending on how you break it
- Yields: Approximately 24 pieces
- Dietary Type: Can be adapted to be Gluten-Free
Ingredients
- 40 saltines (approximately one sleeve from the package)
- ½ cup (1 stick) butter
- 1 cup light brown sugar, firmly packed (or dark brown sugar, firmly packed)
- 2 cups chocolate chips (semi-sweet, milk, or dark – your preference!)
- 1 cup chopped pecans (optional, but highly recommended)
Equipment Needed
- Jelly-roll pan
- Aluminum foil
- Non-stick cooking spray (optional)
- Saucepan
- Spatula
Instructions
-
Preheat your oven to 400°F (200°C). This is crucial for the crackers to crisp up properly and the caramel to set.
-
Line a jelly-roll pan with aluminum foil. Extend the foil over the edges for easy removal later. For extra insurance against sticking, you can spray the foil with non-stick cooking spray, but it’s usually not necessary.
-
Arrange the saltines in a single layer, side by side, in the foil-lined jelly-roll pan. You want to cover the entire bottom surface of the pan, so you may need to break a few crackers to fill any gaps. A snug fit is ideal.
-
In a medium saucepan, combine the butter and brown sugar. Use medium heat.
-
Bring the mixture to a boil, stirring constantly with a spatula. The key here is constant stirring to prevent burning. This will help the sugar dissolve evenly into the butter.
-
Once boiling, continue to cook for 3 minutes, still stirring constantly. The mixture should thicken slightly and become a smooth, glossy caramel. This is where the magic happens!
-
Immediately pour the hot caramel mixture evenly over the crackers. Use a spatula to spread the caramel and ensure all the crackers are coated. Work quickly, as the caramel will start to set as it cools.
-
Bake for 5 minutes in the preheated oven. The caramel will bubble and become slightly darker. Watch it carefully to prevent burning.
-
Remove the pan from the oven and immediately sprinkle the chocolate chips evenly over the baked crackers.
-
Let the pan stand for 5 minutes. The residual heat from the crackers and caramel will melt the chocolate chips.
-
After 5 minutes, use a spatula to spread the melted chocolate evenly over the top.
-
If desired, sprinkle the chopped pecans (or any other nuts) over the melted chocolate. Gently press the nuts into the chocolate to help them adhere.
-
Chill the candy in the refrigerator until completely set. This usually takes about 30-60 minutes.
-
Once the candy is firm, invert the pan onto a flat surface. Carefully peel away the foil.
-
Break the candy into irregular pieces. This is part of the charm!
-
Store the cracker candy in an airtight container in the refrigerator. The cool temperature will help the chocolate stay firm and prevent the crackers from becoming soggy.
Expert Tips & Tricks
- Use a heavy-bottomed saucepan: This will help to prevent the caramel from burning.
- Watch the caramel closely: The difference between perfectly caramelized and burnt is only a matter of seconds. Stay vigilant!
- Don’t overbake: Overbaking the caramel will make it hard and brittle.
- Customize your chocolate: Use your favorite type of chocolate chips – semi-sweet, milk chocolate, dark chocolate, or even white chocolate.
- Add a sprinkle of sea salt: A sprinkle of flaky sea salt on top of the chocolate will enhance the sweet and salty flavors.
- Use a pizza cutter: For cleaner, more uniform pieces, try using a pizza cutter to score the candy while it’s still slightly warm. Once fully cooled, the candy will easily break along the scored lines.
- Gluten-Free Variation: Use gluten-free crackers as a base. The rest of the ingredients are naturally gluten-free.
Serving & Storage Suggestions
Cracker Candy is best served cold or at room temperature. Arrange the pieces on a platter for a festive presentation. It’s a great addition to holiday cookie trays or as a simple dessert for any occasion.
Store leftover cracker candy in an airtight container in the refrigerator for up to a week. You can also freeze it for longer storage (up to a month), but the crackers may lose some of their crispness upon thawing. If freezing, wrap the candy tightly in plastic wrap and then place it in a freezer-safe container.
Nutritional Information
Note: Nutritional information is an estimate and will vary depending on the specific ingredients used.
| Nutrient | Amount per Serving | % Daily Value |
|---|---|---|
| Calories | 157 kcal | – |
| Total Fat | 8.5 g | 13% |
| Saturated Fat | 5 g | 25% |
| Cholesterol | 10.2 mg | 3% |
| Sodium | 93.7 mg | 3% |
| Total Carbohydrate | 21.7 g | 7% |
| Dietary Fiber | 1 g | 3% |
| Sugars | 16.6 g | – |
| Protein | 1.1 g | 2% |
Variations & Substitutions
- Different Nuts: Substitute pecans with walnuts, almonds, or macadamia nuts.
- Spice it Up: Add a pinch of cinnamon, nutmeg, or cayenne pepper to the caramel for a warm, spicy kick.
- Peanut Butter Version: Use peanut butter chips instead of chocolate chips.
- Toffee Crunch: Add chopped toffee bits to the top along with (or instead of) nuts.
- Mint Chocolate: Use mint chocolate chips and a few drops of peppermint extract in the caramel.
- White Chocolate Raspberry: Use white chocolate chips and sprinkle with freeze-dried raspberries.
- Salted Caramel: Before chilling, sprinkle the top with a generous amount of flaky sea salt for an even bolder salted caramel flavor.
FAQs (Frequently Asked Questions)
Q: Can I use salted butter instead of unsalted?
A: Yes, you can use salted butter, but reduce the amount of salt you add later, if any. The candy will be saltier overall.
Q: What if my caramel burns?
A: Unfortunately, there’s no saving burnt caramel. You’ll need to discard it and start again, being more careful to stir constantly and watch the heat.
Q: Can I make this ahead of time?
A: Absolutely! Cracker candy is perfect for making ahead of time. Store it in an airtight container in the refrigerator for up to a week.
Q: My chocolate didn’t melt evenly. What should I do?
A: Place the pan back in the warm (but turned off) oven for a minute or two to help the chocolate melt further. Then, spread it evenly with a spatula. Alternatively, you can microwave the chocolate in a microwave-safe bowl in 30-second intervals, stirring in between, until melted. Drizzle or spread the melted chocolate over the baked crackers.
Q: Can I use a different type of cracker?
A: While saltines are traditional, you can experiment with other crackers, such as Ritz crackers or graham crackers. Keep in mind that the cooking time may need to be adjusted depending on the thickness of the cracker.
Final Thoughts
Cracker Candy is more than just a recipe; it’s a memory in the making. Its simplicity belies its addictive flavor, and its versatility allows for endless customization. Don’t be afraid to experiment with different flavors, toppings, and variations to create your own signature version. Gather your ingredients, preheat your oven, and get ready to create a sweet and salty masterpiece that will impress your friends and family. And please, share your creations and feedback—I’d love to hear how it turns out! Pair it with a glass of cold milk or a cup of hot coffee for the ultimate indulgence. Happy baking!