
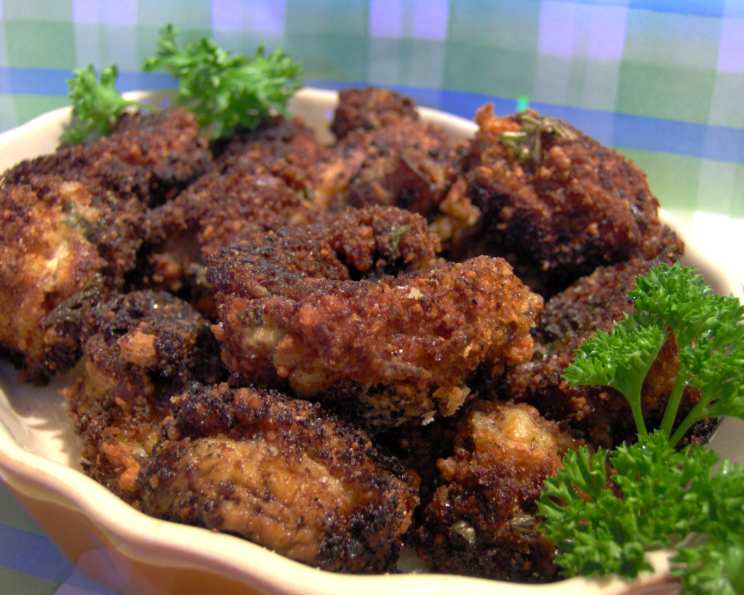
Easy Deep-Fried Mushroom Caps: A Crispy Bite of Nostalgia
There’s something inherently comforting about fried food, isn’t there? For me, it always brings me back to childhood summers, spent at the local fair. The smell of corn dogs and funnel cakes filled the air, but my absolute favorite was always the humble, deep-fried mushroom. That crispy, golden exterior giving way to a juicy, earthy interior – it was pure magic. After years of trying to replicate that fairground flavor, I finally nailed a recipe that brings back those happy memories with every single bite. I’m excited to share my method with you!
Recipe Overview
- Prep Time: 10 minutes
- Cook Time: 1 minute per batch
- Total Time: 11 minutes
- Servings: 12-14
- Yield: 12-14 mushroom caps
- Dietary Type: Vegetarian
Ingredients
- 12-14 large white mushrooms, stems and caps separated
- ½ cup flour
- 2 eggs, beaten
- Fine dry breadcrumbs
- Seasoning salt
- Garlic powder
- Oil, for deep-frying (vegetable, canola, or peanut oil work well)
Equipment Needed
- Large frypan or deep fryer
- 3 shallow bowls or plates for dredging
- Slotted spoon or tongs
- Paper towels
Instructions
-
Begin by prepping your mushrooms. Gently separate the caps from the stems. You can reserve the stems for another use, such as chopping them into a vegetable stock or adding them to a stir-fry.
-
Set up your dredging station. In the first shallow bowl, place the flour. In the second, add the beaten eggs. And in the third bowl, pour the fine dry breadcrumbs. Making sure the breadcrumbs are fine is key, as larger crumbs won’t adhere to the mushroom caps as well. If your breadcrumbs are too coarse, pulse them in a food processor until they reach a finer consistency.
-
Now it’s time to dredge the mushroom caps. Take each mushroom cap and dredge it first in the flour, ensuring it’s evenly coated. Shake off any excess flour.
-
Next, dip the floured mushroom cap into the beaten egg, making sure it’s completely coated. Let any excess egg drip off.
-
Finally, roll the egg-coated mushroom cap in the fine dry breadcrumbs, pressing gently to ensure the crumbs adhere to the entire surface of the cap. Place the breaded mushroom caps on a clean plate while you prepare the rest.
-
Lightly season the breaded mushroom caps with seasoning salt and garlic powder. Don’t overdo it, as you can always add more seasoning later.
-
Heat the oil in a large frypan or deep fryer to approximately 350°F (175°C). The oil should be deep enough to fully submerge the mushroom caps. To test if the oil is hot enough, carefully drop a breadcrumb into the oil; it should sizzle immediately and turn golden brown in about 30 seconds.
-
Carefully place the coated mushroom caps into the hot oil, being careful not to overcrowd the pan. Overcrowding will lower the oil temperature and result in soggy, less crispy mushrooms.
-
Deep-fry the coated mushroom caps in the hot oil for about 1 minute per side, or until golden brown on the outside. The cooking time may vary slightly depending on the size of your mushroom caps and the temperature of your oil. Watch them closely to prevent burning.
-
Use a slotted spoon or tongs to remove the deep-fried mushroom caps from the oil and place them on a plate lined with paper towels to drain excess oil.
-
Serve immediately and enjoy!
Expert Tips & Tricks
- Don’t skip the flour! The flour layer helps the egg adhere properly to the mushroom, which in turn helps the breadcrumbs stick.
- For extra crispy mushrooms, try doing a double dredge. After the initial breading, dip the mushroom back into the egg and then back into the breadcrumbs. This creates a thicker, more satisfying crust.
- To prevent soggy mushrooms, make sure the oil is hot enough before adding the mushroom caps.
- Don’t overcrowd the pan. Fry in batches to maintain the oil temperature.
- If you want to prepare these ahead of time, you can bread the mushroom caps and store them in the refrigerator for up to 2 hours before frying. Be sure to keep them in a single layer to prevent them from getting soggy.
- Experiment with different seasonings! Try adding a pinch of cayenne pepper for a little heat, or some dried herbs like thyme or oregano for an earthy flavor.
Serving & Storage Suggestions
These deep-fried mushroom caps are best served immediately while they are still hot and crispy. They make a fantastic appetizer, side dish, or snack. Serve them with your favorite dipping sauce, such as ranch dressing, blue cheese dressing, or a spicy aioli.
If you have any leftovers, store them in an airtight container in the refrigerator for up to 3 days. Keep in mind that they will lose some of their crispness as they sit. To reheat, you can bake them in a preheated oven at 350°F (175°C) for about 5-10 minutes, or until heated through. Alternatively, you can reheat them in an air fryer for a few minutes to help restore some of their crispness. I don’t recommend microwaving them, as this will make them very soggy.
Nutritional Information
| Nutrient | Amount per Serving | % Daily Value |
|---|---|---|
| Calories | 36.3 kcal | N/A |
| Calories from Fat | 8 g | 24% |
| Total Fat | 1 g | 1% |
| Saturated Fat | 0.3 g | 1% |
| Cholesterol | 35.2 mg | 11% |
| Sodium | 12.9 mg | 0% |
| Total Carbohydrate | 4.8 g | 1% |
| Dietary Fiber | 0.4 g | 1% |
| Sugars | 0.5 g | N/A |
| Protein | 2.3 g | 4% |
Note: Nutritional information is an estimate and may vary based on specific ingredients and cooking methods.
Variations & Substitutions
- Gluten-Free: Use gluten-free flour and gluten-free breadcrumbs.
- Vegan: Substitute the eggs with a mixture of plant-based milk (like almond or soy milk) and a tablespoon of cornstarch. Use a vegan breadcrumb mix.
- Spicy: Add a pinch of cayenne pepper or a dash of hot sauce to the egg mixture.
- Cheesy: Add a tablespoon of grated Parmesan cheese or nutritional yeast to the breadcrumb mixture.
- Herbaceous: Add dried herbs like thyme, oregano, or rosemary to the breadcrumb mixture.
- Different Mushrooms: While this recipe calls for white mushrooms, you can also use cremini or portobello mushrooms. Just adjust the cooking time accordingly.
FAQs (Frequently Asked Questions)
Q: Can I use regular breadcrumbs instead of fine dry breadcrumbs?
A: While you can, fine dry breadcrumbs are recommended because they adhere to the mushroom caps better, creating a more even and crispy coating. If you only have regular breadcrumbs, pulse them in a food processor until they are finer.
Q: My mushroom caps are soggy. What did I do wrong?
A: The most common reason for soggy mushroom caps is that the oil wasn’t hot enough or the pan was overcrowded. Make sure the oil is at 350°F (175°C) and fry in batches.
Q: Can I bake these instead of deep-frying?
A: You can bake them, but they won’t be as crispy as the deep-fried version. To bake, preheat your oven to 400°F (200°C), place the breaded mushroom caps on a baking sheet, and bake for 15-20 minutes, or until golden brown.
Q: What’s the best oil to use for deep-frying?
A: Vegetable, canola, and peanut oil are all good choices for deep-frying because they have a high smoke point.
Q: Can I freeze these?
A: It’s not recommended to freeze them after frying, as the breading will become soggy when thawed. However, you can freeze the breaded mushroom caps before frying. Place them on a baking sheet in a single layer and freeze for 1-2 hours, or until solid. Then, transfer them to a freezer bag and store for up to 2 months. Fry them directly from frozen, adding a minute or two to the cooking time.
Final Thoughts
These Easy Deep-Fried Mushroom Caps are a simple yet satisfying treat that’s perfect for any occasion. Whether you’re looking for a quick appetizer, a tasty snack, or a trip down memory lane, this recipe is sure to deliver. Don’t be afraid to experiment with different seasonings and dipping sauces to create your own unique flavor combinations. And most importantly, have fun in the kitchen! I encourage you to give this recipe a try and share your feedback. They pair perfectly with a cold beer or a crisp glass of white wine. Happy frying!