
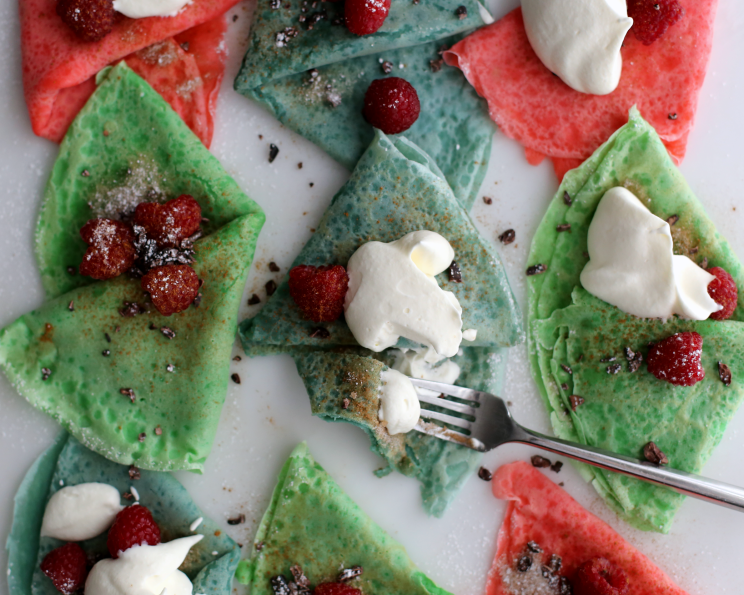
The Easiest, Most Elegant French Crepes You’ll Ever Make
The first time I made crepes, I was probably ten years old, huddled over a sputtering electric skillet with my grandmother. The air was thick with the scent of melted butter and anticipation. We weren’t aiming for perfection, just for something warm and comforting to slather with jam. Each crepe, regardless of its shape or texture, was a tiny victory – a testament to our shared kitchen adventure and a sweet, simple pleasure. The memory of those imperfect, lovingly-made crepes still makes me smile, and it’s what I think of every time I pull out my crepe pan.
Recipe Overview
- Prep Time: 5 minutes
- Cook Time: 20 minutes
- Total Time: 25 minutes
- Yields: 12-15 Crepes
- Serves: 3-5
- Dietary Type: Vegetarian
Ingredients
- 1 1/2 cups Wondra Flour
- 4 tablespoons melted butter
- 4 large eggs
- 1 cup water
- 1 cup milk
- 1/2 teaspoon salt
Equipment Needed
- Blender
- Non-stick crepe pan (8″ or 10″ recommended)
- Spatula
Instructions
- In a blender, combine 1 cup water, 1 cup milk, 1 1/2 cups Wondra Flour, 4 large eggs, and 1/2 teaspoon salt in that order (this ensures the flour doesn’t stick to the bottom).
- Blend on the lowest setting for about 30 seconds.
- Stop the blender and scrape any unmixed flour from the sides of the blender.
- Add 4 tablespoons melted butter to the blender.
- Continue to blend on the lowest setting for 2 minutes, stopping after 15 seconds to scrape the sides again, if needed. The batter should be smooth and relatively thin.
- Warm a non-stick crepe pan (8″ or 10″ size) over medium heat. The pan is ready when a drop of water sizzles and evaporates quickly.
- With the pan already tilted, pour in 1/4 cup to 1/3 cup of batter (depending on the pan size) into the center of the pan.
- Immediately and quickly tilt the pan in a circular motion to spread the batter thinly and evenly across the surface. The goal is a thin, delicate crepe.
- Cook for 1-2 minutes, or until the edges start to curl up slightly and the underside is a light golden-brown. Use a spatula to gently lift an edge to check for doneness.
- Once the underside is golden brown, carefully flip the crepe using a spatula.
- Cook the other side for about 10-15 seconds, or until lightly golden. This step is optional but gives the crepe a more finished appearance.
- Slide the crepe onto a plate.
- Repeat steps 7-12 with the remaining batter, stacking the cooked crepes on a plate. You can place a piece of parchment paper between each crepe to prevent sticking.
- Fill with your desired toppings, such as fruit, Nutella, cinnamon-sugar, or savory options like ham & Gruyère (with a sprinkle of pepper!).
Expert Tips & Tricks
- Batter Consistency is Key: The batter should be thin, like heavy cream. If it seems too thick, add a tablespoon of milk at a time until the desired consistency is reached.
- Rest the Batter: For an even smoother crepe, let the batter rest in the refrigerator for at least 30 minutes (or even overnight). This allows the gluten to relax, resulting in a more tender crepe.
- Pan Temperature is Crucial: Too hot, and the crepes will burn. Too cold, and they’ll stick. Medium heat is usually ideal, but you may need to adjust it depending on your stovetop.
- Non-Stick is Essential: A good non-stick crepe pan (or a well-seasoned cast iron pan) is essential for easy crepe removal and preventing sticking.
- Butter the Pan Sparingly: While the recipe doesn’t require it, you can lightly butter the pan before cooking each crepe for extra flavor and to ensure it doesn’t stick. Use a pastry brush or paper towel to apply a very thin layer of melted butter.
- Practice Makes Perfect: Don’t be discouraged if your first few crepes aren’t perfect. It takes a little practice to get the technique down. The first crepe is often a “tester” to gauge the pan temperature and batter consistency.
- Prevent Sticking: If your crepes are sticking, make sure your pan is hot enough and that you’re using enough butter (if you choose to butter the pan). You can also try adding a tablespoon of oil to the batter.
Serving & Storage Suggestions
Serve your crepes immediately while they’re warm and pliable. Fold them into quarters, roll them up, or simply stack them on a plate.
- Serving Suggestions: Offer a variety of fillings and toppings so everyone can customize their crepes. Sweet options include fresh berries, sliced bananas, whipped cream, chocolate sauce, Nutella, jam, lemon curd, and powdered sugar. Savory options include ham, cheese, spinach, mushrooms, and eggs.
- Storage: Leftover crepes can be stored in the refrigerator for up to 3 days. Stack them with parchment paper between each one to prevent sticking.
- Reheating: To reheat, you can microwave them for a few seconds, warm them in a skillet over low heat, or bake them in a preheated oven at 350°F (175°C) for a few minutes.
- Freezing: Crepes can also be frozen for up to 2 months. Stack them with parchment paper between each one, wrap them tightly in plastic wrap, and then place them in a freezer bag. Thaw them in the refrigerator overnight before reheating.
Nutritional Information
| Nutrient | Amount per Serving | % Daily Value |
|---|---|---|
| Calories | 283 kcal | N/A |
| Calories from Fat | 222 g | 78% |
| Total Fat | 24.7 g | 37% |
| Saturated Fat | 13.7 g | 68% |
| Cholesterol | 300.1 mg | 100% |
| Sodium | 659.6 mg | 27% |
| Total Carbohydrate | 4.3 g | 1% |
| Dietary Fiber | 0 g | 0% |
| Sugars | 0.3 g | 1% |
| Protein | 11.2 g | 22% |
Note: Nutritional information is an estimate and may vary depending on the specific ingredients and portion sizes used.
Variations & Substitutions
- Gluten-Free Crepes: Substitute the Wondra flour with a gluten-free all-purpose flour blend. You may need to adjust the liquid slightly to achieve the correct batter consistency.
- Dairy-Free Crepes: Replace the milk with almond milk, soy milk, or oat milk. Ensure the melted butter is replaced with a dairy-free butter substitute or melted coconut oil.
- Vegan Crepes: Substitute the milk and butter as described above, and use an egg replacer or flax egg (1 tablespoon ground flaxseed mixed with 3 tablespoons water per egg) for the eggs.
- Savory Crepes: Omit the butter from the batter and add a pinch of dried herbs like thyme or rosemary for a savory twist.
- Sweet Crepes: Add a tablespoon of sugar and a teaspoon of vanilla extract to the batter for a sweeter crepe.
- Chocolate Crepes: Add 2 tablespoons of cocoa powder to the batter for chocolate crepes.
FAQs (Frequently Asked Questions)
Q: Why is my crepe batter lumpy?
A: Lumpy batter is usually caused by not blending the ingredients thoroughly enough. Make sure to scrape down the sides of the blender and blend until the batter is completely smooth. Resting the batter can also help smooth out any lumps.
Q: My crepes are sticking to the pan. What am I doing wrong?
A: Sticking usually indicates the pan is not hot enough, or you aren’t using a sufficiently non-stick pan. Ensure the pan is heated to medium heat before adding the batter. Also, consider lightly buttering the pan before each crepe, even if it’s non-stick.
Q: How do I make sure my crepes are thin enough?
A: The key to thin crepes is a thin batter and a quick spreading technique. Use the correct amount of batter (1/4 to 1/3 cup) and quickly tilt the pan in a circular motion to spread the batter evenly across the surface.
Q: Can I make the crepe batter ahead of time?
A: Yes, in fact, it’s recommended! Making the batter ahead of time and letting it rest in the refrigerator for at least 30 minutes (or even overnight) allows the gluten to relax, resulting in more tender crepes.
Q: What’s the best way to keep crepes warm while cooking the rest of the batch?
A: You can keep crepes warm by stacking them on a plate in a warm oven (about 200°F or 95°C). Cover the plate with foil to prevent the crepes from drying out.
Final Thoughts
There’s a certain magic in transforming simple ingredients into delicate, golden crepes. Whether you’re craving a sweet treat or a savory delight, this recipe offers a delicious canvas for your culinary creativity. So, gather your ingredients, dust off your crepe pan, and get ready to create some edible masterpieces. Don’t be afraid to experiment with different fillings and toppings to discover your own signature crepe creations. And most importantly, have fun! Share your crepe adventures with friends and family, and don’t hesitate to let me know how they turned out. Perhaps pair them with a crisp glass of cider for a truly authentic French experience. Bon appétit!