
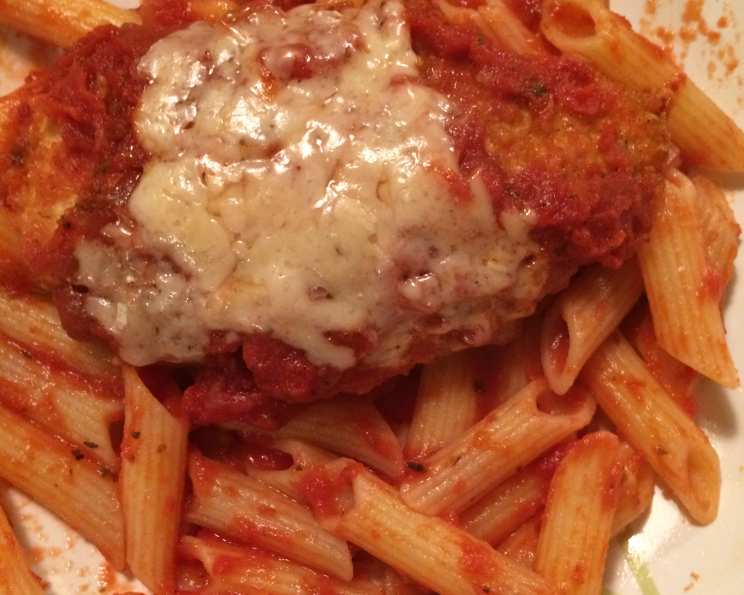
Easy Gluten-Free Chicken Parmesan: A Weeknight Winner
Chicken Parmesan. Even just whispering the name conjures up images of bubbling cheese, rich tomato sauce, and crispy-coated chicken. It’s a dish I’ve loved since I was a kid, sneaking bites of my grandma’s famous version straight from the baking dish, the anticipation almost unbearable. When I had to switch to a gluten-free diet, I thought those comforting memories were relegated to the past. But necessity is the mother of invention, and with a little creativity, I’ve recreated that classic comfort food, gluten-free and just as delicious.
Recipe Overview
- Prep Time: 20 minutes
- Cook Time: 35-40 minutes
- Total Time: 55-60 minutes
- Servings: 4
- Dietary Type: Gluten-Free
Ingredients
- 1 lb chicken breast
- 2 cups Chex cereal (make sure you’re using rice or corn, GF)
- ½ cup parmesan cheese, divided
- 1 egg
- 1 teaspoon Italian seasoning
- 1 teaspoon garlic powder
- ¼ teaspoon paprika
- 1 dash cayenne
- Black pepper
- Salt
- 1 (24 ounce) jar spaghetti sauce
Equipment Needed
- 9×13 inch baking pan
- Food processor
- Two wide, shallow bowls
- Meat mallet (optional)
Instructions
-
Preheat your oven to 400 degrees F (200 degrees C). Spray a nonstick 9×13 inch baking pan with cooking spray to grease it thoroughly. This will prevent the chicken from sticking and ensure easy cleanup.
-
Prepare the chicken breasts. They should be no more than 1 inch thick. If they are thicker, place them between two sheets of plastic wrap and use a meat mallet to pound them down to the desired thickness. This ensures even cooking and a more tender result.
-
Make the gluten-free breading. In a food processor, combine the Chex cereal, ¼ cup of the parmesan cheese, Italian seasoning, garlic powder, cayenne, and paprika. Pulse the mixture until you achieve a fine, even consistency. The cereal should be finely ground, creating a light and crispy coating. Pour the breading mixture into a wide, shallow bowl.
-
Prepare the egg wash. In a separate wide, shallow bowl, beat the egg with salt and pepper to taste. Seasoning the egg wash adds another layer of flavor to the chicken.
-
Bread the chicken. Dip each chicken breast into the egg mixture, ensuring it’s fully coated. Then, dredge the chicken in the Chex cereal breading, pressing gently to ensure the breading adheres to the chicken. Coat both sides thoroughly.
-
Bake the chicken. Place the breaded chicken breasts in the prepared baking pan. Bake for 20 minutes, or until the coating is set and golden brown. Keep a close eye on the chicken to prevent the breading from burning.
-
Add the sauce and cheese. Remove the pan from the oven. Pour the spaghetti sauce evenly over the top of the chicken breasts. Sprinkle the remaining ¼ cup of parmesan cheese over the sauce.
-
Finish baking. Cover the pan with aluminum foil. This will help to keep the chicken moist and prevent the cheese from burning. Return the pan to the oven and bake for 15-20 minutes more, or until the chicken is cooked through and the sauce is heated through. The internal temperature of the chicken should reach 165 degrees F (74 degrees C).
-
Serve hot. Let the chicken rest for a few minutes before serving. This allows the juices to redistribute, resulting in a more tender and flavorful dish. Serve with hot cooked gluten-free pasta (Sam Mills is a great brand) or polenta and a fresh green salad for a complete and satisfying meal.
Allergen Modifications: If you have an egg allergy, try using plain yogurt to coat the chicken instead of egg. If you are dairy-free, leave the cheese out of the coating mixture and topping; you can also try a dairy-free parmesan alternative.
Expert Tips & Tricks
- Don’t overcrowd the pan. Give the chicken breasts enough space in the baking pan so they can bake evenly. Overcrowding can lead to steaming instead of browning.
- Pulse the Chex cereal carefully. Avoid over-processing the cereal into a powder, as this will result in a less crispy coating. Aim for a coarse, breadcrumb-like texture.
- Use a meat thermometer. The best way to ensure your chicken is cooked through is to use a meat thermometer. Insert it into the thickest part of the chicken breast and check that it reaches 165 degrees F (74 degrees C).
- Make ahead: You can prepare the breaded chicken breasts ahead of time. Place them on a baking sheet lined with parchment paper and refrigerate for up to 24 hours before baking.
- Spice it up! Add a pinch of red pepper flakes to the sauce or breading for a little extra heat.
Serving & Storage Suggestions
Serve your Easy Gluten-Free Chicken Parmesan hot, garnished with fresh basil leaves for a pop of color and freshness. It pairs beautifully with a side of gluten-free pasta tossed with a simple garlic and olive oil sauce or creamy polenta. A crisp green salad with a light vinaigrette complements the richness of the dish.
Leftovers can be stored in an airtight container in the refrigerator for up to 3-4 days. To reheat, preheat your oven to 350 degrees F (175 degrees C). Place the chicken parmesan in an oven-safe dish and bake for 15-20 minutes, or until heated through. You can also reheat it in the microwave, but the breading may become slightly less crispy. Freezing is not recommended, as the texture of the chicken and sauce may change upon thawing.
Nutritional Information
| Nutrient | Amount per Serving | % Daily Value |
|---|---|---|
| Calories | 350 kcal | N/A |
| Total Fat | 17.8 g | 27% |
| Saturated Fat | 6.2 g | 31% |
| Cholesterol | 132 mg | 43% |
| Sodium | 658.8 mg | 27% |
| Total Carbohydrate | 13.9 g | 4% |
| Dietary Fiber | 2.5 g | 10% |
| Sugars | 8.3 g | N/A |
| Protein | 31.8 g | 63% |
Note: Nutritional information is an estimate and may vary based on specific ingredients and preparation methods.
Variations & Substitutions
- Dairy-Free Chicken Parmesan: Use a dairy-free parmesan cheese alternative and brush the chicken with olive oil instead of using an egg wash.
- Spicy Chicken Parmesan: Add a pinch of red pepper flakes or a dash of hot sauce to the breading or the sauce for a spicy kick.
- Vegetarian “Chicken” Parmesan: Substitute the chicken breasts with thick slices of eggplant or portobello mushrooms. Bread and bake them using the same method.
- Different Sauce: Experiment with different types of tomato sauce, such as marinara, arrabbiata, or even a creamy vodka sauce.
- Herb Variations: Add fresh herbs like basil, oregano, or thyme to the breading for extra flavor.
FAQs (Frequently Asked Questions)
Q: Can I use other types of gluten-free cereal besides Chex?
A: Yes, you can use other gluten-free cereals that are plain and relatively unsweetened, such as Rice Krispies (check labels to ensure they are gluten-free) or gluten-free cornflakes. Just make sure to pulse them in the food processor to a breadcrumb-like consistency.
Q: How do I prevent the breading from falling off the chicken?
A: Make sure to thoroughly coat the chicken in the egg wash and press the breading firmly onto the chicken breasts. Letting the breaded chicken rest for a few minutes before baking can also help the breading adhere better.
Q: Can I bake this dish ahead of time and reheat it later?
A: Yes, you can bake the chicken parmesan ahead of time. Store it in the refrigerator and reheat it in the oven at 350°F (175°C) until heated through. Be aware that the breading may soften slightly upon reheating.
Q: What is the best way to tell if the chicken is cooked through?
A: The best way is to use a meat thermometer. Insert it into the thickest part of the chicken breast. It should register 165°F (74°C).
Q: Can I use pre-shredded parmesan cheese?
A: While you can use pre-shredded parmesan, freshly grated parmesan will melt more smoothly and provide a richer flavor.
Final Thoughts
This Easy Gluten-Free Chicken Parmesan is a testament to the fact that dietary restrictions don’t have to mean sacrificing your favorite comfort foods. With just a few simple substitutions, you can enjoy all the cheesy, saucy goodness of this classic dish, without the gluten. So, gather your ingredients, preheat your oven, and get ready to create a meal that’s sure to become a weeknight favorite. Don’t be afraid to experiment with variations and make it your own! And be sure to share your creations and feedback; I’d love to hear what you think. Enjoy!