
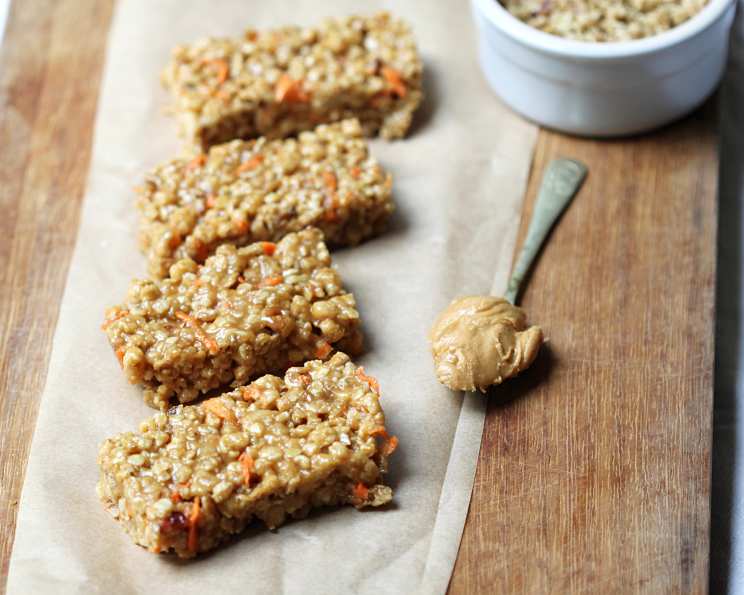
Easy Granola Bars: A Homemade Treat
I remember my first foray into homemade granola bars. I was determined to pack healthier snacks for my daughter’s kindergarten lunchbox. The store-bought options were loaded with ingredients I couldn’t pronounce, and I envisioned myself as the super-mom whipping up nutritious delights. The first batch was a sticky, crumbly mess, but after tweaking the recipe and experimenting with flavors, I finally landed on a formula that was a hit with everyone – even the grown-ups! There’s something deeply satisfying about knowing exactly what goes into your family’s food, and these granola bars are a testament to that.
Recipe Overview
- Prep Time: 5 minutes
- Cook Time: 1 minute
- Total Time: 1 hour 6 minutes
- Servings: Varies depending on cut
- Yield: Approximately 12 bars
- Dietary Type: Vegetarian (can be made vegan with substitutions)
Ingredients
- 1/2 cup light corn syrup
- 2/3 cup peanut butter
- 3 cups granola cereal (bought or homemade)
- 1 medium carrot, grated (optional)
Equipment Needed
- 9-inch square pan
- 3-quart saucepan
- Spoon or dampened spatula
Instructions
-
Begin by preparing your pan. Butter a 9-inch square pan thoroughly. This will prevent the granola bars from sticking and make them easier to remove later.
-
In a 3-quart saucepan, pour in the 1/2 cup of light corn syrup. Place the saucepan over medium heat.
-
Boil the corn syrup for only 1 minute, stirring constantly. It’s crucial to stir continuously to prevent the syrup from burning and to ensure even heating. The syrup should become slightly thicker and more viscous.
-
Remove the saucepan from the heat. Immediately add the 2/3 cup of peanut butter to the hot corn syrup.
-
Stir the peanut butter into the corn syrup until completely combined. The mixture should be smooth and creamy. Make sure no lumps of peanut butter remain.
-
Add the 3 cups of granola cereal to the saucepan. If you’re using the optional grated carrot, add it now as well.
-
Stir until all the granola and carrot (if using) are evenly coated with the peanut butter and corn syrup mixture. Work quickly, as the mixture hardens rapidly as it cools.
-
Transfer the mixture to the prepared 9-inch square pan.
-
Using a spoon or a dampened spatula, spread and pat the mixture evenly in the pan. Press down firmly to create a compact layer. The dampness of the spatula will prevent the mixture from sticking to it.
-
Cool for at least one hour before cutting into bars. This allows the granola bars to set properly and makes them easier to cut cleanly.
Expert Tips & Tricks
- Don’t overcook the corn syrup: Boiling it for longer than 1 minute will make the bars too hard.
- Use a high-quality peanut butter: The flavor of the peanut butter significantly impacts the final taste of the bars. Opt for a natural peanut butter without added sugar or oils for a healthier option.
- Customize with your favorite granola: Experiment with different types of granola, such as those with nuts, seeds, or dried fruit.
- Line the pan with parchment paper: For extra easy removal, line the buttered pan with parchment paper, leaving an overhang on the sides. This allows you to lift the entire batch of granola bars out of the pan easily.
- Add a pinch of salt: A small pinch of salt to the corn syrup and peanut butter mixture enhances the sweetness and adds depth of flavor.
- Warm the peanut butter: If your peanut butter is very thick, microwave it for a few seconds to soften it, making it easier to stir into the corn syrup.
- Press firmly: Pressing the granola mixture firmly into the pan is essential for creating bars that hold together well. Use the bottom of a measuring cup or a piece of parchment paper to press the mixture down evenly.
Serving & Storage Suggestions
These granola bars are perfect as a quick breakfast, a midday snack, or a treat in a lunchbox. Cut them into your desired size and shape. For serving, consider pairing them with a glass of cold milk or a cup of hot coffee or tea.
Store the granola bars in an airtight container at room temperature for up to a week. For longer storage, wrap them individually and freeze them for up to a month. Thaw at room temperature before serving. They might become slightly softer after freezing, but the taste will remain delicious.
Nutritional Information
| Nutrient | Amount per Serving (estimated) | % Daily Value (estimated) |
|---|---|---|
| Calories | 250 kcal | 13% |
| Total Fat | 12g | 18% |
| Saturated Fat | 2g | 10% |
| Cholesterol | 0mg | 0% |
| Sodium | 80mg | 3% |
| Total Carbohydrate | 30g | 10% |
| Dietary Fiber | 3g | 12% |
| Sugars | 12g | – |
| Protein | 6g | 12% |
Note: Nutritional information is an estimate and may vary based on specific ingredients used.
Variations & Substitutions
- Vegan Granola Bars: Substitute the light corn syrup with maple syrup or agave nectar. Ensure your granola is also vegan-friendly.
- Nut-Free Granola Bars: Use sunflower seed butter or tahini instead of peanut butter. Double-check that your granola is nut-free as well.
- Chocolate Chip Granola Bars: Add 1/2 cup of chocolate chips to the granola mixture for a chocolatey twist.
- Dried Fruit Granola Bars: Mix in 1/2 cup of chopped dried fruit, such as cranberries, raisins, or apricots, for added sweetness and texture.
- Seed Granola Bars: Include 1/4 cup of mixed seeds, like pumpkin, sunflower, and flax seeds, for an extra boost of nutrients.
- Spice it Up: Add 1/2 teaspoon of cinnamon or nutmeg to the granola mixture for a warm, comforting flavor.
FAQs (Frequently Asked Questions)
Q: Can I use homemade granola for this recipe?
A: Absolutely! Homemade granola works wonderfully in this recipe. Just ensure it’s cooled completely before adding it to the mixture.
Q: What if I don’t have a 9-inch square pan?
A: You can use an 8-inch square pan, but the granola bars will be slightly thicker. You can also use a baking sheet, but you’ll need to adjust the spreading and patting process accordingly.
Q: How do I prevent the bars from being too sticky?
A: Make sure you don’t overcook the corn syrup and press the granola mixture firmly into the pan. Cooling them completely is also essential.
Q: Can I freeze these granola bars?
A: Yes, you can freeze them for up to a month. Wrap them individually to prevent freezer burn and thaw at room temperature before serving.
Q: What if my granola bars are too hard?
A: This usually means the corn syrup was cooked for too long. Next time, stick strictly to the 1-minute boiling time.
Final Thoughts
These easy granola bars are a delightful and customizable treat that you can feel good about making. The combination of simple ingredients and a straightforward method makes them perfect for even the most novice baker. Don’t hesitate to experiment with different granola types, nut butters, and add-ins to create your own signature flavor. I encourage you to give this recipe a try and share your feedback with me. Imagine enjoying these homemade bars with a steaming mug of herbal tea on a cool afternoon – a simple pleasure crafted with your own hands!