
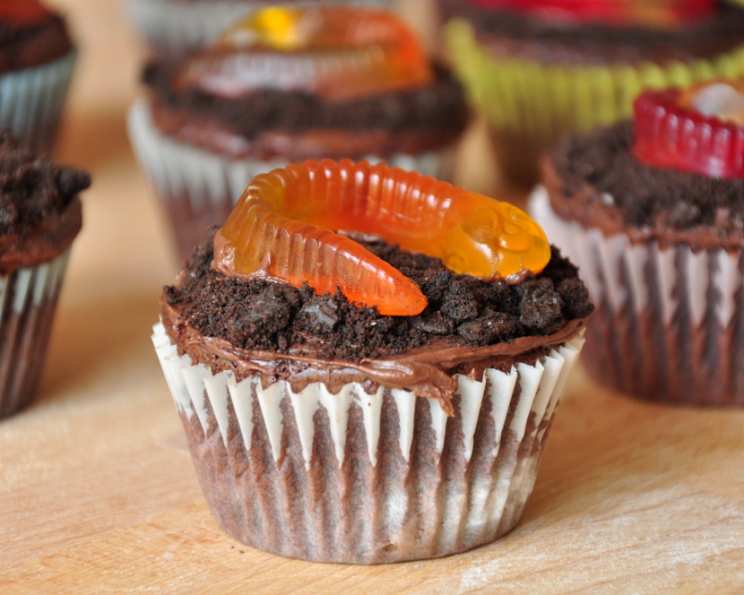
Easy Halloween Worm Cupcakes
The first Halloween I ever remember, my mom outdid herself with spooky treats. Everything was fantastic, but what really stuck with me were the worm cupcakes. The squirmy gummy worms peeking out from the chocolatey “dirt” were both revolting and irresistible to my five-year-old self. Each year, I’ve tried to recapture that childhood magic, and these easy worm cupcakes are my go-to recipe. They’re simple enough for kids to help make, and they bring smiles (and maybe a few shivers) to everyone who sees them.
Recipe Overview
- Prep Time: 15 minutes
- Cook Time: 20 minutes
- Total Time: 35 minutes
- Yields: 12 cupcakes
- Serves: 8-10
- Dietary Type: Vegetarian
Ingredients
- 1 (18.25 ounce) box chocolate cake mix
- 3 cups any flavor cookie crumbs (chocolate, vanilla, or even graham crackers work great!)
- 1 (18 ounce) can chocolate icing
- 1 (16 ounce) bag gummy worms
Equipment Needed
- 12-cup cupcake pan
- Mixing bowls
- Electric mixer (optional, but helpful)
- Measuring cups and spoons
- Rubber spatula
- Knife or kitchen shears
Instructions
- Preheat your oven according to the instructions on the chocolate cake mix box. Typically, this will be around 350°F (175°C), but always double-check!
- Grease and flour a 12-cup cupcake pan. This step is crucial to prevent the cupcakes from sticking. You can also use cupcake liners for easier removal and cleanup.
- Prepare the chocolate cake mix according to the package directions. Usually, this involves adding eggs, oil, and water, but follow the specific instructions on your box. Mix until just combined; avoid overmixing, which can lead to tough cupcakes.
- Pour the batter into the prepared cupcake pan, filling each cup about two-thirds full. This allows for some rising during baking without overflowing.
- Bake as directed on the cake mix box. Baking times can vary depending on your oven, but generally, cupcakes take around 18-22 minutes. Check for doneness by inserting a toothpick into the center of a cupcake; if it comes out clean, they’re ready!
- Let the cupcakes cool thoroughly in the pan for about 10 minutes before transferring them to a wire rack to cool completely. Frosting warm cupcakes will result in a melty mess, so patience is key!
- Once the cupcakes are completely cool, spread them lightly with chocolate icing. You don’t need a thick layer – just enough for the cookie crumbs to adhere.
- Sprinkle the cookie crumbs generously on top of the iced cupcakes, creating a “dirt” effect. Gently press the crumbs into the icing to help them stick.
- Cut the gummy worms in half (or even smaller pieces, if you prefer) using a knife or kitchen shears.
- Put a small dab of chocolate icing onto the cut end of each gummy worm piece. This acts as “glue” to stick the worms to the cupcakes.
- Arrange the gummy worms on top of the cupcakes, sticking the iced ends into the cookie crumb “dirt.” Use as few or as many worms as you like, creating a delightfully creepy crawly effect.
- Let the icing set for about 10 minutes to secure the gummy worms in place. Then, serve and enjoy!
Expert Tips & Tricks
- Enhance the “dirt”: For a richer, darker “dirt,” use chocolate sandwich cookies (like Oreos) and remove the filling before crushing them.
- Level Up Your Icing: Add a teaspoon of instant espresso powder to your chocolate icing for a mocha-flavored boost.
- Make-Ahead Magic: Bake the cupcakes a day in advance and store them in an airtight container at room temperature. Frost and decorate just before serving to prevent the cookie crumbs from getting soggy.
- Prevent Sticking: Even with greasing and flouring, cupcakes can sometimes stick. Lining the cupcake pan with paper liners ensures easy removal and a cleaner presentation.
- Melting Icing Rescue: If your icing is too thick, microwave it in 5-second intervals, stirring in between, until it reaches a spreadable consistency. Be careful not to overheat it!
- Worm Placement: For a more realistic “burrowing” effect, partially bury some of the gummy worms into the cookie crumb topping.
Serving & Storage Suggestions
Serve these worm cupcakes chilled or at room temperature. Arrange them on a platter for a spooky presentation. You can also add other Halloween-themed decorations, such as plastic spiders or candy eyeballs. Leftover cupcakes can be stored in an airtight container at room temperature for up to 2 days or in the refrigerator for up to 5 days. The cookie crumbs may soften slightly during refrigeration, but they’ll still taste delicious. Freezing is not recommended, as the icing and gummy worms may become sticky upon thawing.
Nutritional Information
Please note that these are estimates, and actual values may vary depending on specific ingredients used.
| Nutrient | Amount per Serving | % Daily Value |
|---|---|---|
| Calories | 755 kcal | 38% |
| Total Fat | 21.3 g | 32% |
| Saturated Fat | 5.6 g | 28% |
| Cholesterol | 0 mg | 0% |
| Sodium | 676 mg | 28% |
| Total Carbohydrate | 143.7 g | 47% |
| Dietary Fiber | 2.2 g | 8% |
| Sugars | 95.1 g | 380% |
| Protein | 4.5 g | 9% |
Variations & Substitutions
- Gluten-Free: Use a gluten-free chocolate cake mix and gluten-free cookie crumbs.
- Vegan: Use a vegan chocolate cake mix, vegan chocolate icing, and vegan gummy worms (check labels carefully, as many gummy worms contain gelatin).
- Different Flavors: Experiment with different cake mix flavors, such as vanilla, red velvet, or even spice cake for a fall twist.
- Cookie Crumb Alternatives: Instead of cookie crumbs, use crushed pretzels for a salty-sweet combination, or chopped nuts for added texture.
- Icing Swaps: Try cream cheese frosting or buttercream frosting instead of chocolate icing for a different flavor profile.
- Seasonal Adaptation: For a Thanksgiving theme, use crushed gingersnap cookies as the “dirt” and add candy corn “worms.”
FAQs (Frequently Asked Questions)
Q: Can I make these cupcakes without a cake mix?
A: Absolutely! You can use your favorite homemade chocolate cupcake recipe instead of a cake mix. Just adjust the baking time accordingly.
Q: What if I can’t find gummy worms?
A: You can substitute other candies, such as licorice strings, sour straws, or even chocolate sprinkles. Get creative and use whatever you have on hand!
Q: Can I use homemade icing instead of store-bought?
A: Yes, homemade chocolate icing will work perfectly. Just make sure it’s a spreadable consistency.
Q: How do I prevent the cookie crumbs from getting soggy?
A: Frost the cupcakes just before serving and don’t store them in the refrigerator for too long, as moisture can cause the crumbs to soften.
Q: Can kids help make these cupcakes?
A: Definitely! These cupcakes are a fun and easy project for kids to participate in, especially the decorating part. Just supervise them closely when using knives or the oven.
Final Thoughts
These Easy Halloween Worm Cupcakes are a guaranteed crowd-pleaser, bringing a touch of spooky fun to any Halloween celebration. Don’t be afraid to experiment with different flavors and decorations to make them your own. Gather your family and friends, get creative in the kitchen, and most importantly, have fun creating these creepy crawly treats! And be sure to share your spooky creations – I’d love to hear how they turned out!