
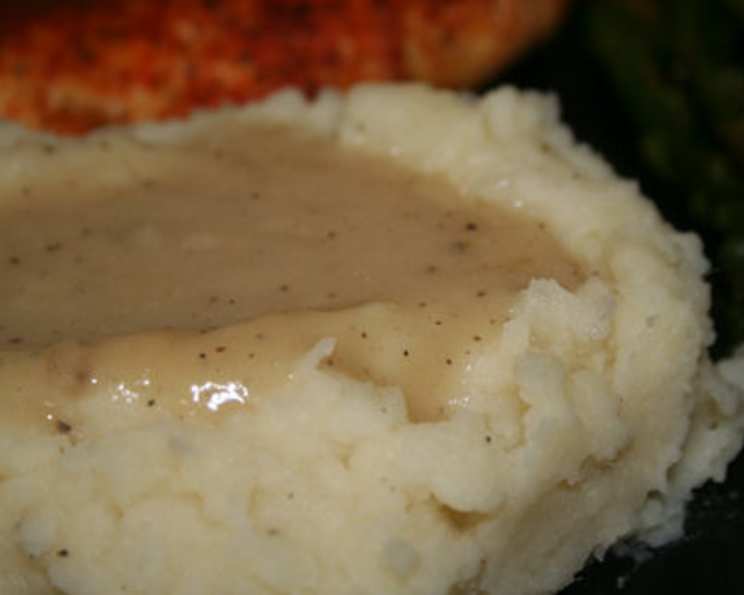
Easy Homemade Gravy: A Chef’s Guide to Silky Smooth Deliciousness
The scent of gravy is pure nostalgia for me. I remember being a child, perched on a stool in my grandmother’s kitchen, watching her effortlessly transform pan drippings into a rich, mahogany-colored sauce. She never measured anything, yet it always turned out perfect – a testament to experience and a generous dose of love. This recipe, while offering precise measurements, aims to capture that same comforting, homemade quality, providing a foundation for countless variations and memories of your own.
Recipe Overview
- Prep Time: 5 minutes
- Cook Time: 20 minutes
- Total Time: 25 minutes
- Servings: 4-6
- Dietary Type: Varies (see variations for Vegetarian)
Ingredients
- 1/4 cup flour
- 1/4 cup turkey drippings or 1/4 cup margarine, melted
- 2 cups water
- 2 teaspoons Wyler’s chicken bouillon granules
Equipment Needed
- Skillet
- Whisk
Instructions
-
Begin by placing your skillet over medium heat. Add either the turkey drippings (from a recently roasted turkey, of course!) or the melted margarine.
-
Sprinkle the flour evenly over the drippings or margarine in the skillet.
-
Now, the key to a lump-free gravy is consistent stirring. Using a whisk, continuously stir the flour into the fat. The mixture will start to form a paste, called a roux.
-
Continue to cook and stir the roux, using the whisk to scrape up any bits from the bottom of the pan, until it turns a light golden brown color. This process usually takes about 5-7 minutes. The longer you cook it, the richer and nuttier the flavor will become, but be careful not to burn it!
-
Gradually stir in the water, about half a cup at a time, whisking continuously to incorporate the liquid and prevent lumps from forming.
-
Add the Wyler’s chicken bouillon granules to the mixture.
-
Continue to cook and stir the gravy, allowing it to simmer gently, until it thickens to your desired consistency. This should take approximately 10-15 minutes. Be patient, and don’t rush the process. The longer it simmers, the more the flavors will meld together.
-
Taste the gravy and adjust seasoning as needed. You may want to add a pinch of salt and pepper to enhance the flavor.
Expert Tips & Tricks
- The Roux is Key: The roux is the foundation of a good gravy. Cooking it to a golden brown color not only deepens the flavor but also helps to prevent a pasty taste.
- Gradual Liquid Addition: Adding the water gradually and whisking constantly is crucial to prevent lumps. If you do end up with lumps, don’t despair! You can use an immersion blender to smooth out the gravy or strain it through a fine-mesh sieve.
- Flavor Boost: For an even richer flavor, consider adding a splash of dry sherry or Madeira wine towards the end of the cooking process. A teaspoon of Worcestershire sauce can also add depth.
- Make-Ahead Gravy: Gravy can be made ahead of time and reheated. Store it in an airtight container in the refrigerator for up to 3 days. When reheating, add a splash of water or broth to thin it out if necessary.
- Fat Separation: If you are using pan drippings from a very fatty bird, you may want to skim off some of the excess fat before making the gravy. This will result in a lighter and less greasy gravy.
Serving & Storage Suggestions
Serve your homemade gravy hot over roasted turkey, chicken, mashed potatoes, stuffing, biscuits, or anything else your heart desires! A sprinkle of fresh herbs, such as parsley or thyme, can add a pop of color and freshness.
Leftover gravy should be stored in an airtight container in the refrigerator. It will keep for up to 3 days. To reheat, gently warm it in a saucepan over low heat, stirring occasionally. You may need to add a little water or broth to thin it out if it has thickened too much. Gravy can also be frozen for up to 2 months. Thaw it in the refrigerator overnight before reheating.
Nutritional Information
| Nutrient | Amount per Serving | % Daily Value |
|---|---|---|
| Calories | 31 kcal | 2% |
| Total Fat | 0.2 g | 0% |
| Saturated Fat | 0.1 g | 0% |
| Cholesterol | 0.1 mg | 0% |
| Sodium | 188.4 mg | 8% |
| Total Carbohydrate | 6.1 g | 2% |
| Dietary Fiber | 0.2 g | 1% |
| Sugars | 0.2 g | 0% |
| Protein | 1 g | 2% |
Note: Nutritional information is an estimate and may vary based on specific ingredients and preparation methods.
Variations & Substitutions
- Vegetarian Gravy: Substitute vegetable broth for the water and use melted butter or olive oil instead of turkey drippings. You can also add sautéed mushrooms and onions to the roux for added flavor. Use vegetable bouillon cubes or granules.
- Gluten-Free Gravy: Use a gluten-free flour blend or cornstarch instead of all-purpose flour. Whisk the cornstarch with a small amount of cold water to create a slurry before adding it to the pan.
- Herb-Infused Gravy: Add fresh herbs, such as rosemary, thyme, or sage, to the gravy during the simmering process. Remove the herbs before serving.
- Spicy Gravy: Add a pinch of cayenne pepper or a dash of hot sauce to the gravy for a kick.
- Mushroom Gravy: Sauté sliced mushrooms in butter or olive oil until tender before adding the flour. This adds a delicious earthy flavor to the gravy.
- Rich Turkey Gravy: For a more intense turkey flavor, use homemade turkey stock instead of water and chicken bouillon.
FAQs (Frequently Asked Questions)
Q: What if my gravy is too thick?
A: Gradually whisk in more water or broth until you reach your desired consistency. Add a tablespoon at a time to avoid over-thinning.
Q: What if my gravy is too thin?
A: Mix a teaspoon of cornstarch with a tablespoon of cold water to form a slurry. Whisk the slurry into the gravy and simmer for a few minutes until thickened.
Q: Can I use chicken drippings instead of turkey drippings?
A: Absolutely! Chicken drippings will create a delicious chicken gravy. You can also use a combination of chicken and turkey drippings.
Q: Can I make this gravy without bouillon granules?
A: Yes, but the flavor will be less intense. If omitting the bouillon, consider using chicken or turkey stock instead of water for a richer taste. Season generously with salt and pepper.
Q: How can I make sure my gravy is perfectly smooth?
A: Consistent whisking is key. If you still have lumps, use an immersion blender or strain the gravy through a fine-mesh sieve.
Final Thoughts
Don’t be intimidated by the thought of making homemade gravy. This recipe is simple, straightforward, and yields a delicious, comforting result that will elevate any meal. Gather your ingredients, embrace the process, and savor the satisfaction of creating something truly special from scratch. I hope this recipe inspires you to create your own gravy memories, just like my grandmother did for me. Happy cooking, and please share your feedback and variations – I’d love to hear about your gravy adventures!