
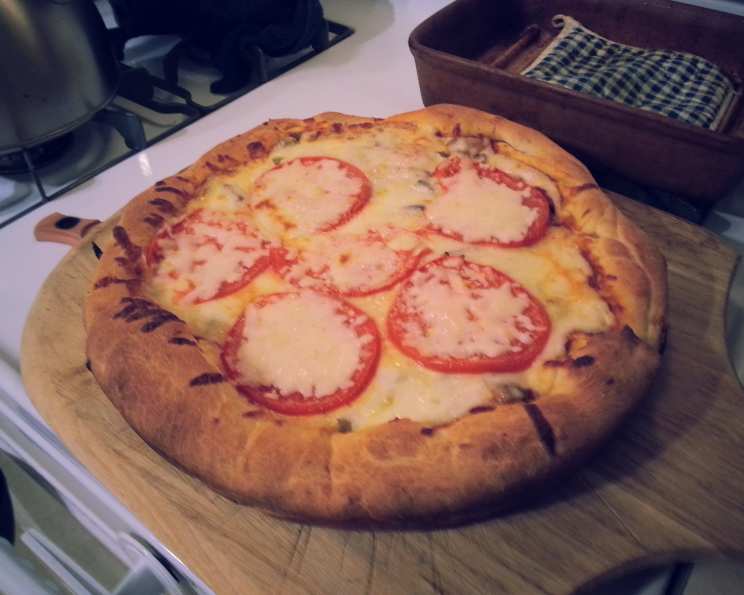
Easy KitchenAid Mixer Pizza Dough: Your Ticket to Homemade Pizza Nights
The aroma still lingers in my mind: a symphony of toasted bread, bubbling mozzarella, and fragrant herbs, all emanating from our tiny Brooklyn apartment kitchen. Every Friday night, without fail, my father would orchestrate a pizza-making spectacle. Flour dusted every surface, laughter filled the air, and the prize at the end was a perfectly imperfect, utterly delicious homemade pizza. He always swore by his trusted KitchenAid, claiming it was the secret weapon to achieving that perfectly chewy, airy crust. Now, decades later, I understand exactly what he meant – and I’m thrilled to share that secret with you.
Recipe Overview
- Prep Time: 20 minutes
- Cook Time: 12 minutes
- Total Time: 32 minutes
- Servings: 8
- Yield: 2 pizzas
- Dietary Type: Vegetarian (easily made vegan)
Ingredients
- 1 cup hot water
- 1 1/4 ounces fast rising yeast (about 2 1/2 teaspoons)
- 1 tablespoon extra virgin olive oil
- 1 teaspoon kosher salt
- 1 teaspoon dried oregano
- 1 tablespoon honey (or maple syrup for vegan)
- 2 1/4 cups bread flour
Equipment Needed
- KitchenAid Stand Mixer
- Whisk attachment
- Dough hook attachment
- Large mixing bowl (for rising)
- Damp cloth
- Perforated pizza pan
- Pizza peel
- Pizza cutter
Instructions
-
In the bowl of your KitchenAid mixer, pour the hot water. Make sure the water is warm to the touch, but not scalding, as excessive heat can kill the yeast. Sprinkle the fast rising yeast over the water and let it sit for a few minutes to dissolve. This step, often called “proofing” the yeast, ensures it’s active and ready to work its magic.
-
Attach the whisk attachment to your mixer. Gently mix the water and yeast on low speed until the mixture becomes foamy. This should take about a minute or two. The foam indicates the yeast is alive and producing carbon dioxide, which is what will make your dough rise.
-
Add the extra virgin olive oil, kosher salt, dried oregano, and honey to the bowl. Whisk on low speed until all the ingredients are well blended, creating a flavorful base for your dough. The honey adds a touch of sweetness and helps to activate the yeast.
-
Add 1 cup of the bread flour to the mixture. Mix with the whisk attachment until just combined. Don’t overmix at this stage; you just want to incorporate the flour into the wet ingredients.
-
Remove the whisk attachment from the mixer. Scrape down any dough clinging to the whisk and the sides of the bowl using a spatula. Now, attach the dough hook to your mixer.
-
Add another cup of the bread flour to the bowl. Mix on low speed with the dough hook until the flour is well incorporated. Observe the dough’s consistency. If it appears too sticky and clings excessively to the sides of the bowl, gradually add the remaining 1/4 cup of bread flour, a tablespoon at a time, until the dough forms a cohesive ball that pulls away from the sides of the bowl. You might need a little more or a little less depending on your climate, but the goal is to get a smooth, slightly tacky dough.
-
Increase the mixer speed to medium. Let the dough hook knead the dough for 5-7 minutes. During this process, the dough will transform from a shaggy mass into a smooth, elastic ball. You’ll notice it becomes more pliable and less sticky as the gluten develops. This kneading is crucial for achieving that characteristic chewy pizza crust.
-
Remove the dough ball from the mixer and place it in a lightly oiled bowl. The bowl should be large enough to allow the dough to double in size. Turn the dough to coat it lightly with oil. Cover the bowl with a damp cloth. This prevents the dough from drying out and forming a crust.
-
Place the covered bowl in a warm, draft-free place. Allow the dough to rise for 15-20 minutes, or until it has doubled in size. The rising time can vary depending on the temperature of your environment. A warm kitchen will expedite the process.
-
Once the dough has doubled, gently remove it from the bowl. Punch it down to release the air bubbles. This step helps to redistribute the yeast and ensures a more even texture in the final pizza.
-
Divide the dough in half. On a lightly floured surface, roll out each portion to your desired thickness and shape for two pizzas. A slightly thicker crust will result in a softer, more bread-like pizza, while a thinner crust will be crispier.
-
Transfer the rolled-out dough to a perforated pizza pan. Drizzle the dough with olive oil, then sprinkle with additional dried oregano and kosher salt. These simple additions enhance the flavor of the crust.
-
Top the pizza with your favorite toppings. Get creative! Classic options include tomato sauce, mozzarella cheese, and pepperoni, but you can also experiment with vegetables, meats, and cheeses to create your own signature pizza.
-
Preheat your oven to a very hot 500 degrees Fahrenheit. This high temperature is key to achieving a crispy crust.
-
Place the pizza pan on the bottom rack of the oven for the first 5 minutes of baking. This initial burst of heat from the bottom helps to crisp the crust.
-
After 5 minutes, using a pizza peel, carefully slide the peel underneath the pizza pan and transfer the pizza to the top rack of the oven. Continue baking for another 5-7 minutes, or until the crust is golden brown and the toppings are heated through and bubbly. Keep a close eye on the pizza to prevent burning, especially on the top rack.
-
Using the pizza peel, carefully remove the pizza pan from the oven. Place the pan on a heat-proof surface. Then, use the pizza peel to slide the pizza off the pan and onto the peel.
-
Allow the pizza to cool for 2 minutes on the peel before slicing and serving. This brief cooling period allows the cheese to set slightly, making it easier to cut clean slices. Use a pizza cutter to slice the pizza into wedges.
Expert Tips & Tricks
- Warm Water is Key: Ensure the water is warm, not hot, to activate the yeast without killing it. Think bathwater temperature.
- Don’t Overknead: Overkneading can result in a tough crust. Stop kneading when the dough is smooth and elastic.
- Experiment with Flour: For a slightly different texture, try substituting some of the bread flour with whole wheat flour.
- Customize Your Crust: Brush the edges of the crust with garlic butter for extra flavor.
- Pre-cook Toppings: If using vegetables like mushrooms or peppers, pre-cook them slightly to prevent them from making the pizza soggy.
Serving & Storage Suggestions
Serve your freshly baked pizza immediately for the best flavor and texture. Garnish with fresh basil or a sprinkle of Parmesan cheese, if desired.
Leftover pizza can be stored in an airtight container in the refrigerator for up to 3 days. To reheat, preheat your oven to 350 degrees Fahrenheit and bake for 5-10 minutes, or until heated through. You can also reheat individual slices in a skillet over medium heat for a crispy crust.
For longer storage, freeze individual slices of pizza. Wrap each slice tightly in plastic wrap, then place them in a freezer-safe bag or container. Frozen pizza can be stored for up to 2 months. To reheat, bake directly from frozen at 375 degrees Fahrenheit for 10-15 minutes, or until heated through.
Nutritional Information
| Nutrient | Amount per Serving | % Daily Value |
|---|---|---|
| Calories | 165.6 kcal | N/A |
| Calories from Fat | 21 g | 13% |
| Total Fat | 2.4 g | 3% |
| Saturated Fat | 0.3 g | 1% |
| Cholesterol | 0 mg | 0% |
| Sodium | 222 mg | 9% |
| Total Carbohydrate | 30.9 g | 10% |
| Dietary Fiber | 2.2 g | 8% |
| Sugars | 2.3 g | N/A |
| Protein | 5.4 g | 10% |
Note: Nutritional information is an estimate and may vary depending on specific ingredients and toppings used.
Variations & Substitutions
- Gluten-Free Pizza: Substitute the bread flour with a gluten-free pizza dough mix. Follow the instructions on the package.
- Vegan Pizza: Use maple syrup instead of honey. Substitute dairy cheese with your favorite vegan cheese alternative.
- Herbed Crust: Add other dried herbs, such as rosemary or thyme, to the dough for a more complex flavor.
- Spicy Pizza: Add a pinch of red pepper flakes to the dough or sprinkle them on top of the pizza before baking.
- Mediterranean Pizza: Top with feta cheese, olives, sun-dried tomatoes, and artichoke hearts.
FAQs (Frequently Asked Questions)
Q: Can I use all-purpose flour instead of bread flour?
A: While bread flour is recommended for its higher protein content (which contributes to a chewier crust), you can use all-purpose flour. Your crust might be slightly less chewy, but it will still be delicious.
Q: How do I know if my yeast is still good?
A: To test your yeast, combine it with warm water and a pinch of sugar. If it foams within 5-10 minutes, it’s active and ready to use.
Q: Can I make the dough ahead of time?
A: Yes! You can prepare the dough and let it rise in the refrigerator for up to 24 hours. This slow fermentation process can enhance the flavor of the crust. Let the dough come to room temperature for about 30 minutes before rolling it out.
Q: My pizza crust is tough. What went wrong?
A: Overkneading the dough is a common cause of tough crust. Also, make sure you’re not adding too much flour. The dough should be slightly tacky, not dry and stiff.
Q: What’s the best way to get a crispy crust?
A: Baking the pizza at a high temperature (500 degrees Fahrenheit) on a preheated pizza stone or perforated pizza pan is key to achieving a crispy crust. Using the bottom rack initially also helps.
Final Thoughts
Armed with this easy KitchenAid pizza dough recipe, you’re now ready to create unforgettable pizza nights in your own kitchen. Don’t be afraid to experiment with different toppings and flavors to create your own signature pies. Pizza making is all about creativity and enjoyment. So gather your loved ones, crank up the oven, and get ready to experience the joy of homemade pizza. I can’t wait to hear about your delicious creations!