
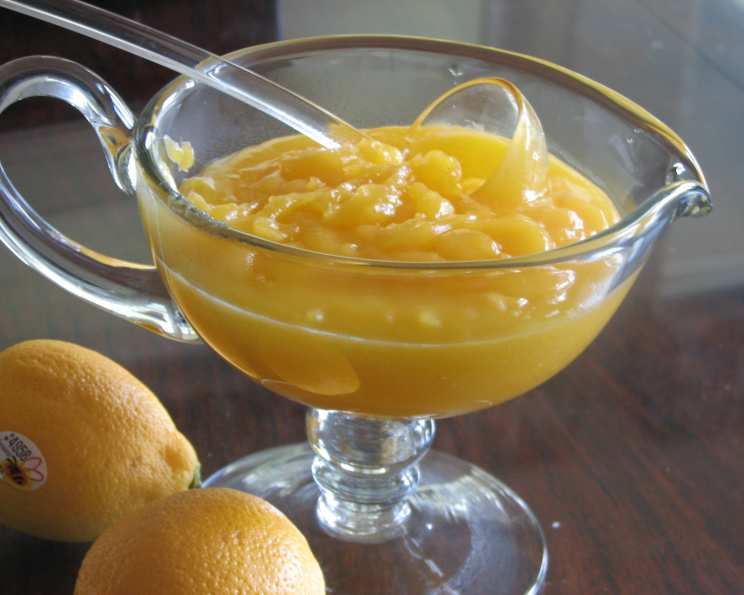
Sunshine in a Jar: The Easiest Lemon Curd You’ll Ever Make
I remember the first time I tasted truly exceptional lemon curd. It was at a tiny village bakery in the Cotswolds, England. The baker, a woman named Mrs. Higgins with flour perpetually dusted on her apron, generously slathered it on a warm, crumbly scone. The tartness of the lemon, the richness of the butter, and the sweetness of the sugar created a symphony in my mouth – pure, unadulterated joy. From that moment on, I was determined to master the art of lemon curd, bringing that little taste of sunshine into my own kitchen.
Recipe Overview
- Prep Time: 5 minutes
- Cook Time: 5 minutes
- Total Time: 10 minutes
- Yields: 2 cups
- Serves: 6-8
- Dietary Type: Vegetarian
Ingredients
- 4 egg yolks
- 2/3 cup (approximately 150g) caster sugar
- 60 g unsalted butter
- 2 teaspoons grated lemon zest
- 100 ml lemon juice
- 1 tablespoon cornflour
Equipment Needed
- Whisk
- Heavy-based non-reactive saucepan
- Sterilized jars
Instructions
-
In a bowl, whisk the egg yolks and caster sugar together until they are well combined. Be sure to whisk thoroughly, but avoid creating a frothy mixture. You want a smooth, homogenous blend.
-
Pour the mixture into a heavy-based, non-reactive saucepan. The heavy base is crucial for even heat distribution, preventing scorching. Add the butter, cornflour, lemon zest, and lemon juice to the saucepan.
-
Place the saucepan over medium-high heat. Stir constantly with a whisk or wooden spoon. Constant stirring is paramount to prevent the eggs from scrambling and ensuring a smooth, silky curd.
-
Continue stirring constantly until the mixture reaches a simmering point. This should take approximately five minutes. You’ll notice the mixture thickening as it heats up.
-
As soon as bubbles appear on the surface, immediately remove the saucepan from the heat, while continuing to stir. This is the critical point where the curd thickens rapidly. If you continue cooking after this point, you risk overcooking it.
-
Allow the lemon curd to cool completely. As it cools, it will thicken further.
-
Once cooled, transfer the lemon curd to sterilized jars and seal tightly. Sterilizing the jars is important to ensure a longer shelf life for your homemade curd.
Expert Tips & Tricks
- Use fresh lemons: The quality of your lemons will directly impact the flavor of your curd. Opt for ripe, juicy lemons with a vibrant yellow color.
- Avoid overcooking: Overcooked lemon curd can become grainy or curdled. Removing the saucepan from the heat as soon as bubbles appear is crucial. The residual heat will continue to cook the curd to the perfect consistency.
- Strain for extra smoothness: For an ultra-smooth curd, strain it through a fine-mesh sieve after cooking to remove any small bits of zest or cooked egg.
- Prevent scorching: The heavy-based saucepan and constant stirring are essential to prevent the curd from scorching on the bottom. If you notice any browning, immediately remove the pan from the heat and transfer the curd to a new saucepan before continuing to cook.
- Add a pinch of salt: A tiny pinch of salt (about 1/8 teaspoon) can enhance the flavors of the lemon curd and balance the sweetness.
- Dealing with lumps: If your curd does develop small lumps, don’t despair. Immediately remove from heat and whisk vigorously. If lumps persist, pour the curd through a fine-mesh sieve.
Serving & Storage Suggestions
Lemon curd is incredibly versatile! Here are some serving suggestions:
- Spread: Spread generously on toast, scones, muffins, or crumpets.
- Filling: Use as a filling for cakes, tarts, pastries, or macarons. It pairs beautifully with sponge cake or shortbread.
- Topping: Drizzle over yogurt, ice cream, or pancakes.
- Mix-in: Swirl into cheesecake batter or blend into smoothies.
For storage, keep your sealed jars of lemon curd in the refrigerator. It will last for several weeks if properly sealed and refrigerated. Once opened, consume within 1-2 weeks. Lemon curd is not recommended for freezing, as the texture can change upon thawing.
Nutritional Information
| Nutrient | Amount per Serving | % Daily Value |
|---|---|---|
| Calories | 201 kcal | N/A |
| Calories from Fat | 97 kcal | N/A |
| Total Fat | 10.8 g | 16% |
| Saturated Fat | 6.1 g | 30% |
| Cholesterol | 147.4 mg | 49% |
| Sodium | 6.4 mg | 0% |
| Total Carbohydrate | 25.7 g | 8% |
| Dietary Fiber | 0.2 g | 0% |
| Sugars | 22.8 g | 91% |
| Protein | 1.8 g | 3% |
Note: Nutritional information is an estimate and may vary based on specific ingredients used.
Variations & Substitutions
- Lime Curd: Substitute lime juice and zest for lemon juice and zest for a refreshing twist.
- Orange Curd: Use orange juice and zest instead of lemon for a sweeter, more floral flavor.
- Grapefruit Curd: Grapefruit curd offers a unique, slightly bitter flavor profile.
- Dairy-Free Curd: Replace the butter with a plant-based butter alternative. Be sure to choose one with a high fat content for a similar texture.
- Brown Butter Curd: Brown the butter before adding it to the other ingredients for a nutty, caramel-like flavor.
- Herbed Lemon Curd: Infuse the lemon curd with fresh herbs like thyme or rosemary for a savory-sweet flavor combination. Add the herbs to the saucepan with the other ingredients and remove them before transferring the curd to jars.
FAQs (Frequently Asked Questions)
Q: Why is my lemon curd too thick?
A: It is likely you overcooked the mixture. Be sure to remove the curd from the heat as soon as bubbles appear.
Q: Why is my lemon curd too runny?
A: This could be due to undercooking the mixture or using too much liquid. Ensure you cook the curd until it thickens and reaches a simmering point.
Q: Can I use bottled lemon juice?
A: While fresh lemon juice is highly recommended for the best flavor, bottled lemon juice can be used in a pinch. However, the flavor will not be as vibrant.
Q: How do I sterilize the jars?
A: There are several methods for sterilizing jars. One way is to wash the jars and lids in hot, soapy water, rinse thoroughly, and then place them on a baking sheet in a preheated oven at 250°F (120°C) for 10 minutes. Another method is to boil the jars and lids in water for 10 minutes.
Q: My lemon curd tastes eggy. How can I fix it?
A: This often happens when the curd is cooked at too high a temperature or not stirred constantly. Next time, keep the heat lower and stir constantly. If it’s already eggy, try whisking in a tablespoon of lemon juice.
Final Thoughts
Lemon curd is a deceptively simple yet incredibly rewarding treat to make at home. Its bright, tangy flavor is a perfect complement to so many desserts and snacks. With this easy recipe and helpful tips, you’ll be whipping up batches of sunshine in no time. Don’t hesitate to experiment with different variations and flavors to create your own signature curd. And most importantly, don’t forget to share the joy of homemade lemon curd with your friends and family! I hope you find that making this lemon curd brings you just a fraction of the joy that Mrs. Higgins’s curd brought me that day in the Cotswolds. Happy cooking!