
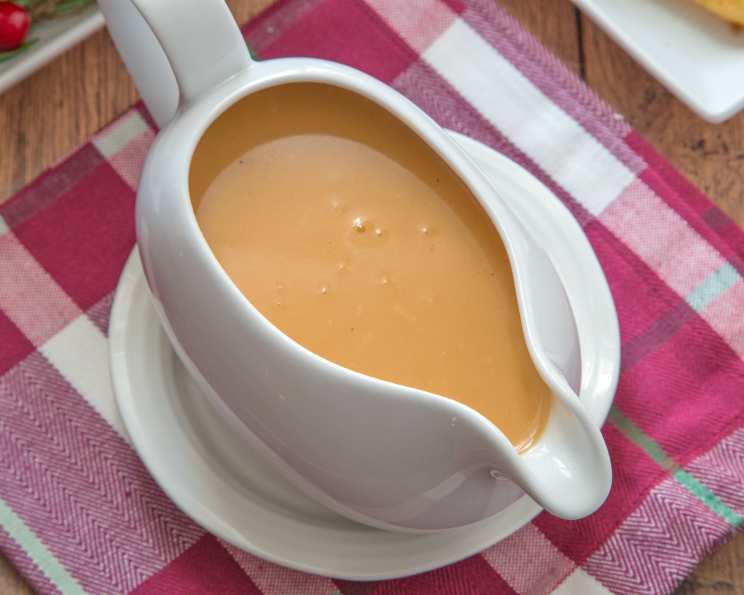
Easy Make-Ahead Turkey Gravy: A Thanksgiving Game Changer
Every Thanksgiving, I’d watch my grandmother, Nana Rose, orchestrate the holiday feast with a gentle smile and unwavering calm, except when it came to the gravy. The moment the turkey came out of the oven, a furrow would appear on her brow. The pressure was on to create a smooth, rich gravy, often with too little time and too many prying eyes. This memory is what drives me to perfect the art of make-ahead gravy, allowing you to enjoy the holiday without the last-minute stress! This recipe delivers that classic, comforting taste without any frantic whisking moments.
Recipe Overview:
- Prep Time: 10 minutes
- Cook Time: approximately 20 minutes
- Total Time: 30 minutes (plus chilling/reheating time)
- Yields: 4 cups
- Serves: 8
- Dietary Type: Can be Gluten-Free
Ingredients:
- 6 tablespoons butter
- 6 tablespoons flour (all-purpose or gluten-free blend)
- 4 cups chicken broth or turkey broth
- Salt and pepper to taste
- Pan drippings from roasted turkey (approximately ½ cup or more, depending on the size of the turkey)
Equipment Needed:
- Medium saucepan
- Whisk
- Measuring cups and spoons
- Storage container (for refrigerating)
Instructions:
- Melt the butter: In a medium saucepan over medium heat, melt the butter. Ensure the butter is fully melted but not browned.
- Create the roux: Whisk in the flour to the melted butter. The mixture will form a thick paste, known as a roux.
- Cook the roux: Continue cooking the roux over medium-high heat, whisking constantly. As it cooks, the flour will incorporate into the butter, and you’ll begin to see small white bubbles forming on the surface.
- Continue Cooking the Roux: Continue to cook the roux for about 2-3 minutes after the white bubbles appear, maintaining constant whisking. This step is crucial as it cooks out the raw flour taste and adds depth to the gravy’s flavor. The roux should turn a light golden color.
- Add the broth: Gradually add the chicken broth or turkey broth to the roux, whisking constantly to prevent lumps from forming. Start with a small amount of broth and whisk it in completely before adding more.
- Thicken the gravy: Continue whisking until the gravy thickens and comes to a gentle boil. This process usually takes about 5-7 minutes. The gravy should coat the back of a spoon.
- Season: Remove the saucepan from the heat and season the gravy with salt and pepper to taste. Start with a small amount of each and adjust according to your preference.
- Cool and Refrigerate (Make-Ahead Step): At this point, you can cool the gravy base completely. Once cooled, cover it tightly and refrigerate for up to 4 days.
- Reheat: When ready to serve, reheat the gravy base in a medium-sized pan over medium heat, whisking occasionally to prevent sticking.
- Incorporate Turkey Drippings: Once the turkey is done roasting, carefully skim off any excess fat from the pan drippings. Pour the pan drippings into the reheated gravy base.
- Adjust Consistency: Bring the gravy to serving temperature, whisking to combine the drippings evenly. If the gravy is too thick, add a little extra broth (chicken or turkey) to reach your desired consistency. If it’s too thin, simmer for a few more minutes to allow it to thicken.
- Final Seasoning: Taste the gravy and adjust the seasoning with salt and pepper as needed. Remember that the pan drippings may already contain some salt, so taste before adding more.
Expert Tips & Tricks:
- Roux Perfection: The key to a lump-free gravy is a well-made roux. Don’t rush the cooking process, and be sure to whisk constantly to prevent burning.
- Broth Temperature: Using warm broth can help the gravy thicken more quickly and evenly.
- Strain for Silkiness: For an extra-smooth gravy, strain it through a fine-mesh sieve after reheating.
- Fat Separator: A fat separator is a helpful tool for easily removing excess fat from the turkey drippings. If you don’t have one, you can let the drippings sit for a few minutes and carefully spoon off the fat from the top.
- Flavor Boost: For a deeper, more complex flavor, consider adding a splash of dry sherry or Madeira wine to the gravy while reheating.
Serving & Storage Suggestions:
Serve the warm, flavorful turkey gravy immediately over sliced turkey, mashed potatoes, stuffing, or any of your favorite Thanksgiving dishes.
Leftover gravy should be stored in an airtight container in the refrigerator. It will keep for up to 3-4 days. To reheat, gently warm it in a saucepan over medium-low heat, whisking occasionally. You may need to add a splash of broth if it has thickened during storage.
Gravy can also be frozen for longer storage. Freeze in an airtight container or freezer bag for up to 2-3 months. Thaw overnight in the refrigerator before reheating. Be aware that freezing may slightly alter the texture of the gravy.
Nutritional Information:
Note: Nutritional information is an estimate and will vary based on specific ingredients used.
| Nutrient | Amount per Serving | % Daily Value |
|---|---|---|
| Calories | 150 kcal | 8% |
| Total Fat | 10g | 15% |
| Saturated Fat | 6g | 30% |
| Cholesterol | 25mg | 8% |
| Sodium | 500mg | 22% |
| Total Carbohydrate | 5g | 2% |
| Dietary Fiber | 0g | 0% |
| Sugars | 1g | 2% |
| Protein | 4g | 8% |
Variations & Substitutions:
- Gluten-Free Gravy: Use a gluten-free all-purpose flour blend in place of regular flour. Ensure the broth you use is also gluten-free.
- Vegetarian Gravy: Omit the turkey drippings and use vegetable broth instead of chicken or turkey broth. Add a teaspoon of soy sauce or Worcestershire sauce (check label for gluten) for umami.
- Herb-Infused Gravy: Add fresh herbs like thyme, rosemary, or sage to the gravy while it simmers. Remove the herbs before serving.
- Mushroom Gravy: Sauté sliced mushrooms in butter before making the roux for a rich, earthy flavor.
- Spicy Gravy: Add a pinch of cayenne pepper or a dash of hot sauce for a touch of heat.
FAQs (Frequently Asked Questions):
Q: Can I make this gravy even further in advance, like a week before Thanksgiving?
A: While the recipe is best made no more than 4 days ahead, you can freeze the cooled gravy for up to 2-3 months. Thaw it overnight in the refrigerator before reheating and adding the turkey drippings.
Q: What if my gravy has lumps even after whisking?
A: If lumps persist, try using an immersion blender to smooth the gravy. Alternatively, strain the gravy through a fine-mesh sieve.
Q: Can I use a different type of flour, like whole wheat?
A: While you can use whole wheat flour, it will result in a slightly darker and more nutty-flavored gravy. All-purpose flour or a gluten-free blend is recommended for the best texture and flavor.
Q: What if I don’t have enough turkey drippings?
A: If you don’t have enough turkey drippings, supplement with melted butter or additional broth to reach the desired amount of liquid.
Q: My gravy is too salty after adding the drippings. What can I do?
A: Add a small amount of water or unsalted broth to dilute the saltiness. You can also add a pinch of sugar to help balance the flavors.
Final Thoughts:
This easy make-ahead turkey gravy recipe is a true Thanksgiving lifesaver. By preparing the base in advance, you can eliminate the last-minute stress and ensure a smooth, flavorful gravy every time. I hope this recipe becomes a cherished part of your holiday traditions. Feel free to experiment with different variations and share your feedback! Pair this gravy with a perfectly roasted turkey, creamy mashed potatoes, and your favorite stuffing for a truly unforgettable Thanksgiving feast. Enjoy!