
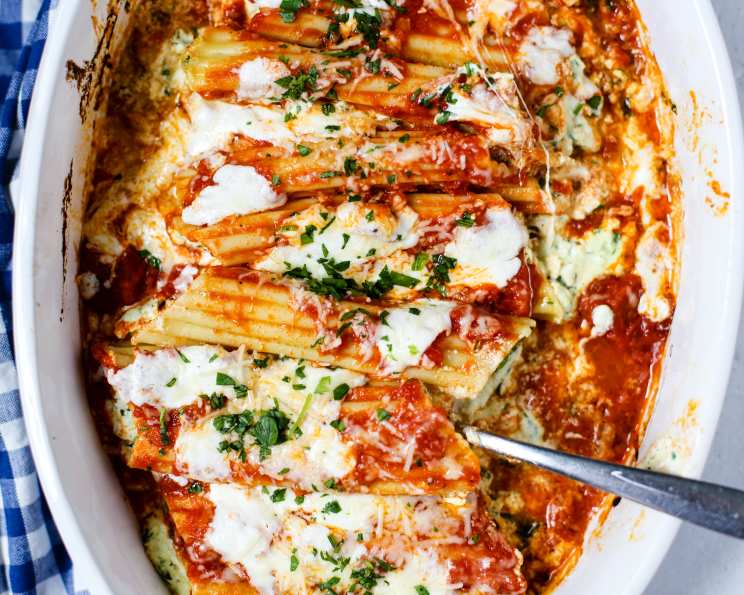
Easy Manicotti: A Nostalgic Comfort Food Classic
I can still picture my grandmother in her floral apron, humming softly as she meticulously stuffed manicotti shells at her kitchen table. The aroma of simmering tomato sauce, infused with garlic and basil, would fill the entire house, promising a hearty and comforting meal. It wasn’t just the delicious taste that made manicotti special; it was the love and care that went into every single shell, a tradition I cherish and continue to this day.
Recipe Overview
- Prep Time: 20 minutes
- Cook Time: 45 minutes
- Total Time: 1 hour 5 minutes
- Servings: 4
- Dietary Type: Vegetarian
Ingredients
- 1 lb ricotta cheese
- 4 ounces mozzarella cheese, grated
- 3 tablespoons Parmesan cheese, grated
- 1 teaspoon sugar
- 1 egg, slightly beaten
- Nutmeg (to taste)
- 1 tablespoon parsley, finely chopped
- Salt and pepper
- 1 (5 ounce) package manicotti shells, uncooked
- 1 (15 1/2 ounce) jar prepared meatless marinara sauce (or homemade, if desired)
Equipment Needed
- Large mixing bowl
- Spoon or piping bag
- Baking pan (9×13 inch recommended)
- Aluminum foil
Instructions
-
Begin by preheating your oven to 400 degrees Fahrenheit. This will ensure even cooking of the manicotti.
-
In a large mixing bowl, prepare the cheese filling. Combine ricotta cheese, mozzarella cheese, Parmesan cheese, sugar, and the slightly beaten egg.
-
Season the cheese mixture generously with nutmeg, salt, and pepper. The nutmeg adds a warm, subtle spice that complements the cheeses beautifully. Add the finely chopped parsley. Mix all ingredients thoroughly until well combined.
-
Now it’s time to stuff the uncooked manicotti shells. This can be done using a spoon or, for a cleaner and faster method, transfer the cheese mixture into a piping bag (or a large zip-top bag with a corner snipped off). Pipe or spoon the cheese mixture generously into each manicotti shell, filling them from both ends. Pack the filling in firmly but gently to avoid breaking the delicate shells.
-
Arrange the stuffed manicotti shells in a single layer in a baking pan. Ensure that the shells are not overcrowded to allow for even cooking.
-
Pour the marinara sauce over the manicotti, ensuring that all the shells are completely covered. You can use store-bought sauce for convenience, or homemade if you have the time and inclination.
-
Cover the baking pan tightly with aluminum foil, crimping the edges to seal the pan securely. This will trap the steam and help the manicotti cook evenly and become tender.
-
Bake in the preheated oven for 40 minutes, keeping the pan covered with the foil.
-
After 40 minutes, carefully remove the foil from the baking pan. Sprinkle the manicotti generously with additional grated cheese (mozzarella and/or Parmesan work well).
-
Return the uncovered pan to the oven and bake for an additional 5 minutes, or until the cheese is melted and bubbly and the manicotti are heated through.
-
Remove the baked manicotti from the oven and let it rest for a few minutes before serving. This allows the cheese to set slightly and prevents the filling from being too runny.
Expert Tips & Tricks
- Don’t overfill the manicotti shells: Overfilling can cause the shells to burst during baking. Aim for a generous filling, but leave a little room at the ends.
- Prevent sticking: Lightly grease the baking pan before arranging the manicotti shells to prevent sticking.
- Add Spinach: As I mentioned, sometimes I’ll add some cooked and squeezed dry frozen spinach to the ricotta mixture for added flavor and nutrients.
- Make ahead: Assemble the manicotti ahead of time and store them, covered, in the refrigerator for up to 24 hours before baking. Add an extra 10-15 minutes to the baking time if baking from cold.
Serving & Storage Suggestions
Serve the manicotti hot, straight from the oven. Garnish with fresh basil or parsley for an added touch of freshness. A simple side salad or crusty bread complements the dish perfectly.
Leftover manicotti can be stored in an airtight container in the refrigerator for up to 3 days. To reheat, bake in a preheated oven at 350 degrees Fahrenheit until heated through, or microwave in short intervals until warm. You can also freeze baked manicotti for longer storage (up to 2 months). Thaw completely before reheating.
Nutritional Information
| Nutrient | Amount per Serving | % Daily Value |
|---|---|---|
| Calories | 562 kcal | N/A |
| Total Fat | 27g | 41% |
| Saturated Fat | 15g | 75% |
| Cholesterol | 133mg | 44% |
| Sodium | 862mg | 35% |
| Total Carbohydrate | 49g | 16% |
| Dietary Fiber | 4g | 17% |
| Sugars | 14g | N/A |
| Protein | 29g | 58% |
Variations & Substitutions
- Meat Lover’s Manicotti: Add cooked and crumbled Italian sausage or ground beef to the cheese mixture for a heartier, meat-filled version.
- Spicy Manicotti: Add a pinch of red pepper flakes to the cheese mixture or the marinara sauce for a touch of heat.
- Vegetable Medley: Incorporate finely chopped vegetables like zucchini, bell peppers, or mushrooms into the cheese filling.
- Cheese Variations: Experiment with different types of cheese in the filling, such as provolone, fontina, or Asiago.
FAQs (Frequently Asked Questions)
Q: Can I use fresh manicotti shells instead of dried?
A: Yes, you can use fresh manicotti shells, but they may require a slightly shorter baking time. Check for doneness after about 35 minutes.
Q: Can I use homemade marinara sauce instead of store-bought?
A: Absolutely! Homemade marinara sauce will add a richer, more complex flavor to the dish.
Q: What if I don’t have a piping bag for filling the shells?
A: A large zip-top bag with a corner snipped off works just as well as a piping bag. You can also use a spoon, although it might be a bit messier.
Q: Can I freeze uncooked manicotti?
A: It’s best to freeze the manicotti after it’s been baked, as uncooked shells can become soggy when thawed.
Q: How do I prevent the manicotti from drying out during baking?
A: Make sure the baking pan is tightly covered with aluminum foil to trap moisture and prevent the manicotti from drying out.
Final Thoughts
This easy manicotti recipe is a timeless classic that’s perfect for a comforting weeknight meal or a special occasion. Feel free to customize the filling and sauce to your liking and don’t be afraid to experiment with different flavor combinations. I hope this dish brings as much joy to your table as it has to mine. Happy cooking, and please share your creations and feedback! Perhaps you can serve alongside a lovely Chianti.