
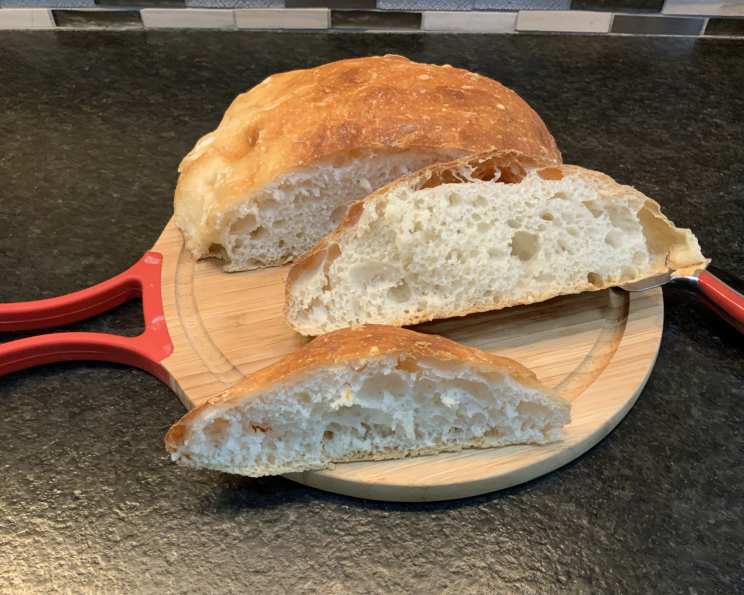
Easy No-Knead Dutch Oven Crusty Bread
The aroma of freshly baked bread has always been a powerful memory trigger for me. I recall my grandmother’s small kitchen, filled with the comforting scent of yeast and warm dough. She never used fancy equipment, just a well-worn wooden bowl and her strong, loving hands. This no-knead Dutch oven bread reminds me of those simple, perfect loaves—a rustic, crusty masterpiece born from patience and a few humble ingredients. It’s a taste of home, wherever you are.
Recipe Overview
- Prep Time: 5 minutes
- Rise Time: 14-20 hours
- Cook Time: 45-50 minutes
- Total Time: 14 hours 50 minutes – 20 hours 5 minutes
- Servings: About 12 slices
- Yield: 1 half-pound loaf
- Dietary Type: Vegetarian
Ingredients
- ¼ teaspoon active dry yeast
- 1 ½ cups warm water (not too hot, about 105-115°F or 40-46°C)
- 3 cups all-purpose flour, plus more for dusting. You can also use a combination of white and whole wheat flour.
- 1 ½ teaspoons salt
- Cornmeal or wheat bran, for dusting
Equipment Needed
- Large bowl
- Plastic wrap
- Work surface
- Clean dish towel
- 6- to 8-quart heavy covered pot (cast iron, enamel, Pyrex or ceramic)
- Cooling rack
Instructions
-
In a large bowl, dissolve the yeast in the warm water. Ensure the water isn’t too hot, as it can kill the yeast. Give it a few minutes to bloom, and you should see a slight frothing on top.
-
Add the flour and salt to the yeast mixture. Stir until just blended. The dough will appear shaggy and sticky – don’t worry, that’s exactly what you want!
-
Cover the bowl tightly with plastic wrap. This helps to trap moisture and create the ideal environment for the yeast to work its magic.
-
Let the dough rest at least 8 hours, preferably 12 to 18 hours, at warm room temperature (around 70°F or 21°C). This long, slow fermentation process is what develops the incredible flavor and texture of the bread.
-
The dough is ready when its surface is dotted with bubbles. This indicates that the yeast has been busy producing carbon dioxide, which will give your bread its airy crumb.
-
Lightly flour a work surface to prevent the dough from sticking. Gently turn the dough out onto the floured surface.
-
Sprinkle the dough with a little more flour and fold it over on itself once or twice. This helps to develop the gluten and give the bread structure.
-
Cover the dough loosely with plastic wrap and let it rest for about 15 minutes. This allows the gluten to relax, making it easier to shape.
-
Using just enough flour to keep the dough from sticking to the work surface or your fingers, gently shape it into a ball. Don’t overwork the dough at this stage; be gentle and let it retain its airy texture.
-
Generously coat a clean dish towel with flour, wheat bran, or cornmeal. This will prevent the dough from sticking to the towel during the final rise.
-
Put the seam side of the dough down on the prepared towel and dust the top with more flour, bran, or cornmeal.
-
Cover the dough with another towel and let it rise for about 1 to 2 hours. This is the final proofing stage, where the dough will almost double in size.
-
When it’s ready, the dough will have doubled in size and will not readily spring back when poked with a finger. This is a crucial step for achieving a light and airy loaf.
-
At least 20 minutes before the dough is ready, preheat your oven to 475°F (246°C).
-
Put a 6- to 8-quart heavy covered pot (cast iron, enamel, Pyrex, or ceramic) in the oven as it heats. It is essential to preheat the pot so it’s extremely hot when the dough is added. This will give you that signature crispy crust.
-
When the dough is ready, carefully remove the hot pot from the oven and lift off the lid. Be extremely careful, as the pot will be very hot! Use oven mitts or thick towels to protect your hands.
-
Slide your hand under the towel and turn the dough over into the pot, seam side up. The dough will lose its shape a bit in the process, but that’s perfectly okay.
-
Give the pan a firm shake or two to help distribute the dough evenly. Don’t worry if it’s not perfect; it will straighten out as it bakes.
-
Cover the pot and bake for 30 minutes. The lid traps steam, creating a moist environment that promotes a good rise and a chewy crumb.
-
Remove the lid and bake for another 15 to 20 minutes, or until the loaf is beautifully browned. The crust should be a deep golden brown and sound hollow when tapped.
-
Remove the bread from the Dutch oven and let it cool on a rack for at least 1 hour before slicing. This is very important. If you cut into it too soon, the bread will be gummy. Patience is key!
Expert Tips & Tricks
-
Adjusting Hydration: If your dough seems too wet, add a tablespoon of flour at a time until it reaches the desired consistency. Conversely, if it’s too dry, add a teaspoon of water at a time.
-
Scoring the Dough: For a more decorative loaf, score the top of the dough with a sharp knife or lame just before baking. This allows the bread to expand evenly and prevents it from cracking randomly.
-
High Altitude Adjustments: At higher altitudes, you may need to reduce the amount of yeast slightly and shorten the rising time.
-
Flavor Infusions: Experiment with adding herbs, spices, or cheese to the dough for added flavor. Rosemary, thyme, garlic powder, or parmesan cheese are all excellent additions.
Serving & Storage Suggestions
This crusty bread is perfect served warm with butter, olive oil, or your favorite spreads. It’s also fantastic for sandwiches, toast, or as an accompaniment to soups and stews.
Store leftover bread in a bread bag or airtight container at room temperature for up to 3 days. For longer storage, slice the bread and freeze it in a freezer-safe bag. To reheat, thaw the bread and bake it in a preheated oven at 350°F (175°C) for a few minutes to crisp it up.
Nutritional Information
| Nutrient | Amount per Serving (approx.) | % Daily Value |
|---|---|---|
| Calories | 114 kcal | 6% |
| Total Fat | 0.4g | 1% |
| Saturated Fat | 0.1g | 1% |
| Cholesterol | 0mg | 0% |
| Sodium | 292mg | 12% |
| Total Carbohydrate | 23.9g | 8% |
| Dietary Fiber | 0.9g | 4% |
| Sugars | 0.1g | 0% |
| Protein | 3.3g | 7% |
Note: Nutritional information is an estimate and can vary based on specific ingredients and portion sizes.
Variations & Substitutions
- Whole Wheat Bread: Substitute up to half of the all-purpose flour with whole wheat flour for a nuttier flavor and increased fiber content.
- Rye Bread: Add 1/2 cup of rye flour for a distinctive flavor.
- Seeded Bread: Sprinkle sesame seeds, poppy seeds, or sunflower seeds on top of the dough before baking for added texture and flavor.
- Garlic Herb Bread: Mix minced garlic and chopped fresh herbs (such as rosemary, thyme, or oregano) into the dough before the first rise.
- Spelt Flour: You can experiment with using spelt flour for a slightly different flavor profile.
FAQs (Frequently Asked Questions)
Q: Why is my bread dense and not airy?
A: The most common reason is insufficient rising time. Ensure the dough rises for the full recommended time, and that your yeast is fresh and active.
Q: Can I use instant yeast instead of active dry yeast?
A: Yes, you can. If using instant yeast, you don’t need to dissolve it in water first. Just add it directly to the flour.
Q: My Dutch oven is smaller than 6 quarts. Can I still use it?
A: Yes, but you may need to reduce the amount of dough slightly to prevent it from overflowing during baking.
Q: How do I know when the bread is fully baked?
A: The crust should be a deep golden brown and sound hollow when tapped. You can also use a thermometer to check the internal temperature, which should be around 200-210°F (93-99°C).
Q: Can I make the dough ahead of time and refrigerate it?
A: Yes, you can refrigerate the dough after the initial rise. This will slow down the fermentation process and allow you to bake the bread at your convenience. Let the dough come to room temperature before shaping and baking.
Final Thoughts
This No-Knead Dutch Oven Crusty Bread is a testament to the fact that incredible things can come from simple beginnings. Don’t be intimidated by the long rising time; it’s mostly hands-off. The reward is a loaf of bread that’s bursting with flavor and boasts a crust so good, you’ll want to make this a staple in your kitchen. I urge you to try this recipe; it will surely impress you and your family. Feel free to experiment with different flours and additions to make it your own. And be sure to let me know how it turns out! It pairs beautifully with a rich tomato soup or a glass of hearty red wine. Enjoy!