
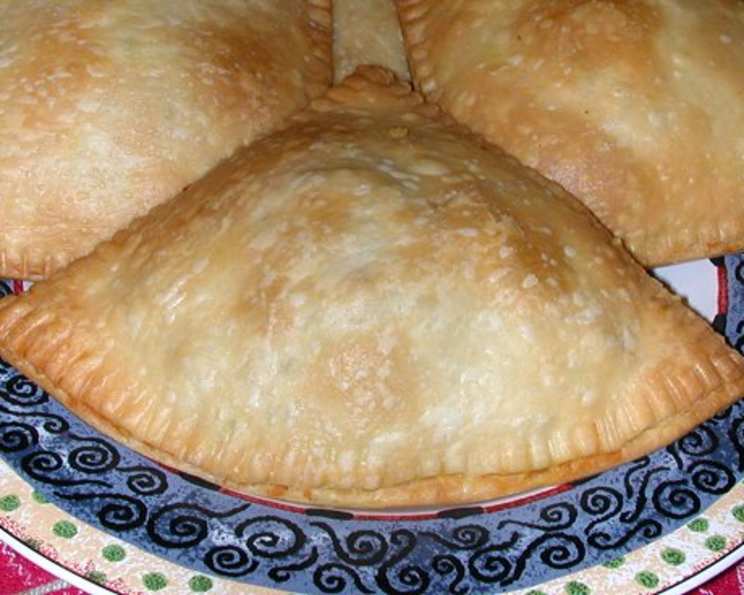
Easy Pantry Pasties: A Culinary Rescue Mission
I’ll never forget the winter storm of ’98. We were snowed in for days, and the pantry was looking bleak. My resourceful grandmother, Nana Elsie, emerged from the kitchen smelling of warm spices and triumphantly presented a tray of golden-brown pasties. She’d cobbled them together from frozen vegetables, leftover roast, and a box of pie crusts – a culinary act of defiance against the blizzard. To this day, the comforting aroma of a freshly baked pasty instantly transports me back to that cozy, snowbound kitchen, filled with laughter and Nana Elsie’s unwavering spirit. These Easy Pantry Pasties are my homage to her ingenuity, a reminder that deliciousness can emerge even from the most humble of ingredients.
Recipe Overview
- Prep Time: 20 minutes
- Cook Time: 30 minutes
- Total Time: 50 minutes
- Servings: 4
- Yield: 4 pasties
- Dietary Type: Adaptable (can be made gluten-free with appropriate pie crust)
Ingredients
- ¾ cup diced frozen carrots or ¾ cup peas and carrots
- 1 teaspoon butter
- 1 lb lean ground beef
- ¼ cup diced yellow onions or 2 tablespoons minced dried onion
- 1 clove garlic, minced
- 1 (16 ounce) can whole white small potatoes, drained and cut into ¼ inch cubes or 1 ¼ cups cubed cooked potatoes
- 1 cup shredded sharp cheddar cheese
- ½ cup shredded monterey jack cheese
- ½ – 1 teaspoon curry powder (optional)
- Salt and pepper, to taste
- 4 pie crusts, from store (2 pkgs)
Equipment Needed
- Microwave-safe bowl
- Non-stick skillet
- Mixing bowl
- Cutting board
- Fork
- Non-stick baking sheet
- Panspray
Instructions
-
Preheat your oven to 350 degrees F (175 degrees C).
-
Thaw and partially cook the carrots (or peas and carrots) by microwaving them in a microwave-safe bowl with the butter on high for 90 seconds. This softens them slightly, ensuring they cook evenly in the pasties. Set aside.
-
In a non-stick skillet over medium heat, begin to brown the ground beef. As the meat is cooking (about halfway through), add the diced yellow onions (or minced dried onion) and minced garlic. Sauté until the beef is completely browned, about 7 to 10 minutes in total. Be sure to crumble the beef well during cooking. Drain any excess drippings from the skillet. No one wants a greasy pasty!
-
In a large mixing bowl, combine the browned beef mixture, cubed potato, shredded cheddar cheese, and shredded monterey jack cheese. If desired, add the curry powder at this stage. I find that ½ teaspoon offers a subtle warmth, while 1 teaspoon gives a bolder, samosa-like flavor.
-
Season the mixture generously with salt and pepper to taste. Stir everything together thoroughly to ensure even distribution of flavors. Don’t be shy with the seasoning; it really brings out the taste of all the ingredients.
-
Lightly flour a clean, flat surface, like a cutting board. Place one of the pie crusts on the floured surface. Visualize the crust divided into four equal quadrants.
-
Place about ½ to ¾ cup of the cooked meat mixture in each of the four quadrants of the crust. Be sure to leave approximately a ¼ inch “aisle” of bare crust between each mound of filling and around the outside edge of the crust. This bare crust is crucial for sealing the pasties properly.
-
Moisten the uncovered “aisles” and the outside edge portions of the crust with water or milk. This acts as a glue, ensuring a secure seal between the top and bottom crusts.
-
Carefully place another pie crust over the top of the filled bottom crust. Gently press the top crust down onto the exposed bottom crust areas (the “aisles” and the outside edge), being careful to cover all the mounds of meat filling completely.
-
Using a sharp knife or pizza cutter, cut the pie crust into four individual pasties along the middle “aisles”.
-
Use a fork to firmly press the edges of each pasty all around to create a sealed crimp. This not only looks pretty but also prevents the filling from escaping during baking.
-
Repeat the entire assembly process with the remaining crusts and meat filling until everything is used up.
-
Lightly spray a non-stick baking sheet with pan spray. Place the assembled pasties on the prepared baking sheet (4 should fit comfortably on a large sheet; you might need to bake in two batches).
-
Bake at 350 degrees F (175 degrees C) until the crusts are golden brown and the filling is heated through, about 30 minutes. Keep an eye on them; baking times may vary slightly depending on your oven.
Expert Tips & Tricks
- Crust Color Boost: For an extra golden-brown crust, brush the pasties with a beaten egg or milk before baking.
- Make-Ahead Marvel: Assemble the pasties ahead of time and store them unbaked in the refrigerator for up to 24 hours. Add a few minutes to the baking time when cooking from cold.
- Prevent Soggy Bottoms: Ensure the baking sheet is preheated in the oven for a few minutes before placing the pasties on it. This helps to crisp up the bottom crust.
- Spice It Up: Experiment with different spices! Smoked paprika, garlic powder, or a pinch of red pepper flakes can add exciting layers of flavor.
- Vegetarian Delight: Substitute the ground beef with lentils or crumbled plant-based meat alternatives for a vegetarian version.
Serving & Storage Suggestions
Serve these Easy Pantry Pasties warm, straight from the oven. They are delicious on their own or with a side of coleslaw, a dollop of sour cream, or a simple green salad.
Leftover pasties can be stored in an airtight container in the refrigerator for up to 3 days. To reheat, bake in a preheated oven at 350 degrees F (175 degrees C) for about 10-15 minutes, or until heated through. You can also reheat them in the microwave, but the crust might lose some of its crispness.
For longer storage, wrap individual pasties tightly in plastic wrap and then place them in a freezer-safe bag. They can be frozen for up to 2 months. Thaw completely in the refrigerator before reheating.
Nutritional Information
| Nutrient | Amount per Serving | % Daily Value |
|---|---|---|
| Calories | 650 kcal | 33% |
| Total Fat | 40g | 51% |
| Saturated Fat | 20g | 100% |
| Cholesterol | 80mg | 27% |
| Sodium | 700mg | 30% |
| Total Carbohydrate | 50g | 18% |
| Dietary Fiber | 5g | 18% |
| Sugars | 5g | 10% |
| Protein | 30g | 60% |
Note: Nutritional information is an estimate and may vary based on specific ingredients and portion sizes.
Variations & Substitutions
- Gluten-Free Pasties: Use a gluten-free pie crust for a gluten-free version. Many store-bought options are available.
- Different Cheeses: Experiment with different cheese combinations. Gruyere, fontina, or pepper jack would all be delicious.
- Vegetable Medley: Use a mix of your favorite frozen or fresh vegetables. Broccoli, cauliflower, bell peppers, and zucchini all work well.
- Spicy Kick: Add a pinch of cayenne pepper or a dash of hot sauce to the meat mixture for a spicy kick.
- Different Meats: Substitute the ground beef with ground turkey, ground chicken, or even cooked sausage.
FAQs (Frequently Asked Questions)
Q: Can I use puff pastry instead of pie crust?
A: Yes, you can! Puff pastry will create a flakier, richer pasty. Just be sure to adjust the baking time accordingly.
Q: Can I add gravy to the filling?
A: While you can add a small amount of gravy, be careful not to make the filling too wet. Excess moisture can lead to a soggy crust.
Q: My pasties are browning too quickly. What should I do?
A: Tent the pasties loosely with aluminum foil to prevent them from browning too much before the filling is heated through.
Q: Can I make these in an air fryer?
A: Yes, you can! Air fry at 350 degrees F (175 degrees C) for about 15-20 minutes, or until golden brown and heated through.
Q: Can I use dried herbs instead of fresh?
A: Absolutely. Use about 1 teaspoon of dried herbs for every tablespoon of fresh herbs called for in the recipe.
Final Thoughts
These Easy Pantry Pasties are a testament to the fact that deliciousness doesn’t always require fancy ingredients or complicated techniques. With a few pantry staples and a little creativity, you can whip up a warm, comforting, and satisfying meal that’s perfect for a weeknight dinner or a cozy weekend lunch. So, gather your ingredients, preheat your oven, and get ready to enjoy a taste of homemade goodness. And don’t forget to share your creations and any fun variations you try – I’d love to hear about them! Perhaps you’ll discover a new family favorite, just like Nana Elsie did during that unforgettable blizzard.