
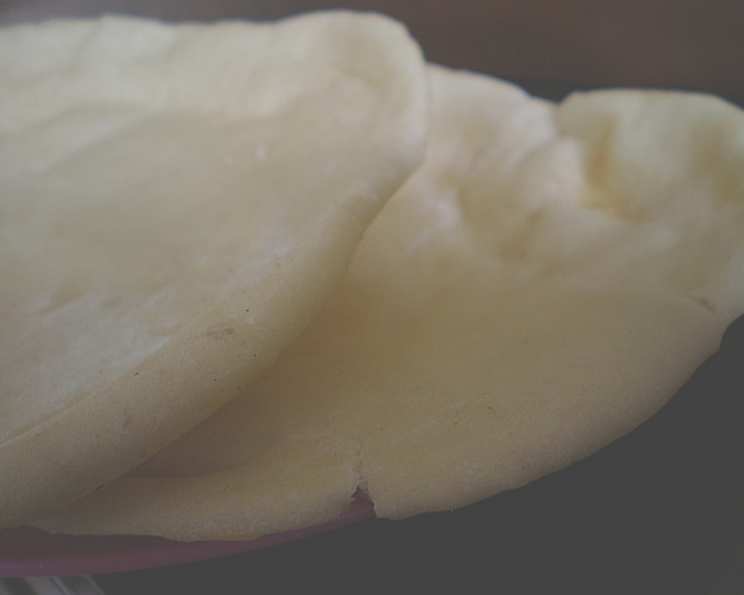
Homemade Happiness: The Easiest Pita Bread You’ll Ever Make
The scent of freshly baked bread has always been my culinary comfort zone. Even as a child, I’d sneak into my grandmother’s kitchen, mesmerized as she transformed simple ingredients into golden loaves. The warmth radiating from the oven, the subtle sweetness of the dough – it was pure magic. While her specialty was crusty sourdough, I remember one afternoon, she decided to try something new: pita bread. The excitement of watching those flat discs puff up into perfect pockets filled the kitchen, and the taste of them, warm and slathered with hummus, is a memory I cherish to this day. This recipe brings back that magic, and is easy enough for even a beginner baker.
Recipe Overview
- Prep Time: 3 hours 4 minutes
- Cook Time: 6-12 minutes
- Total Time: 3 hours 16 minutes
- Servings: 16-32
- Yield: 16-32 rounds
- Dietary Type: Vegan
Ingredients
- 2 cups warm water
- 1 teaspoon sugar
- 1 package dry yeast (or 1 tablespoon)
- 5 cups all-purpose flour, plus more for dusting
- ¼ cup vegetable oil
- 2 teaspoons salt
Equipment Needed
- Mixing bowl
- Electric mixer
- Wooden spoon
- Plastic wrap
- Lightly greased bowl
- Baking sheet
- Metal spatula
- Damp tea towels or cooling rack
Instructions
-
In a mixing bowl, combine the warm water and sugar. Sprinkle the dry yeast over the mixture and let it stand for 10 minutes, or until the yeast is dissolved and creamy. This step is crucial for activating the yeast and ensuring your pita bread rises properly.
-
Using an electric mixer, beat in 2 cups of the flour, the vegetable oil, and the salt. Beat for about 3 minutes, or until the mixture is smooth. Remember to scrape down the sides of the bowl from time to time to ensure all ingredients are incorporated evenly.
-
With a wooden spoon, beat in enough of the remaining flour to form a stiff dough. You might not need all 5 cups, so add the flour gradually until the dough comes together.
-
Turn the dough out onto a lightly floured surface and knead for about 10 minutes, or until the dough is smooth and elastic. Kneading develops the gluten in the flour, which gives the pita bread its characteristic texture. If the dough is too sticky, add a little more flour.
-
Place the dough in a lightly greased bowl, turning it to coat all over. This prevents the dough from drying out during the rising process.
-
Cover the bowl with plastic wrap and let it rise in a warm place for 1 to 1 1/2 hours, or until doubled in bulk. This is where the magic happens! The yeast ferments, producing carbon dioxide that makes the dough rise.
-
Divide the dough into 16 or 32 pieces, depending on the desired size of your pita bread. 16 pieces will yield approximately 7-inch pitas, while 32 pieces will yield approximately 4-inch pitas.
-
On a lightly floured surface, roll each piece into 7-inch or 4-inch rounds, respectively. Aim for an even thickness to ensure even baking.
-
Cover the rolled-out rounds and let them rise for 15 minutes, or until slightly risen. This second rise helps create those beautiful pockets inside the pita bread.
-
Meanwhile, heat an ungreased baking sheet on the lowest rack in a 500-degree oven (240 degrees C). Preheating the baking sheet is essential for achieving the characteristic pita bread puff. The high heat creates steam that helps the dough rise quickly.
-
Using a floured metal spatula, quickly transfer 2 or 3 pita rounds to the heated baking sheet. Bake for 3 or 4 minutes, or until the pitas are puffed up and lightly golden around the edges. Keep a close eye on them, as they can burn easily at this high temperature.
-
Repeat with the remaining pita rounds.
-
Let the pitas cool between damp tea towels. This will help keep them soft and pliable. Alternatively, if you prefer crispier pitas, let them cool on racks.
-
The pitas will collapse and soften slightly as they cool, but the pocket will remain.
Expert Tips & Tricks
- For a deeper flavor, try using bread flour instead of all-purpose flour. Bread flour has a higher protein content, which results in a chewier texture.
- If you don’t have an electric mixer, you can knead the dough by hand from the start. Just be prepared for a bit more elbow grease!
- To ensure even cooking, rotate the baking sheet halfway through baking.
- If your oven doesn’t reach 500 degrees, preheat it to the highest temperature it can reach. The baking time might need to be slightly longer.
- For extra flavorful pita, brush with garlic infused oil before baking.
- Troubleshooting flat pitas: If your pitas aren’t puffing up, it could be due to several factors. Make sure your yeast is fresh and active. The dough should be elastic after kneading. Ensure your oven is hot enough, and the baking sheet is preheated. Avoid overcrowding the baking sheet, as this can lower the oven temperature and prevent proper puffing.
Serving & Storage Suggestions
Serve your homemade pita bread warm with your favorite dips, such as hummus, baba ghanoush, or tzatziki. They’re also perfect for filling with falafel, shawarma, or grilled vegetables. You can even use them to make delicious pita pizzas.
Store leftover pitas in a plastic bag at room temperature for up to 2 days, in the refrigerator for up to a week, or in the freezer for up to 1 month. To reheat, simply wrap the pita in a damp paper towel and microwave for a few seconds, or warm it in a dry skillet over medium heat. Frozen pitas can be thawed at room temperature or in the microwave before reheating.
Nutritional Information
Note: Nutritional information is an estimate and may vary based on specific ingredients and portion sizes.
| Nutrient | Amount per Serving (1 pita) | % Daily Value |
|---|---|---|
| Calories | 174.8 kcal | N/A |
| Calories from Fat | 34 g | 20% |
| Total Fat | 3.8 g | 5% |
| Saturated Fat | 0.5 g | 2% |
| Cholesterol | 0 mg | 0% |
| Sodium | 292.6 mg | 12% |
| Total Carbohydrate | 30.3 g | 10% |
| Dietary Fiber | 1.2 g | 4% |
| Sugars | 0.4 g | 1% |
| Protein | 4.2 g | 8% |
Variations & Substitutions
- Whole Wheat Pita: Substitute half or all of the all-purpose flour with whole wheat flour for a nuttier flavor and added fiber.
- Gluten-Free Pita: Use a gluten-free flour blend designed for bread making. You may need to add a binder like xanthan gum to improve the texture.
- Herb-Infused Pita: Add dried herbs like oregano, thyme, or rosemary to the dough for an aromatic twist.
- Garlic Pita: Brush the rolled-out rounds with garlic-infused olive oil before baking.
- Spiced Pita: Add a pinch of chili powder, cumin, or paprika to the dough for a warm, spicy flavor.
FAQs (Frequently Asked Questions)
Q: Why aren’t my pitas puffing up?
A: Several factors can prevent pitas from puffing, including using old yeast, not kneading the dough enough, not preheating the baking sheet sufficiently, or overcrowding the baking sheet. Ensure your yeast is fresh, the dough is elastic after kneading, and your oven is hot enough.
Q: Can I make the dough ahead of time?
A: Yes, you can prepare the dough ahead of time and store it in the refrigerator for up to 24 hours. Punch down the dough before refrigerating, and let it come to room temperature before rolling and baking.
Q: Can I freeze the pita bread?
A: Absolutely! Pita bread freezes well. Let the pitas cool completely, then store them in a freezer-safe bag for up to 1 month. Thaw at room temperature or in the microwave before reheating.
Q: How do I reheat pita bread?
A: Wrap the pita in a damp paper towel and microwave for a few seconds, or warm it in a dry skillet over medium heat. You can also toast it in a toaster or toaster oven.
Q: Can I use active dry yeast instead of instant yeast?
A: Yes, you can use active dry yeast. However, you’ll need to proof it in warm water with sugar for 10-15 minutes before adding it to the other ingredients.
Final Thoughts
There’s something truly satisfying about creating your own bread from scratch, and this pita bread recipe is the perfect place to start. The process is simple, the ingredients are readily available, and the results are delicious. So, gather your ingredients, preheat your oven, and get ready to experience the joy of homemade pita bread. Don’t hesitate to experiment with different flavors and variations to create your own signature pita. And, of course, share your creations with friends and family – they’ll be impressed by your culinary skills! Pair with your favorite Mediterranean dishes, like falafel or a fresh Greek salad, for a complete and satisfying meal. Enjoy the process, and happy baking!