
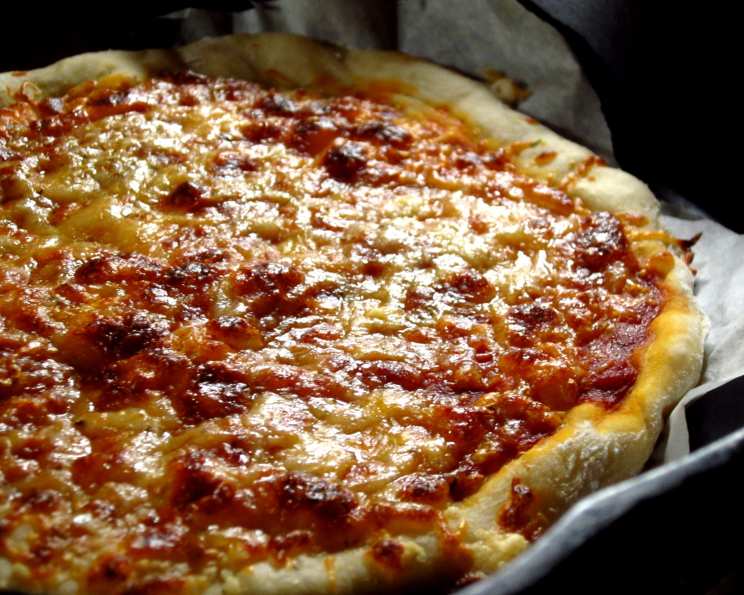
Easy Pizza Dough from Scratch- Fine Cooking Magazine
The aroma of baking pizza always transports me back to my childhood. I remember my grandmother’s tiny kitchen, filled with warmth and the yeasty scent of dough rising on the windowsill. She would let me ‘help’ by poking holes in the dough before slathering it with her homemade tomato sauce. Though my pizza-making skills have evolved since those days, the comforting feeling remains the same, especially with a recipe like this one that’s so simple and satisfying.
Recipe Overview:
- Prep Time: 25 minutes
- Cook Time: 8-25 minutes
- Total Time: 33 minutes – 2 days
- Servings: 2-6
- Yield: 2 large thin crusts
- Dietary Type: Vegetarian
Ingredients:
- 1 3⁄4 cups lukewarm water (about 100 degrees)
- 1 tablespoon extra virgin olive oil
- 2 teaspoons kosher salt
- 1 1⁄2 teaspoons dry yeast (fast-rising, or active dry)
- 1 1⁄2 teaspoons granulated sugar
- 4 1⁄2 cups unbleached all-purpose flour
Equipment Needed:
- 3-quart bowl or large lidded plastic food container
- Wooden spoon
- Plastic wrap
- Floured board
- Pizza stone or baking sheet
- Parchment paper (optional)
Instructions:
-
Pour the lukewarm water into a 3-quart bowl or a large lidded plastic food container.
-
Using a wooden spoon, mix in the olive oil, salt, yeast, and sugar. Don’t worry about dissolving all of the ingredients completely; just stir well to combine. Proofing the yeast is unnecessary if it’s fresh and within its expiration date.
-
Add the flour and mix until it’s uniformly moist. The dough will be quite wet and sticky at this stage, and that’s perfectly fine. No kneading is required for this easy pizza dough.
-
Cover the bowl with plastic wrap, or partially cover with the lid, leaving a small opening to allow gases to escape during rising. Let the dough rise for two hours at room temperature. The dough will fully expand and may even begin to collapse slightly during this time – don’t worry, it’s all part of the process!
-
Do not punch down the dough. It will collapse on its own and will shrink later while chilling in the refrigerator. It will never regain its height, and that’s OK. Chill the dough for at least 3 hours before using it. For best results, let it chill for a day. After 2 days, tightly cover the bowl to keep the surface of the dough from drying out. The dough can be kept in the refrigerator for up to 2 weeks.
-
After the initial refrigeration period, you can also tightly wrap the dough into 1/2 pound balls and freeze them for up to 3 weeks for longer storage.
-
When you’re ready to make your pizza, dust a board with flour. Place the dough on the floured surface, and roll and stretch it to your desired thickness and shape. If the dough continues to contract while stretching, cover it and let it rest for 10 to 15 minutes before stretching it again. This allows the gluten to relax, making it easier to work with.
-
Add your favorite pizza toppings. Be creative and don’t be afraid to experiment with different flavor combinations.
-
Bake the pizza in the bottom third of the oven using a pizza stone or baking sheet. I like to use parchment paper to prevent the dough from sticking to the stone or baking sheet, especially when making thin-crust pizzas. Remember to turn the pizza halfway through baking to ensure even cooking.
-
Depending on how thick or thin you like your pizza crusts, the amount of dough needed will vary. This recipe is great for making two large pizzas with very thin crusts, about 12×18 inches. Keep in mind that prep times are approximate and may vary based on your skill level and kitchen setup.
-
For thin crusts (approximately 1/16th of an inch thick), bake at 550°F (288°C) for 10 to 15 minutes.
-
For regular-style crusts (approximately 1/8 inch thick), bake at 550°F (288°C) for 8 to 10 minutes.
-
For a thick crust (approximately 1/2 inch thick), bake at 500°F (260°C) for 20 to 25 minutes.
-
Let the pizza sit for a minute or two before cutting into slices and serving. This allows the cheese to set slightly, preventing it from sliding off when you cut it.
Expert Tips & Tricks:
- For an even crispier crust, preheat your pizza stone or baking sheet in the oven for at least 30 minutes before baking.
- If you don’t have a pizza stone, you can use an inverted baking sheet to achieve a similar effect.
- Don’t overcrowd the pizza with toppings, as this can prevent the crust from cooking properly and result in a soggy pizza.
- Brush the crust with olive oil before adding toppings to create a barrier and prevent the sauce from soaking into the dough.
- If the top of the pizza is browning too quickly, you can tent it with foil to prevent it from burning.
Serving & Storage Suggestions:
Serve your homemade pizza immediately for the best flavor and texture. Leftover pizza can be stored in an airtight container in the refrigerator for up to 3 days. To reheat, you can use a toaster oven, regular oven, or even a skillet on the stovetop. For best results, reheat the pizza until the crust is crispy and the cheese is melted and bubbly. Avoid microwaving, as it can make the crust soggy.
Nutritional Information:
| Nutrient | Amount per Serving | % Daily Value |
|---|---|---|
| Calories | 1105 kcal | N/A |
| Calories from Fat | 87 g | 8% |
| Total Fat | 9.7 g | 14% |
| Saturated Fat | 1.4 g | 6% |
| Cholesterol | 0 mg | 0% |
| Sodium | 1757.7 mg | 73% |
| Total Carbohydrate | 219 g | 73% |
| Dietary Fiber | 8.4 g | 33% |
| Sugars | 3.9 g | 15% |
| Protein | 30.3 g | 60% |
Variations & Substitutions:
- Whole Wheat Crust: Substitute one cup of whole wheat flour for the same amount of all-purpose flour, and add 2 tablespoons of extra water. This will give the crust a nuttier flavor and slightly denser texture.
- Cornmeal Crust: Substitute 1 cup of stone-ground yellow cornmeal for the same amount of all-purpose flour and add 1 tablespoon of extra water. This will add a slightly gritty texture and a subtle corn flavor.
- Gluten-Free Crust: Use a high-quality gluten-free all-purpose flour blend. You may need to adjust the amount of water slightly depending on the specific blend you use.
- Herbed Crust: Add 1-2 tablespoons of dried herbs, such as oregano, basil, or thyme, to the dough when mixing the ingredients.
- Garlic Crust: Add 1-2 cloves of minced garlic to the dough when mixing the ingredients.
- Spicy Crust: Add 1/2 teaspoon of red pepper flakes to the dough when mixing the ingredients.
FAQs (Frequently Asked Questions):
Q: Can I use bread flour instead of all-purpose flour?
A: Yes, you can substitute bread flour for all-purpose flour. Bread flour has a higher protein content, which will result in a slightly chewier crust.
Q: How long can I keep the dough in the refrigerator?
A: The dough can be kept in the refrigerator for up to 2 weeks. After 2 days, tightly cover the bowl to prevent the surface of the dough from drying out.
Q: Can I freeze the pizza dough?
A: Yes, you can freeze the pizza dough. After the initial refrigeration period, tightly wrap the dough into 1/2 pound balls and freeze them for up to 3 weeks.
Q: Why is my pizza crust tough?
A: A tough pizza crust can be caused by over-kneading the dough or using too much flour. This recipe is designed to be no-knead, so it should result in a tender crust. Make sure you measure the flour accurately.
Q: My dough is too sticky; what should I do?
A: If your dough is too sticky, add flour, one tablespoon at a time, until it reaches the desired consistency. Keep in mind that this dough is meant to be on the wetter side, so don’t add too much flour.
Final Thoughts:
Making pizza dough from scratch is easier than you might think, and this recipe is proof of that! With just a few simple ingredients and a little patience, you can create a delicious and versatile dough that can be used for countless pizza variations. So gather your favorite toppings, preheat your oven, and get ready to enjoy a homemade pizza that’s far superior to anything you can order for delivery. Don’t hesitate to experiment with different flavors and toppings to create your own signature pizza. Share your creations with friends and family and enjoy the process of making something delicious from scratch. I’d love to hear your thoughts and see your pizza creations!