
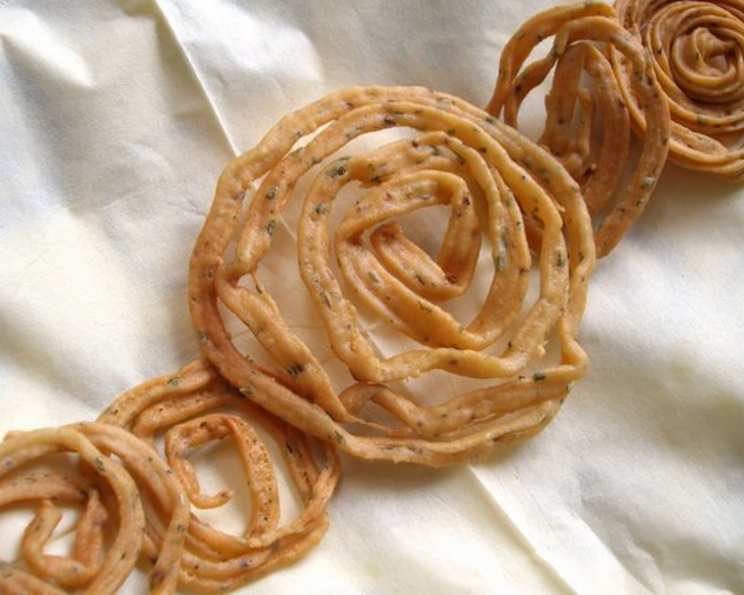
Easy Tasty Murukku: A Step-by-Step Guide
The aroma of freshly fried murukku instantly transports me back to my grandmother’s kitchen. I remember being a small child, mesmerized by the way she effortlessly swirled the dough into perfect spirals directly into the hot oil. The rhythmic sizzle, the golden hue deepening with each passing second – it was pure culinary magic. These crispy, savory snacks were a staple during festive occasions, and even now, the taste evokes a sense of warmth, comfort, and the irreplaceable joy of family gatherings.
Recipe Overview
- Prep Time: 15 minutes
- Cook Time: 12 minutes
- Total Time: 27 minutes
- Yields: 12 murukkus
- Serves: 3
- Dietary Type: Vegetarian
Ingredients
- 3 cups besan (gram flour)
- 1 cup rice flour
- 1 teaspoon cumin powder
- ¾ teaspoon chili powder
- ¾ teaspoon salt
- Oil, for deep frying
- Water, as needed
Equipment Needed
- Large mixing bowl
- Murukku mould (or icing syringe or plastic bag with a hole)
- Deep frying pan or wok
- Slotted spoon or spider
- Paper towels
Instructions
- In a large mixing bowl, combine the besan, rice flour, cumin powder, chili powder, and salt.
- Gradually add water to the dry ingredients, mixing continuously until a stiff, pliable dough forms. The dough should be similar in consistency to chapati dough – smooth and not too sticky. Add water a little at a time to avoid making the dough too soft.
- Heat oil in a deep frying pan or wok over medium-high heat. The oil is ready when a small piece of dough dropped into it sizzles immediately and rises to the surface.
- Load the murukku mould with a portion of the prepared dough. If you don’t have a murukku mould, you can use an icing syringe or even a sturdy plastic bag with a small hole cut in one corner.
- Hold the murukku mould (or makeshift piping device) directly over the hot oil and press the dough through it, creating spiral or ribbon-like shapes. Aim to make each murukku a manageable size for frying.
- Fry the murukku in batches, being careful not to overcrowd the pan. Overcrowding will lower the oil temperature and result in soggy murukku.
- Fry until the murukku turns golden brown on one side, then gently turn it over using a slotted spoon or spider.
- Continue frying until the other side is also golden brown and crispy. The total frying time for each batch should be around 2-3 minutes.
- Remove the fried murukku from the oil using a slotted spoon or spider and transfer it to a plate lined with paper towels to drain excess oil.
- Repeat steps 5-9 with the remaining dough.
- Allow the murukku to cool completely before serving or storing.
Expert Tips & Tricks
- Dough Consistency is Key: The consistency of the dough is crucial for achieving the perfect murukku. If the dough is too soft, the murukku will absorb too much oil and become soggy. If the dough is too stiff, it will be difficult to press through the mould and the murukku may break during frying.
- Oil Temperature Control: Maintaining the correct oil temperature is essential for even cooking. If the oil is not hot enough, the murukku will be greasy. If the oil is too hot, the murukku will burn on the outside while remaining uncooked on the inside.
- Achieving Extra Crispness: For extra crispy murukku, add a tablespoon or two of hot oil to the dough while mixing. This will create a flakier texture.
- Flavor Enhancement: Experiment with different spices to customize the flavor of your murukku. You can add a pinch of asafoetida (hing), black pepper powder, or sesame seeds to the dough for added depth of flavor.
- Preventing Breakage: If your murukku are breaking while frying, it could be due to the dough being too dry. Add a teaspoon of water to the dough, mix well, and try again.
- Butter Addition: To make the murukku richer, you can add 2 tablespoons of melted butter to the dough.
Serving & Storage Suggestions
Serve the murukku as a snack with tea or coffee, or as part of a larger Indian meal. They are delicious on their own, or with chutneys or dips.
Store the cooled murukku in an airtight container at room temperature. Properly stored, they will stay fresh and crispy for up to 3 weeks. Ensure that the murukku are completely cooled before storing to prevent them from becoming soggy. Do not refrigerate.
Nutritional Information
| Nutrient | Amount per Serving | % Daily Value |
|---|---|---|
| Calories | 553.5 kcal | N/A |
| Calories from Fat | 64g | 12% |
| Total Fat | 7.2 g | 11% |
| Saturated Fat | 0.9 g | 4% |
| Cholesterol | 0 mg | 0% |
| Sodium | 648 mg | 26% |
| Total Carbohydrate | 96.1 g | 32% |
| Dietary Fiber | 11.5 g | 46% |
| Sugars | 10.1 g | 40% |
| Protein | 23.9 g | 47% |
Variations & Substitutions
- Gluten-Free Murukku: Ensure that the rice flour is certified gluten-free and use a gluten-free binding agent if needed to improve dough consistency.
- Spicy Murukku: Increase the amount of chili powder or add a pinch of cayenne pepper for a spicier kick.
- Herb-Infused Murukku: Add finely chopped fresh herbs like cilantro or curry leaves to the dough for a fragrant twist.
- Lentil Flour Blend: You can substitute some of the besan with other lentil flours like urad dal flour for a different flavor profile.
FAQs (Frequently Asked Questions)
Q: How do I prevent the murukku from becoming too hard?
A: Over-frying can make the murukku hard. Make sure to fry them until golden brown, but not too dark. Also, ensure the dough isn’t too stiff.
Q: Can I use a different type of oil for frying?
A: Yes, you can use other neutral-flavored oils like sunflower oil or canola oil. Avoid oils with strong flavors like olive oil.
Q: My murukku are breaking apart in the oil. What am I doing wrong?
A: The dough is likely too dry. Add a teaspoon of water at a time until the dough is more pliable.
Q: How can I make the murukku less oily?
A: Make sure the oil is hot enough before frying. Also, drain the fried murukku thoroughly on paper towels.
Q: Can I bake the murukku instead of frying them?
A: While frying is traditional, you can try baking them at 350°F (175°C) for about 20-25 minutes, flipping halfway through, but the texture will be different from the traditional fried version.
Final Thoughts
Now that you have all the tips and tricks, I wholeheartedly encourage you to try making these delightful murukku at home. It’s a rewarding experience that brings the flavors of India to your kitchen. Don’t be afraid to experiment with different spice combinations to create your own signature version. And most importantly, share your creations with loved ones – because food always tastes better when enjoyed together! I’d love to hear about your experiences and any variations you come up with, so please feel free to share your feedback. These crispy treats pair perfectly with a steaming cup of chai, creating a truly comforting and satisfying snack.