
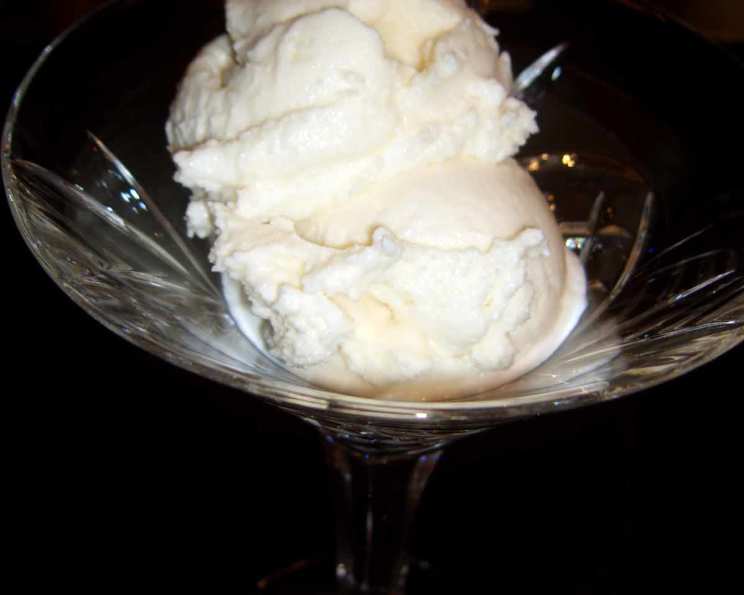
The Purest Pleasure: Homemade Vanilla Ice Cream, Simplified
I can still remember the summer my grandfather bought an old-fashioned, hand-crank ice cream maker. It was a behemoth of wood and metal, a stark contrast to the sleek appliances in my grandmother’s modern kitchen. But the magic it produced was undeniable. The rhythmic churning, the anticipation as the mixture thickened, and finally, that first spoonful of simple, creamy vanilla ice cream—it was pure joy, a taste of summer itself. I always thought making ice cream was complicated, but with this recipe, you’ll see how easy it is to capture that same magic in your own kitchen.
Recipe Overview
- Prep Time: 20 minutes
- Cook Time: 0 minutes
- Total Time: 1 hour 20 minutes (includes freezing time)
- Servings: 5
- Yield: About 1.5 quarts
- Dietary Type: Vegetarian
Ingredients
- 4 eggs
- 2 1⁄2 cups sugar
- 7 cups milk
- 3 cups heavy cream
- 2 1⁄2 tablespoons vanilla extract (use a good quality extract for the best flavor)
- 1⁄2 teaspoon salt
Equipment Needed
- Large mixing bowl
- Whisk
- 5-quart ice cream maker
Instructions
- In a large mixing bowl, beat the eggs until they are light and frothy. This incorporates air and helps create a smoother ice cream texture.
- Gradually add the sugar to the beaten eggs, beating continuously until the mixture becomes thick and pale yellow. This step is crucial for dissolving the sugar properly, which prevents a grainy texture in the final product.
- Now, add the milk, heavy cream, vanilla extract, and salt to the egg and sugar mixture. Mix everything thoroughly until all the ingredients are well combined and the mixture is homogenous. The salt enhances the sweetness and balances the flavors.
- Pour the mixture into your 5-quart ice cream maker. Follow the manufacturer’s instructions for your specific machine.
- Freeze according to the ice cream maker’s instructions. This usually takes about 20-40 minutes, depending on the machine. The ice cream is ready when it has reached a soft-serve consistency.
- Once the ice cream has reached the desired consistency, you can either enjoy it immediately for a delightful soft-serve treat or transfer it to an airtight container and freeze it for a few hours to allow it to firm up further.
Expert Tips & Tricks
- Chill your ingredients: Before you start, make sure your milk and heavy cream are well-chilled. This will help the ice cream freeze faster and result in a smoother texture. You can even chill your mixing bowl!
- Don’t overbeat the eggs: While it’s important to beat the eggs until light, avoid overbeating them. Overbeating can incorporate too much air, which can lead to a less dense ice cream.
- Patience is key: Resist the temptation to check on the ice cream too frequently while it’s freezing. Opening the ice cream maker can disrupt the freezing process and affect the final texture.
- Boozy Boost: For a grown-up twist, try adding a tablespoon or two of your favorite liqueur, such as bourbon or rum, to the mixture before freezing. Be careful not to add too much liquid, as it can affect the freezing process.
- Vanilla Bean Infusion: For an even more intense vanilla flavor, scrape the seeds from one vanilla bean into the milk and cream mixture and steep for 30 minutes before using. Remove the pod before adding the other ingredients.
Serving & Storage Suggestions
This vanilla ice cream is incredibly versatile and can be enjoyed in so many ways. Serve it in a classic waffle cone, alongside a warm brownie or slice of pie, or as the perfect complement to a fruit crumble. For a simple yet elegant dessert, try drizzling it with chocolate sauce or sprinkling it with chopped nuts.
To store leftover ice cream, transfer it to an airtight container and freeze for up to 2 weeks. To prevent ice crystals from forming, press a piece of plastic wrap directly onto the surface of the ice cream before sealing the container. If the ice cream becomes too hard, let it soften at room temperature for a few minutes before scooping. Remember that homemade ice cream doesn’t have the same stabilizers as store-bought varieties, so it’s best enjoyed sooner rather than later.
Nutritional Information
(Estimates based on approximately one serving)
| Nutrient | Amount per Serving | % Daily Value |
|---|---|---|
| Calories | 850 kcal | 43% |
| Total Fat | 48 g | 74% |
| Saturated Fat | 29 g | 145% |
| Cholesterol | 290 mg | 97% |
| Sodium | 357 mg | 15% |
| Total Carbohydrate | 85 g | 28% |
| Dietary Fiber | 0 g | 0% |
| Sugars | 71 g | – |
| Protein | 13 g | 26% |
Note: Nutritional information is an estimate and may vary based on specific ingredients and serving sizes.
Variations & Substitutions
- Chocolate Chunk: Add chopped dark chocolate or chocolate chips to the ice cream mixture just before freezing.
- Strawberry Swirl: Puree fresh strawberries and swirl them into the ice cream after it has been partially frozen.
- Coffee Infusion: Add a few tablespoons of strong brewed coffee or instant espresso powder to the milk and cream mixture for a coffee-flavored ice cream.
- Dairy-Free Version: While this recipe relies on dairy, you could experiment with full-fat coconut milk and plant-based cream alternatives. Note that the texture and flavor will be different.
- Peanut Butter Cup: Swirl in peanut butter and chopped peanut butter cups after the ice cream has been partially frozen.
FAQs (Frequently Asked Questions)
Q: Can I use less sugar?
A: You can reduce the sugar slightly, but remember that sugar contributes to the texture and prevents the ice cream from becoming too icy. Reducing it too much may affect the final result.
Q: What if I don’t have an ice cream maker?
A: While an ice cream maker is ideal, you can try the “no-churn” method. Freeze the mixture in a shallow container and whisk vigorously every 30 minutes for a few hours to break up ice crystals.
Q: How can I prevent ice crystals from forming?
A: Ensuring your ingredients are cold and freezing the ice cream quickly helps minimize ice crystal formation. Also, using an airtight container for storage is essential.
Q: Can I use a different extract instead of vanilla?
A: Absolutely! Experiment with almond extract, peppermint extract, or even a combination of extracts to create unique flavor profiles.
Q: My ice cream is too soft. What can I do?
A: Transfer the ice cream to an airtight container and freeze for a few more hours to allow it to firm up further. The consistency will improve with additional freezing time.
Final Thoughts
Making homemade ice cream might seem like a special occasion treat, but with this easy vanilla recipe, it can become a simple pleasure you enjoy anytime. The beauty of it lies in its simplicity and the endless possibilities for customization. Don’t be afraid to experiment with different flavors and additions to create your own signature ice cream. Gather your family, crank up the ice cream maker, and savor the sweet taste of homemade goodness. I hope this recipe brings you as much joy as it has brought me over the years. And don’t forget to share your creations and feedback – I’d love to hear what you come up with!