
Easy White Bread for Large 13″ Pullman Pan
The scent of baking bread, warm and yeasty, has always been my happy place. I remember as a child, my grandmother would let me stand on a stool next to her as she kneaded dough. The rhythmic push and pull, the way the dough transformed under her hands – it was pure magic. Though her recipe was a closely guarded secret, this simple white bread brings back those cherished memories with every slice, especially when baked in a beautiful Pullman pan, yielding perfectly square, golden-crusted loaves.
Recipe Overview
- Prep Time: 2 hours
- Cook Time: 40 minutes
- Total Time: 3 hours 40 minutes
- Servings: 20
- Yield: 1 long loaf
- Dietary Type: Vegetarian
Ingredients
- 1 1⁄3 – 1 ½ cups water, lukewarm
- 1 – 2 tablespoons honey
- 2 tablespoons butter, softened
- 4 cups all-purpose flour
- 1 ¾ teaspoons salt
- ½ cup non-fat powdered milk
- 2 ¼ teaspoons yeast
Equipment Needed
- Bread Machine (optional)
- 13-14″ Pullman Pan with Lid
- Measuring cups and spoons
- Instant-read thermometer
- Cooling rack
- Butter brush (optional)
Instructions
- If using a bread machine, select the Dough setting.
- Add ingredients to the bread machine in the order recommended by your machine’s manufacturer. Typically, this is liquids first, followed by dry ingredients, with the yeast added last.
- Allow the dough to rise in the bread machine until it has doubled in size, approximately 90 minutes.
- While the dough is rising, generously butter your Pullman pan and its lid. Ensure all corners and edges are well-greased to prevent sticking.
- Once the dough has doubled, remove it from the bread machine. Lightly grease your hands to prevent the dough from sticking.
- Gently shape the dough into a log, approximately 12-13 inches long, to fit snugly into the Pullman pan.
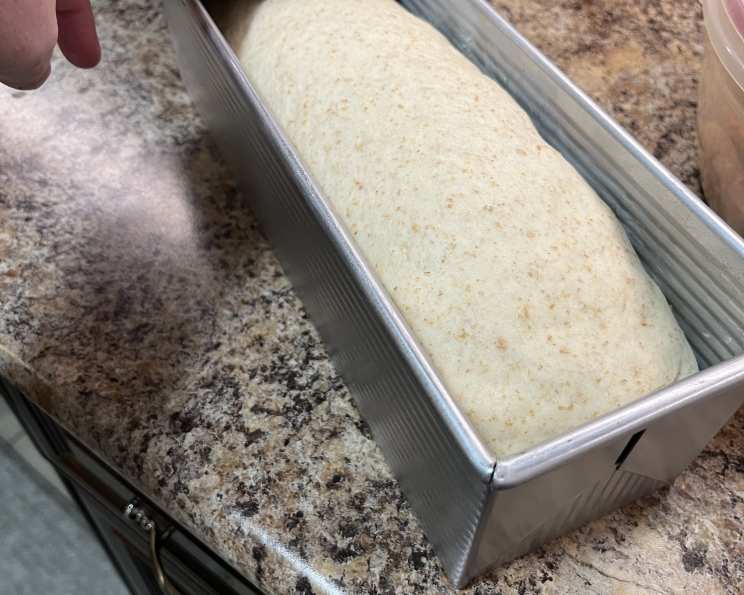
- Place the dough log into the prepared pan, pressing the ends into the corners and along the pan edges to ensure an even shape.
- Position the lid on the Pullman pan, leaving it open about an inch. This allows you to monitor the dough’s rise during the second proofing.
- Let the dough rise again, this time until it reaches about 2/3 full in the pan, or approximately 1 ½ inches from the top of the pan. This should take about 60 minutes.
- Near the end of the rising time, preheat your oven to 350°F (175°C).
- Once the dough has sufficiently risen, fully close the lid of the Pullman pan.
- Bake for 25 minutes with the lid on.
- Carefully remove the lid and bake for an additional 15-20 minutes, or until the crust is golden brown and reaches your desired color. Keep a close eye on the bread during this stage to prevent burning.
- To ensure the bread is fully baked, use an instant-read thermometer to check the internal temperature. It should register 190°F (88°C).
- Remove the baked bread from the Pullman pan and place it on a cooling rack.
- If desired, brush the crust with melted butter for a softer, more tender crust. This is optional, but it adds a lovely richness and sheen.
- Allow the bread to cool completely before slicing. This is crucial, as slicing warm bread can result in a gummy texture.
- Store the cooled bread in an airtight bag to maintain its freshness.
Expert Tips & Tricks
- Water Temperature is Key: Lukewarm water (around 105-115°F or 40-46°C) is essential for activating the yeast. Too hot, and you risk killing the yeast; too cold, and it won’t activate properly.
- Dough Consistency: The amount of water needed may vary slightly depending on the humidity and the type of flour used. Start with 1 1/3 cups and gradually add more, a tablespoon at a time, until the dough forms a smooth, slightly sticky ball.
- Pullman Pan Buttering: Don’t skimp on the buttering! A well-greased pan is crucial for easy release and prevents the bread from sticking. Consider using baking spray with flour if you are concerned.
- Second Rise Monitoring: Keep a close eye on the second rise. Over-proofing can lead to a deflated loaf in the oven. If the dough seems to be rising too quickly, you can gently deflate it and allow it to rise again.
- Crust Browning: If the crust is browning too quickly during the final 15-20 minutes of baking, tent the loaf with foil to prevent burning.
- No Bread Machine?: If you do not have a bread machine, you can mix the dough by hand or using a stand mixer with a dough hook. Knead for 8-10 minutes until smooth and elastic, then follow the remaining steps for rising and baking.
Serving & Storage Suggestions
This white bread is incredibly versatile. It’s perfect for sandwiches, toast, or simply enjoyed with a pat of butter and a sprinkle of sea salt. It also makes fantastic grilled cheese sandwiches and is an excellent base for French toast.
Store the cooled bread in an airtight bag at room temperature for up to 3 days. For longer storage, you can freeze the loaf for up to 2 months. Slice the bread before freezing for easier portioning. To reheat, thaw at room temperature and warm in a toaster or oven.
Nutritional Information
| Nutrient | Amount per Serving | % Daily Value |
|---|---|---|
| Calories | 117 kcal | N/A |
| Total Fat | 1.4 g | 2% |
| Saturated Fat | 0.8 g | 3% |
| Cholesterol | 3.6 mg | 1% |
| Sodium | 231 mg | 9% |
| Total Carbohydrate | 21.7 g | 7% |
| Dietary Fiber | 0.8 g | 3% |
| Sugars | 2.5 g | N/A |
| Protein | 3.9 g | 7% |
Note: Nutritional information is an estimate and may vary based on specific ingredients and portion sizes.
Variations & Substitutions
- Whole Wheat Bread: Substitute up to half of the all-purpose flour with whole wheat flour for a nuttier flavor and added fiber.
- Herb Infusion: Add 1-2 tablespoons of dried herbs like rosemary, thyme, or oregano to the dough for a savory twist.
- Sweet Bread: Increase the honey to ¼ cup for a sweeter loaf, perfect for breakfast or dessert. You can also add a teaspoon of vanilla extract.
- Dairy-Free: Substitute the butter with a plant-based butter alternative and use a non-dairy milk powder.
- Sourdough Variation: Add 1/2 cup of active sourdough starter. You may need to adjust the water content to achieve a good dough consistency.
FAQs (Frequently Asked Questions)
Q: Can I use bread flour instead of all-purpose flour?
A: Yes, you can use bread flour for a slightly chewier texture. You may need to adjust the water content slightly.
Q: What if I don’t have a Pullman pan?
A: If you don’t have a Pullman pan, you can use two 8″ loaf pans. Divide the dough in half and bake each loaf separately. The baking time may need to be adjusted.
Q: Can I make this recipe without a bread machine?
A: Absolutely! You can mix and knead the dough by hand or with a stand mixer. Knead until smooth and elastic before the first rise.
Q: How do I prevent the bread from sticking to the pan?
A: Generously butter the pan, paying close attention to the corners and edges. You can also use baking spray with flour for added insurance.
Q: My bread is browning too quickly. What should I do?
A: Tent the loaf with foil during the final 15-20 minutes of baking to prevent burning.
Final Thoughts
There’s something truly satisfying about baking your own bread, and this recipe makes it easy to create a beautiful and delicious loaf in a Pullman pan. Don’t be intimidated – with a few simple steps, you can enjoy the aroma and taste of homemade white bread. Feel free to experiment with variations and find what you enjoy. I encourage you to give this recipe a try and share your creations. Imagine this warm bread alongside a comforting bowl of soup or stacked high with your favorite deli meats. Happy baking!