
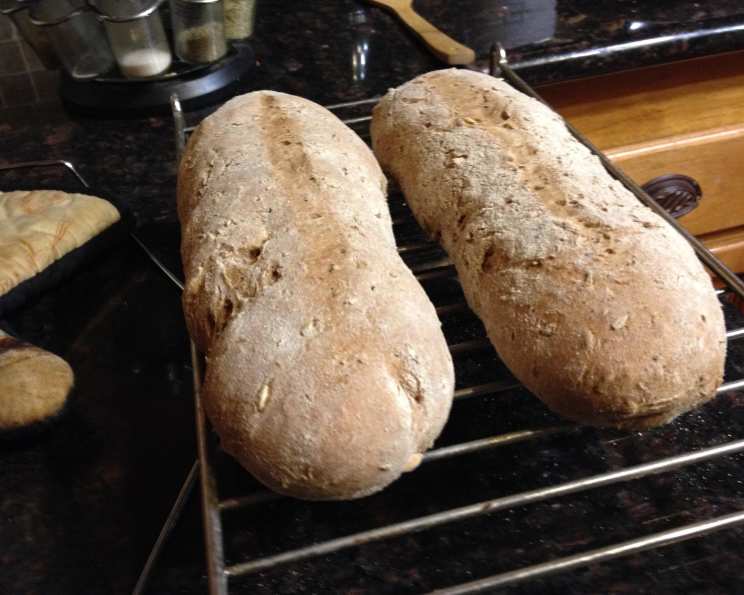
Easy Whole Wheat Malted Barley Bread
I remember the first time I truly appreciated the magic of homemade bread. It wasn’t the perfectly shaped loaves from fancy bakeries, but a slightly lopsided, deeply fragrant loaf my friend Sarah made after discovering her love for baking during a particularly harsh winter. The warmth that filled her tiny apartment was intoxicating, and the simple act of sharing that bread, slathered with homemade jam, felt like the ultimate act of comfort and connection. This whole wheat malted barley bread brings me back to that moment every time; it’s a reminder that even imperfect creations, made with love and simple ingredients, can be profoundly satisfying.
Recipe Overview
- Prep Time: 6 hours 5 minutes
- Cook Time: 25-35 minutes
- Total Time: 6 hours 30-40 minutes
- Servings: 16
- Yield: 2 small loaves
- Dietary Type: Vegetarian
Ingredients
- 500 g King Arthur Whole Wheat Flour
- 100 g Whole Milk
- 200 g Warm Water (divided into two 100g portions)
- 40 g Coconut Oil
- 10 g Salt
- 160 g Malted Barley
- 1 tablespoon Yeast
- 1 teaspoon Sugar
Equipment Needed
- Two large mixing bowls
- Measuring cups and spoons
- Kneading surface
- Oven
- Baking stone (optional, but recommended)
- Cooling rack
Instructions
- Begin by proofing the yeast. In a small bowl, combine 100 g of warm water with 1 teaspoon of sugar. Sprinkle 1 tablespoon of yeast over the top. Gently stir and set aside in a lukewarm place for 15 minutes. The mixture is ready when it becomes frothy, indicating that the yeast is active. If your kitchen is cool, consider placing the bowl on a heating pad to encourage the yeast to proof properly.
- While the yeast is proofing, divide the remaining ingredients into two equal portions. In two separate large mixing bowls, add half of the whole wheat flour, whole milk, coconut oil, salt, and malted barley to each bowl.
- Once the yeast mixture is ready, add it to one of the bowls. To the other bowl, add the remaining 100 g of warm water.
- Knead the ingredients in each bowl separately until you have two evenly mixed dough balls. The dough may feel slightly sticky, but resist the urge to add too much flour, as this can result in a dry bread.
- Clean and lightly oil the two mixing bowls. Place each dough ball back into its respective bowl, turning to coat with the oil.
- Cover the bowls and let the dough rise for 4 hours in a warm place. Again, a heating pad can be helpful if your kitchen is cool. The dough should approximately double in size.
- After the first rise, gently remove each dough ball from its bowl and knead separately for a few minutes to release some of the trapped air. Replace the dough back into the oiled bowls.
- Let the dough rise again for another hour.
- After the second rise, remove both dough balls from their bowls and combine them on a lightly floured surface. Knead the two doughs together for about 5 minutes until they are well combined.
- Allow the combined dough to rise for a final hour. If you prefer a more pronounced sourdough flavor, you can extend this final rise for several hours, periodically tasting a small pinch of the dough to monitor the flavor development.
- Preheat your oven to the appropriate temperature. While the recipe does not specify a temperature, a typical bread baking temperature is 375°F (190°C).
- Divide the dough into two equal portions and shape each portion into a long loaf.
- Place the loaves on a baking sheet or, ideally, on a preheated baking stone for a crispier crust.
- Bake in the preheated oven for 25-35 minutes, or until the loaves are golden brown and sound hollow when tapped on the bottom. It’s crucial not to overcook the bread, as this can result in a dry and crumbly texture.
- Remove the loaves from the oven and transfer them to a cooling rack. Allow the bread to cool completely before slicing.
Expert Tips & Tricks
- Warmth is Key: Yeast thrives in warm environments. Use a heating pad or place the dough in a slightly warmed oven (turned off!) to encourage rising.
- Don’t Overknead: Overkneading can make the bread tough. Knead until the dough is smooth and elastic but not overly firm.
- Baking Stone Advantage: A baking stone helps to distribute heat evenly and create a crispier crust. If you don’t have one, a preheated baking sheet works well too.
- Scoring the Loaves: Before baking, score the tops of the loaves with a sharp knife. This helps control how the bread expands in the oven and prevents cracking.
- Hydration Levels: Adjust the water slightly depending on the humidity and the flour’s absorbency. The dough should be slightly tacky but not overly sticky.
Serving & Storage Suggestions
This whole wheat malted barley bread is delicious served in a variety of ways. Enjoy it sliced and toasted for breakfast, as a sandwich bread for lunch, or as a hearty accompaniment to soups and stews. For a truly special treat, serve it warm with a generous smear of butter or homemade jam.
To store the bread, wrap it tightly in plastic wrap or place it in an airtight container. At room temperature, it will stay fresh for 2-3 days. For longer storage, slice the bread and freeze it for up to 2 months. To reheat, simply toast the frozen slices or warm them in a low oven.
Nutritional Information
| Nutrient | Amount per Serving | % Daily Value |
|---|---|---|
| Calories | 170 kcal | N/A |
| Calories from Fat | 33 g | 20% |
| Total Fat | 3.8 g | 5% |
| Saturated Fat | 2.5 g | 12% |
| Cholesterol | 0.6 mg | 0% |
| Sodium | 247.5 mg | 10% |
| Total Carbohydrate | 30.6 g | 10% |
| Dietary Fiber | 5.3 g | 21% |
| Sugars | 0.8 g | 3% |
| Protein | 5.9 g | 11% |
Variations & Substitutions
- Spelt Flour: Substitute some or all of the whole wheat flour with spelt flour for a slightly sweeter and nuttier flavor.
- Different Oils: Experiment with other oils, such as olive oil or avocado oil, in place of coconut oil. Keep in mind that the flavor profile of the bread will change slightly.
- Sweeteners: Instead of sugar, you could use honey or maple syrup.
- Seeds and Nuts: Add seeds (sunflower, pumpkin, sesame) or chopped nuts (walnuts, pecans) to the dough for added texture and flavor.
- Herbs: Incorporate fresh or dried herbs, such as rosemary, thyme, or oregano, for a savory twist.
FAQs (Frequently Asked Questions)
Q: Why is it important to proof the yeast?
A: Proofing the yeast ensures that it is alive and active, which is essential for the bread to rise properly. If the yeast doesn’t froth, it may be old or inactive, and you’ll need to use fresh yeast.
Q: Can I use a stand mixer instead of kneading by hand?
A: Yes, you can use a stand mixer with a dough hook attachment. Knead the dough on low speed until it forms a smooth, elastic ball.
Q: How do I know when the bread is done baking?
A: The bread is done when it is golden brown and sounds hollow when tapped on the bottom. An internal temperature of 200-210°F (93-99°C) indicates doneness.
Q: What if my dough doesn’t rise properly?
A: Several factors can affect the rising process, including the temperature of your kitchen, the age of the yeast, and the amount of moisture in the dough. Ensure your yeast is fresh, your kitchen is warm, and adjust the amount of water as needed.
Q: Can I freeze this bread?
A: Yes, this bread freezes well. Slice the cooled bread and wrap it tightly in plastic wrap or place it in a freezer-safe bag. It can be stored in the freezer for up to 2 months.
Final Thoughts
I hope this recipe inspires you to embark on your own bread-baking journey! There’s something truly special about creating a loaf of bread from scratch, and the aroma that fills your home as it bakes is simply irresistible. Don’t be afraid to experiment with variations and substitutions to make this recipe your own. And, most importantly, have fun! Share your creations with friends and family and enjoy the simple pleasure of homemade bread.