
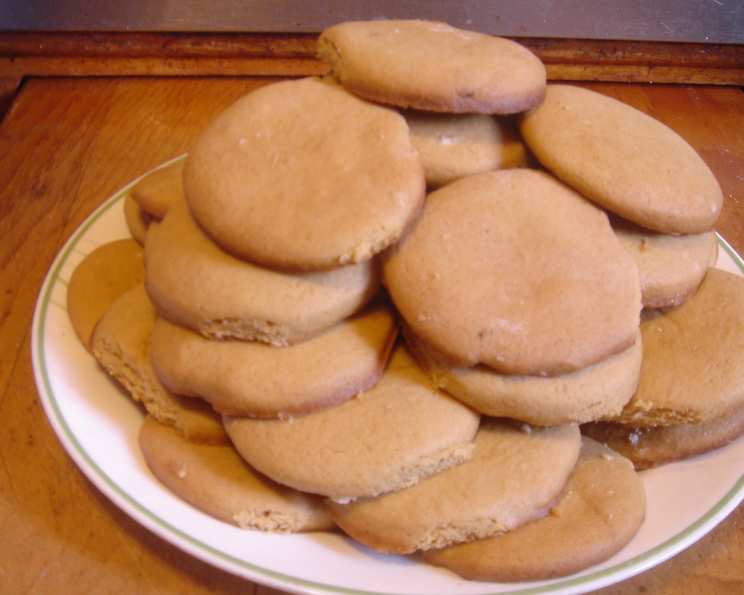
Edenton Tea Party Cakes: A Taste of History
The scent of brown sugar always transports me back to childhood, baking alongside my grandmother. She had a knack for imbuing every creation with a story, a little bit of history baked right in. These Edenton Tea Party Cakes evoke that same feeling. Simple, unassuming, yet carrying within them a whisper of rebellion and the spirit of those courageous women who stood up for their beliefs. These cookies aren’t just a sweet treat; they’re a tangible connection to a pivotal moment in American history.
Recipe Overview
- Prep Time: 30 minutes
- Cook Time: 5-8 minutes per batch (total time varies)
- Total Time: Several hours (including chilling)
- Yield: Varies depending on cookie size
- Dietary Type: Not specified
Ingredients
- 3 ½ cups flour
- 1 teaspoon vanilla
- 1 teaspoon baking soda
- 2 cups brown sugar
- ½ teaspoon salt
- 3 eggs
- ¾ cup butter (softened)
Equipment Needed
- Large mixing bowl
- Sifter
- Measuring cups and spoons
- Wax paper
- Rolling pin
- Cookie cutters
- Greased cookie sheet
Instructions
- Begin by sifting together the flour, baking soda, and salt in a large mixing bowl. This ensures a light and even distribution of the leavening agent, resulting in a more tender cookie. Set this dry mixture aside for later.
- In a separate bowl, cream together the butter and vanilla until the mixture is light and fluffy. This step is crucial for achieving a delicate texture. Make sure your butter is properly softened; it should be pliable but not melted.
- Gradually add the brown sugar, a little at a time, to the butter mixture, while continuing to cream everything together. The goal is to fully incorporate the sugar and create a smooth, uniform consistency. Be patient and don’t rush this step.
- Beat in the eggs, one at a time, making sure each egg is fully incorporated before adding the next. This helps to emulsify the mixture and contributes to the cookie’s structure.
- Gradually stir in the flour mixture into the wet ingredients until just combined. Be careful not to overmix, as this can develop the gluten in the flour and result in a tough cookie. Mix until everything is just incorporated.
- Divide the dough in half, wrap each half in wax paper, and chill in the refrigerator for several hours. This chilling period is essential. It allows the gluten to relax, making the dough easier to roll out, and it also prevents the cookies from spreading too much during baking.
- Once the dough is thoroughly chilled, preheat your oven to 400°F (200°C). Make sure your oven rack is positioned in the center for even baking.
- Lightly grease a cookie sheet to prevent the cookies from sticking. You can also line the baking sheet with parchment paper for even easier cleanup.
- On a lightly floured surface, roll out one portion of the chilled dough to your desired thickness (about ¼ inch is ideal).
- Cut out the cookies using your favorite cookie cutters. Get creative and have fun with different shapes!
- Carefully transfer the cut-out cookies to the prepared cookie sheet, leaving a little space between each one to allow for even baking.
- Bake in the preheated oven for 5-8 minutes, or until the edges of the cookies are lightly golden brown. Keep a close eye on them, as baking times can vary depending on your oven.
- Remove the cookie sheet from the oven and let the cookies cool on the baking sheet for a few minutes before transferring them to a wire rack to cool completely.
Expert Tips & Tricks
- Brown Butter Boost: For an even richer flavor, try browning the butter before creaming it with the sugar. Simply melt the butter in a saucepan over medium heat, swirling occasionally, until it turns a nutty brown color. Let it cool slightly before using.
- Even Chilling: To ensure the dough chills evenly, flatten it into a disc before wrapping it in wax paper. This will help it cool down more quickly and consistently.
- Cookie Cutter Magic: Dip your cookie cutters in flour before each use to prevent the dough from sticking.
- Baking Sheet Rotation: If your oven tends to bake unevenly, rotate the cookie sheet halfway through the baking time for consistent results.
- Spice it Up: Add a pinch of ground cinnamon, nutmeg, or cloves to the dry ingredients for a warm, comforting flavor.
- Egg Wash: For a glossy finish, brush the tops of the cookies with a beaten egg before baking.
Serving & Storage Suggestions
These Edenton Tea Party Cakes are perfect served with a warm cup of tea, just as they were back in 1774. They also make a delightful addition to a dessert platter or a thoughtful homemade gift.
- Storage: Store the cooled cookies in an airtight container at room temperature for up to 3 days. For longer storage, you can freeze them for up to 2 months.
- Freezing: To freeze, place the cooled cookies in a single layer on a baking sheet and freeze until solid. Then, transfer them to a freezer-safe container or bag.
- Reheating: If desired, you can reheat the frozen cookies in a preheated oven at 350°F (175°C) for a few minutes, or until warmed through.
Nutritional Information
Please note that these values are estimates and may vary based on specific ingredients and serving size.
| Nutrient | Amount per Serving | % Daily Value |
|---|---|---|
| Calories | 157 kcal | N/A |
| Total Fat | 5.2g | 8% |
| Saturated Fat | 3.1g | 15% |
| Cholesterol | 33.4mg | 11% |
| Sodium | 126.4mg | 5% |
| Total Carbohydrate | 25.5g | 8% |
| Dietary Fiber | 0.4g | 1% |
| Sugars | 14.2g | N/A |
| Protein | 2.2g | 4% |
Variations & Substitutions
- Gluten-Free: Substitute a gluten-free all-purpose flour blend for the regular flour. You may need to adjust the liquid slightly, so add it gradually until the dough comes together.
- Dairy-Free: Use a dairy-free butter substitute in place of the regular butter. Be sure to choose one that’s designed for baking.
- Spiced Tea Cakes: Add a teaspoon of your favorite tea leaves (such as Earl Grey or English Breakfast) to the dry ingredients for a subtle tea-infused flavor.
- Citrus Zest: Add the zest of an orange or lemon to the dough for a bright, refreshing twist.
- Nuts: Fold in some chopped nuts, such as pecans or walnuts, for added texture and flavor.
FAQs (Frequently Asked Questions)
Q: Why do I need to chill the dough?
A: Chilling the dough allows the gluten to relax, preventing the cookies from becoming tough. It also helps the cookies hold their shape during baking and prevents excessive spreading.
Q: Can I use a different type of sugar?
A: While brown sugar is traditional, you can experiment with other sugars, such as granulated sugar or coconut sugar. Keep in mind that this will alter the flavor and texture of the cookies.
Q: My cookies are spreading too much. What can I do?
A: Make sure your oven is properly preheated and that you’re not overcrowding the baking sheet. You can also try chilling the dough for a longer period of time or adding a tablespoon or two of flour to the dough.
Q: How can I tell when the cookies are done?
A: The cookies are done when the edges are lightly golden brown and the centers are set. Be careful not to overbake them, as they will continue to harden as they cool.
Q: Can I decorate these cookies?
A: Absolutely! Once the cookies are completely cool, you can decorate them with royal icing, sprinkles, or a simple dusting of powdered sugar.
Final Thoughts
These Edenton Tea Party Cakes are more than just a delicious treat; they’re a taste of history, a connection to the women who stood up for their beliefs. Whether you’re a seasoned baker or just starting out, I encourage you to try this recipe and experience the simple pleasure of baking these historical cookies. Share them with friends and family, and perhaps even share the story of the Edenton Tea Party along with them. Don’t be afraid to experiment with variations and make them your own. And most importantly, enjoy the process! Pair these cookies with a fragrant cup of tea and let the flavors transport you back in time.