
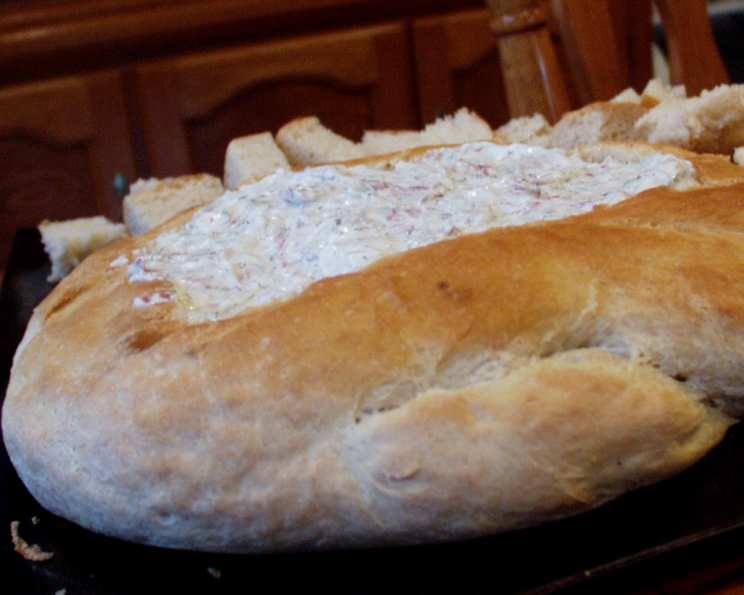
Edible Picnic Basket (Bread Machine)
I can still remember the first time I saw an edible bread bowl. It was at a county fair, and a local bakery was selling steaming clam chowder in these crusty, golden containers. As a child, the idea of eating the bowl itself was pure magic! Years later, that memory inspired me to explore the possibilities of edible vessels, and this edible picnic basket, born from my trusty bread machine, is a testament to that initial fascination. It’s not just a fun novelty; it’s a practical and delicious way to elevate any outdoor meal, bringing a touch of rustic charm and eliminating the need to lug bulky containers back home.
Recipe Overview
- Prep Time: 20 minutes
- Rise Time: 1 hour
- Cook Time: 30-35 minutes
- Total Time: Approximately 2 hours
- Yields: 1 large bread basket
- Dietary Type: Vegetarian (can be made Vegan)
Ingredients
- 1 ½ cups water
- 4 cups white bread flour
- 2 tablespoons sugar
- 2 teaspoons salt
- 2 teaspoons fast rise yeast or 3 teaspoons active dry yeast
- 1 egg, beaten (optional, for brushing; can be substituted with milk or aquafaba for a vegan option)
- Butter, for greasing and buttering inside the basket
- Your favorite picnic fillings, such as fried chicken, sandwiches, salads, etc.
Equipment Needed
- Bread machine
- Large baking sheet
- Pastry brush (optional)
- Serrated bread knife
- Heavy-duty foil
- Newspaper (optional)
Instructions
-
Place all ingredients (water, flour, sugar, salt, and yeast) into your bread machine in the order recommended by the manufacturer. This is crucial for proper gluten development and yeast activation.
-
Select the dough cycle or manual cycle on your bread machine. This cycle will mix and knead the dough and allow it to rise.
-
Once the dough cycle is complete, carefully remove the dough from the bread machine. Be gentle; you want to retain as much air in the dough as possible for a light and airy basket.
-
Turn the dough out onto a lightly floured surface. Gently shape it into a ball, avoiding punching it down excessively. Over-handling can deflate the dough and result in a dense, less appealing basket.
-
Place the dough ball onto a greased baking sheet. A well-greased sheet is essential to prevent sticking.
-
Let the dough rise in a warm place for about one hour, or until it has roughly doubled in size. This is a critical step for achieving a light and airy texture. Cover the dough loosely with plastic wrap or a damp kitchen towel to prevent it from drying out.
-
Preheat your oven to 350°F (175°C). Make sure the oven is fully preheated before baking for even cooking and optimal browning.
-
If desired, brush the risen dough with a beaten egg. This will give the finished basket a beautiful golden-brown color and a slightly glossy sheen. For a vegan option, brush with milk (dairy or plant-based) or aquafaba (the liquid from a can of chickpeas).
-
Bake in the preheated oven for 30-35 minutes, or until the basket is golden brown and sounds hollow when tapped on the bottom. The baking time may vary depending on your oven, so keep a close eye on it. If the top starts to brown too quickly, you can loosely tent it with foil.
-
Remove the baked basket from the oven and let it cool completely on a wire rack. Cooling it completely prevents the inside from becoming gummy when you hollow it out.
-
Once the basket is cool enough to handle, use a serrated bread knife to carefully cut out a circular “lid” from the top. Reserve this lid, as you’ll need it later.
-
Hollow out the inside of the bread basket, like you would a pumpkin. Remove the soft bread from the interior, leaving a sturdy shell. You can save the removed bread for breadcrumbs, croutons, or dipping in soup.
-
Brush the inside of the hollowed-out bread basket with melted butter. This will help to seal the bread and prevent it from becoming soggy when filled with your picnic goodies.
-
Fill the basket with your desired picnic fare. Fried chicken is a classic choice, but you can also use sandwiches, salads, pasta salads, or any other picnic-friendly food.
-
Replace the “lid” on the basket.
-
For optimal temperature retention, wrap the filled basket in heavy-duty foil, then newspaper, and then another layer of foil. This insulation will help keep your food warm or cold for longer.
Expert Tips & Tricks
- Yeast Activation: If using active dry yeast instead of fast-rise yeast, it’s best to proof it in warm water with a pinch of sugar for 5-10 minutes before adding it to the bread machine. This ensures the yeast is alive and active.
- Dough Consistency: The dough should be slightly tacky but not sticky. If it’s too sticky, add a tablespoon of flour at a time until it reaches the desired consistency.
- Even Baking: To ensure even baking, rotate the baking sheet halfway through the baking time.
- Preventing Soggy Bottom: Besides buttering the inside, you can also line the bottom of the basket with lettuce leaves or parchment paper to create a barrier between the bread and the filling.
- Flavor Infusion: Consider adding herbs or spices to the dough for extra flavor. Rosemary, thyme, or garlic powder would all be delicious additions.
Serving & Storage Suggestions
Serve the edible picnic basket immediately after filling it for the best flavor and texture. The basket is designed to be eaten along with the contents, so encourage your guests to tear off pieces of the bread as they enjoy their picnic.
If you have any leftover bread, store it in an airtight container at room temperature for up to 2 days. You can also freeze the baked bread basket (hollowed out or not) for longer storage; wrap it tightly in plastic wrap and then in foil. Thaw completely before using. To reheat, wrap in foil and bake at 300°F (150°C) for 10-15 minutes.
Nutritional Information
Note: Nutritional information is an estimate and may vary based on specific ingredients and portion sizes.
| Nutrient | Amount per Serving | % Daily Value |
|---|---|---|
| Calories | 450 kcal | 23% |
| Total Fat | 8g | 12% |
| Saturated Fat | 2g | 10% |
| Cholesterol | 30mg | 10% |
| Sodium | 600mg | 25% |
| Total Carbohydrate | 80g | 27% |
| Dietary Fiber | 4g | 16% |
| Sugars | 5g | – |
| Protein | 15g | 30% |
Variations & Substitutions
- Whole Wheat Basket: Substitute half of the white bread flour with whole wheat flour for a nuttier flavor and added fiber.
- Gluten-Free Basket: Use a gluten-free bread flour blend specifically designed for bread machines. You may need to adjust the amount of liquid depending on the blend.
- Vegan Basket: Replace the egg wash with plant-based milk or aquafaba. Ensure your filling is also vegan-friendly.
- Savory Basket: Add herbs and spices to the dough, such as rosemary, thyme, or garlic powder.
- Sweet Basket: Add cinnamon and sugar to the dough for a sweet treat. Fill with fruit salad and whipped cream.
FAQs (Frequently Asked Questions)
Q: Can I make the dough ahead of time?
A: Yes, you can prepare the dough in the bread machine and then refrigerate it after the dough cycle is complete. Let it come to room temperature for about 30 minutes before shaping and baking.
Q: How do I prevent the bread basket from becoming soggy?
A: Brushing the inside with melted butter creates a barrier against moisture. Lining the bottom with lettuce leaves or parchment paper can also help.
Q: Can I use this recipe to make smaller bread bowls?
A: Absolutely! Simply divide the dough into smaller portions before shaping and baking. Adjust the baking time accordingly.
Q: What is the best way to transport the filled basket?
A: Wrap it securely in heavy-duty foil and newspaper to insulate it. Place it in a sturdy box or container to prevent it from being crushed.
Q: Can I freeze the empty bread basket?
A: Yes, wrap it tightly in plastic wrap and then in foil. Thaw completely before filling.
Final Thoughts
This Edible Picnic Basket is more than just a recipe; it’s an experience. It’s a chance to get creative in the kitchen, impress your friends and family, and add a touch of whimsy to your next outdoor adventure. Don’t be afraid to experiment with different fillings and flavors to create your own signature picnic basket. I encourage you to give this recipe a try and share your creations with the world. And if you’re feeling extra fancy, pair it with a crisp, chilled white wine or a refreshing homemade lemonade. Happy picnicking!