
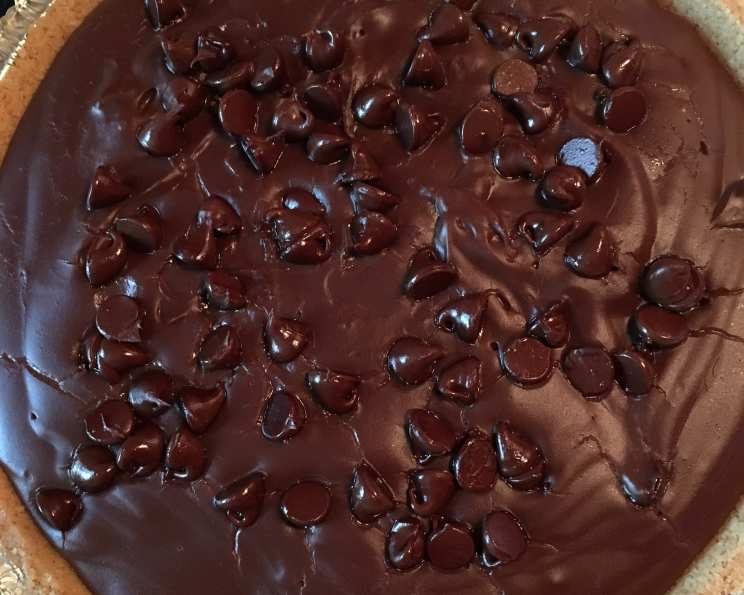
Luscious Eggless Chocolate Pudding or Pie Filling: A Childhood Favorite, Reinvented
My grandmother, bless her heart, was a whiz in the kitchen, but eggs were often a tricky subject. Whether she’d simply run out or was catering to a guest with allergies, she had a knack for making do, and often creating something even better in the process. This eggless chocolate pudding was one of her happy accidents. I remember sneaking into her kitchen, the rich aroma of cocoa filling the air, and dipping my finger (again and again!) into the pot while it cooled. It tasted like pure, unadulterated chocolate bliss, and I’ve been hooked ever since. This recipe is my homage to her ingenuity, a testament that you don’t need eggs to achieve a decadent, silky-smooth chocolate dream.
Recipe Overview
- Prep Time: 5 minutes
- Cook Time: 10 minutes
- Total Time: 15 minutes (plus chilling time)
- Servings: 4-6
- Yield: 1 8-inch pie filling
- Dietary Type: Vegetarian (can be made vegan with substitutions)
Ingredients
- 2/3 cup sugar
- 1/4 cup cocoa
- 3 tablespoons cornstarch
- 1/4 teaspoon salt
- 1 2/3 cups milk (dairy or non-dairy – see variations below)
- 2 tablespoons butter (dairy or vegan butter)
- 1 teaspoon vanilla extract
Equipment Needed
- Medium saucepan
- Whisk
- Measuring cups and spoons
- Dessert dishes or 8-inch pie shell
Instructions
-
In a medium saucepan, combine the sugar, cocoa, cornstarch, and salt. Whisk these dry ingredients together thoroughly to ensure there are no lumps of cocoa or cornstarch clinging to the bottom. This even distribution is crucial for a smooth, lump-free pudding.
-
Gradually stir in the milk. Add the milk slowly, whisking constantly, to create a smooth slurry. This prevents the dry ingredients from clumping together and ensures a consistent texture. Make sure to scrape the bottom and sides of the saucepan to incorporate all the dry ingredients.
-
Cook over medium heat, stirring constantly. This is perhaps the most crucial step. Constant stirring prevents the pudding from scorching on the bottom of the pan and ensures that the cornstarch cooks evenly, creating the desired thick, velvety texture. Don’t stop stirring!
-
Bring to a slow boil, and stir constantly for one minute. Once the mixture starts to bubble gently (a slow boil, not a rapid one), continue to stir vigorously for exactly one minute. This is the point where the cornstarch fully gelatinizes, transforming the mixture from a thin liquid into a thick, luscious pudding.
-
Remove from heat, and stir in the butter and vanilla. Take the saucepan off the heat and immediately add the butter (or vegan butter) and vanilla extract. Stir until the butter is completely melted and incorporated, creating a glossy sheen and adding richness to the pudding. The vanilla enhances the chocolate flavor.
-
Fill individual dessert dishes or a pre-baked 8-inch pie shell. Pour the hot pudding into serving dishes or your prepared pie shell. For a pie, be sure the crust is completely cool before adding the filling.
-
Chill until cool. Cover the pudding with plastic wrap, pressing it directly onto the surface to prevent a skin from forming. Refrigerate for at least 2 hours, or preferably longer, to allow the pudding to fully set and chill. This chilling time is essential for achieving the right consistency.
Expert Tips & Tricks
-
Preventing a Skin: The plastic wrap trick is key. If you don’t have plastic wrap, you can whisk the pudding vigorously every 30 minutes as it cools in the fridge. This breaks up any skin that forms.
-
Lump-Free Guarantee: Whisk, whisk, whisk! And if you do end up with a few stubborn lumps, don’t despair. Simply pour the cooked pudding through a fine-mesh sieve.
-
Enhancing the Chocolate Flavor: For a more intense chocolate experience, add a tablespoon of instant espresso powder to the dry ingredients. The coffee enhances the chocolate without making the pudding taste like coffee.
-
Getting the Perfect Thickness: If the pudding is too thin after chilling, you likely didn’t cook it long enough. If it’s too thick, you may have overcooked it. Both are recoverable! If too thin, return it to the saucepan, add a slurry of 1 teaspoon of cornstarch mixed with 1 tablespoon of cold milk, and cook over low heat, stirring constantly, until it thickens. If too thick, whisk in a little extra milk until you reach the desired consistency.
Serving & Storage Suggestions
Serve the pudding chilled, garnished with whipped cream (dairy or non-dairy), chocolate shavings, fresh berries, or a sprinkle of cocoa powder. For the pie, a dollop of whipped cream or a dusting of cocoa adds an elegant touch.
Leftover pudding should be stored in an airtight container in the refrigerator. It will keep for up to 3 days. While you can freeze this pudding, the texture may change slightly upon thawing. If freezing, wrap it tightly in plastic wrap and then foil. Thaw in the refrigerator overnight.
Nutritional Information
(Estimated, per serving, based on dairy milk and butter)
| Nutrient | Amount per Serving | % Daily Value |
|---|---|---|
| Calories | 250 kcal | 13% |
| Total Fat | 8g | 10% |
| Saturated Fat | 5g | 25% |
| Cholesterol | 20mg | 7% |
| Sodium | 150mg | 7% |
| Total Carbohydrate | 40g | 15% |
| Dietary Fiber | 2g | 7% |
| Sugars | 25g | – |
| Protein | 4g | 8% |
Variations & Substitutions
- Vegan Pudding: Use your favorite non-dairy milk (almond, soy, oat, or coconut all work well) and vegan butter. Be sure to check the labels for any hidden dairy ingredients.
- Dairy-Free Delight: If you’re dairy-free but not vegan, you can use lactose-free milk and regular butter.
- Gluten-Free Pie: Ensure your pie crust is gluten-free. Many store-bought crusts are, or you can easily make your own with gluten-free flour.
- Mexican Chocolate Pudding: Add a pinch of cinnamon and a dash of cayenne pepper to the dry ingredients for a warm, spicy twist.
- Peanut Butter Chocolate Pudding: Swirl in a few tablespoons of peanut butter (or your favorite nut butter) after removing the pudding from the heat.
FAQs (Frequently Asked Questions)
Q: Can I use a different type of sweetener?
A: Yes, you can substitute granulated sugar with coconut sugar or maple syrup. Note that this may slightly alter the flavor and color of the pudding. Use equal amounts of coconut sugar, or reduce the maple syrup by a tablespoon or two to account for the extra liquid.
Q: Why is my pudding grainy?
A: Grainy pudding is usually a sign of undercooked cornstarch. Be sure to cook the pudding at a slow boil for the full minute, stirring constantly, to ensure the cornstarch gelatinizes properly.
Q: Can I make this pudding ahead of time?
A: Absolutely! This pudding is a great make-ahead dessert. It will keep in the refrigerator for up to 3 days.
Q: My pudding is too thick. How can I thin it out?
A: Simply whisk in a little extra milk, one tablespoon at a time, until you reach the desired consistency.
Q: Can I use this recipe for a chocolate mousse?
A: While this is technically a pudding, you can make a mousse-like dessert by folding in whipped cream (or non-dairy whipped cream) after the pudding has cooled slightly.
Final Thoughts
This eggless chocolate pudding is more than just a recipe; it’s a comforting hug in a bowl. Whether you’re catering to dietary restrictions or simply looking for a quick and easy dessert, this recipe delivers every time. So go ahead, gather your ingredients, and whip up a batch of this velvety chocolate goodness. I promise, you won’t be disappointed! And if you try any fun variations, be sure to let me know in the comments below. Enjoy!