
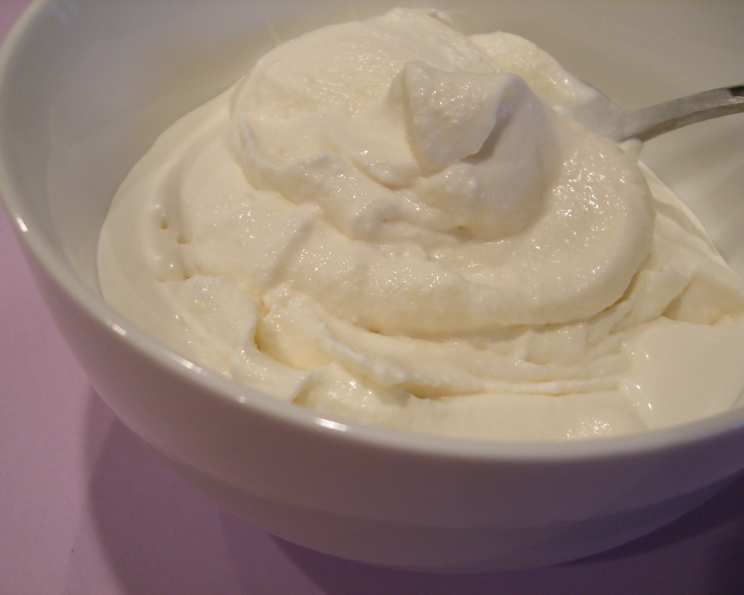
The Creamiest Dream: Homemade Eggless Vanilla Ice Cream
My earliest memories are steeped in the sweet, comforting aroma of vanilla. As a child, my grandmother always had a pot of vanilla simmering gently on the stove, infusing the entire house with its delicate fragrance. It wasn’t just for baking; it was her secret weapon against a bad day, a spoonful of pure, unadulterated happiness. That vanilla-infused air still evokes a sense of warmth and love, and this eggless vanilla ice cream is my attempt to capture that feeling in a bowl. It’s simple, classic, and utterly irresistible.
Recipe Overview
- Prep Time: 5 minutes
- Cook Time: 5 minutes
- Total Time: 10 minutes + freezing time
- Yields: 1 gallon
- Dietary Type: Vegetarian
Ingredients
- 2 cups milk
- 1 cup sugar
- 2 cups whipping cream (or 2 cups half-and-half)
- 2 teaspoons vanilla extract
Equipment Needed
- Large mixing bowl
- Whisk
- 1-gallon ice cream maker
Instructions
-
In a large mixing bowl, combine the milk, sugar, whipping cream (or half-and-half), and vanilla extract.
-
Using a whisk, stir briskly for about two minutes, or until the sugar is completely dissolved. This step is crucial because undissolved sugar crystals can lead to a grainy texture in your final ice cream. Make sure you scrape the bottom of the bowl to ensure no sugar is lurking there.
-
Pour the mixture into the canister of a 1-gallon ice cream maker.
-
Freeze according to the ice cream maker manufacturer’s instructions. This typically involves churning the mixture while it is chilled. The exact time varies depending on your machine, but it usually takes between 20 and 40 minutes. Keep an eye on the consistency; you want it to be thick and creamy.
Expert Tips & Tricks
- Chill the Mixture: For optimal results, chill the milk mixture in the refrigerator for at least 30 minutes, or even better, for a couple of hours before churning. This helps the ice cream freeze faster and more evenly, resulting in a smoother texture.
- Vanilla Bean Paste: For a more intense vanilla flavor, consider using vanilla bean paste instead of vanilla extract. Use the same quantity (2 teaspoons). The little black specks from the vanilla bean add a beautiful visual element as well.
- Don’t Overfill: When pouring the mixture into your ice cream maker, be sure not to overfill it. The mixture will expand as it freezes, and overfilling can cause it to overflow and make a mess. Leave about an inch or two of space at the top of the canister.
- Check Sugar Dissolution: Before adding the mixture to the ice cream maker, take a moment to rub a small amount between your fingers. If you feel any gritty sugar crystals, continue stirring until they are fully dissolved.
- Salt Addition: A pinch of salt (about 1/4 teaspoon) can enhance the sweetness and overall flavor of the ice cream. Add it to the mixture along with the sugar.
Serving & Storage Suggestions
Serve this creamy delight immediately after churning for a soft-serve consistency, or transfer it to an airtight container and freeze for a firmer texture. Allow the ice cream to soften slightly before serving if it’s been frozen solid. It’s delicious on its own, but also pairs beautifully with fresh berries, chocolate sauce, or a warm brownie.
Store leftover ice cream in a freezer-safe container in the freezer for up to two weeks. For the best texture, try to minimize temperature fluctuations by storing it in the back of the freezer, away from the door.
Nutritional Information
Nutritional information is an estimate and may vary based on specific ingredients and serving sizes.
| Nutrient | Amount per Serving (approx. 1 cup) | % Daily Value |
|---|---|---|
| Calories | 344 kcal | 17% |
| Total Fat | 24.3g | 37% |
| Saturated Fat | 15.1g | 76% |
| Cholesterol | 60mg | 20% |
| Sodium | 35mg | 1% |
| Total Carbohydrate | 28.2g | 9% |
| Dietary Fiber | 0g | 0% |
| Sugars | 24.4g | – |
| Protein | 3.8g | 8% |
Variations & Substitutions
- Dairy-Free: For a dairy-free version, substitute the milk and whipping cream with coconut milk or other plant-based milk alternatives. Full-fat coconut milk will provide the richest and creamiest texture. Be sure to choose a brand that doesn’t have a strong coconut flavor if you prefer a more neutral taste.
- Brown Sugar Vanilla: Replace half of the granulated sugar with brown sugar for a hint of molasses and caramel notes.
- Spiced Vanilla: Add a pinch of cinnamon, nutmeg, or cardamom to the mixture for a warm, spiced flavor.
- Coffee Infusion: Steep coarsely ground coffee beans in the milk for about 30 minutes, then strain before adding the remaining ingredients. This will create a delightful coffee-flavored ice cream.
- Chocolate Chip Vanilla: Stir in mini chocolate chips or shaved chocolate towards the end of the churning process.
FAQs (Frequently Asked Questions)
Q: Why is it important to dissolve the sugar completely?
A: Undissolved sugar crystals will result in a grainy texture in your finished ice cream. Ensure thorough stirring to prevent this.
Q: Can I use a different type of sugar?
A: While granulated sugar is recommended, you can experiment with other types like caster sugar. Avoid using very coarse sugars as they might not dissolve properly.
Q: My ice cream is too hard after freezing. What can I do?
A: Let the ice cream sit at room temperature for a few minutes before scooping to soften it slightly. Adding a tablespoon or two of alcohol (like vodka or rum) to the mixture before churning can also help prevent it from freezing rock-solid.
Q: Can I add mix-ins to this recipe?
A: Absolutely! Stir in your favorite mix-ins, such as chocolate chips, fruit pieces, or nuts, during the last few minutes of churning.
Q: My ice cream maker is smaller than 1 gallon. How do I adjust the recipe?
A: Simply reduce the quantities of all ingredients proportionally to match the capacity of your ice cream maker. For example, if your machine is half a gallon, halve all the ingredient amounts.
Final Thoughts
This eggless vanilla ice cream is a blank canvas for your creativity. Whether you stick to the classic recipe or experiment with exciting variations, you’re sure to create a frozen treat that delights your taste buds. I encourage you to give this recipe a try and share your creations. Don’t be afraid to get creative with mix-ins and flavor combinations, and most importantly, enjoy the process of making something delicious from scratch. Imagine pairing this with a warm slice of apple pie or a decadent chocolate lava cake – the possibilities are endless!