
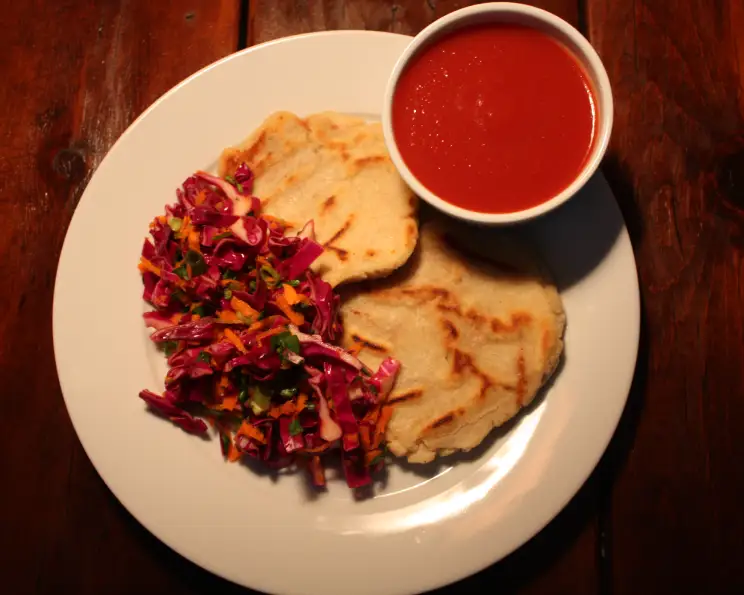
El Salvadorian Bean and Cheese Pupusas: A Taste of Home
The aroma of toasted corn and melting cheese always transports me back to my abuela’s kitchen. I can almost see her now, hands dusted with masa, expertly shaping each pupusa with the kind of practiced ease that only comes from generations of tradition. The sizzle of the pupusas hitting the hot oil, the murmurs of conversation, the laughter echoing through the room – these are the flavors and sounds of my childhood, and they’re all wrapped up in this one simple, perfect dish. For me, these pupusas are not just a meal; they are edible memories.
Recipe Overview
- Prep Time: 20 minutes
- Cook Time: 20 minutes
- Total Time: 40 minutes
- Servings: 4-6
- Yield: Variable, depending on size (approx. 8-12 pupusas)
- Dietary Type: Vegetarian (can be vegan with cheese substitute)
Ingredients
- 4 cups masa corn flour, divided
- 2 1⁄2 cups water, divided
- 1⁄2 teaspoon salt, divided
- 1 (15 ounce) can refried beans
- 1 cup shredded jack cheese (or vegan alternative)
- Vegetable oil, for frying
- 1 (14 ounce) can good quality tomato sauce
Equipment Needed
- Mixing bowls
- Nonstick skillet
- Spatula
- Measuring cups and spoons
Instructions
- First, prepare the filling. In a small mixing bowl, combine the entire can of refried beans with the shredded jack cheese. Mix thoroughly until well combined. Set aside.
- Now, make the dough. In a separate, larger mixing bowl, combine 2 cups of the masa with 1 1⁄4 cups of water and 1/4 teaspoon of salt. Mix thoroughly with your hands until it forms a soft, pliable dough. The key here is to get the right consistency; the dough should be moist but not sticky.
- Important: Masa dough tends to dry out quickly. This is why the ingredients are divided. If the dough starts to dry out while you’re still working with it, you can add a touch more water, a tablespoon at a time, until it regains its softness.
- Next, form the pupusas. Pinch off a portion of the prepared masa dough. Roll it into a ball approximately 2 inches in diameter – about the size of a golf ball.
- Using your thumb, gently push down into the center of the ball, creating a small “bowl” or indentation. This will be where you place the filling.
- Spoon a generous amount of the bean and cheese mixture into the indentation of the masa bowl. Don’t overfill it, or the pupusa will be difficult to close.
- Pinch off another small piece of the masa dough. Flatten it slightly to create a small disc, large enough to cover the opening of the filled masa bowl.
- Carefully place the disc of dough over the filling, completely sealing it in. Gently pinch the edges together to ensure there are no gaps or openings.
- Now comes the tricky part: flattening the filled ball into a disc. Gently pat and flatten the filled ball between your palms, aiming for a thickness of about 1/2 inch. Be careful not to press too hard, or the filling will squeeze out. This step takes practice, so don’t worry if your first few pupusas aren’t perfect.
- Heat a nonstick skillet over medium to medium-high heat. Pour approximately 1/4 cup of vegetable oil into the skillet, enough to lightly coat the bottom.
- Carefully place as many pupusas as will comfortably fit into the hot skillet without overcrowding.
- Cook the pupusas for 3-5 minutes on each side, or until they are golden brown and slightly crispy. Keep a close eye on them and adjust the heat as needed to prevent burning.
- As the pupusas cook, the cheese inside will melt, and the outside will develop a beautiful golden crust.
- Once the first batch is cooked, remove them from the skillet and place them on a plate lined with paper towels to drain any excess oil.
- Repeat the process with the remaining pupusas, adding more vegetable oil to the skillet as needed.
- If you run out of masa dough while you’re still making pupusas, simply prepare another fresh batch using the remaining ingredients. Remember to keep the unused dough covered with a damp cloth to prevent it from drying out.
- While the pupusas are cooking, gently warm the tomato sauce in a saucepan over low heat. You can add a pinch of salt, pepper, or a dash of your favorite hot sauce to the tomato sauce for extra flavor.
- Serve the hot, freshly cooked pupusas immediately with the warmed tomato sauce poured over the top, or served on the side for dipping. Curtido (El Salvadorian slaw) is a traditional accompaniment.
Expert Tips & Tricks
- Masa Magic: The quality of your masa flour matters! Look for a brand specifically designed for making pupusas or tortillas.
- Filling Finesse: Get creative with your fillings! While the bean and cheese combination is classic, you can add cooked pork, chicken, or vegetables for a more complex flavor.
- Dough Doctor: If your dough is too dry, add water gradually, a tablespoon at a time. If it’s too sticky, add a bit more masa, a tablespoon at a time.
- Heat Harmony: Adjust the heat of your skillet as needed to ensure the pupusas cook evenly and don’t burn.
- Crispy Crust: For an extra-crispy crust, try brushing the pupusas with a little bit of oil before placing them in the skillet.
- Don’t be afraid to experiment with different cheeses! Queso Oaxaca or even a mild cheddar can be delicious.
Serving & Storage Suggestions
Serve the pupusas hot, straight from the skillet. The warm tomato sauce is essential, and curtido adds a delightful tangy crunch. Leftover pupusas can be stored in an airtight container in the refrigerator for up to 3 days. To reheat, you can pan-fry them in a little oil, bake them in a preheated oven at 350°F (175°C) until heated through, or microwave them (though they may lose some of their crispness). Pupusas can also be frozen for longer storage; wrap them individually in plastic wrap and then place them in a freezer bag. They can be reheated directly from frozen using any of the methods mentioned above.
Nutritional Information
| Nutrient | Amount per Serving | % Daily Value |
|---|---|---|
| Calories | 450 kcal | 23% |
| Total Fat | 18g | 28% |
| Saturated Fat | 8g | 40% |
| Cholesterol | 30mg | 10% |
| Sodium | 800mg | 33% |
| Total Carbohydrate | 60g | 20% |
| Dietary Fiber | 10g | 40% |
| Sugars | 3g | – |
| Protein | 15g | 30% |
Note: Nutritional information is an estimate and may vary based on specific ingredients and portion sizes.
Variations & Substitutions
- Vegan Pupusas: Substitute the jack cheese with a vegan cheese alternative.
- Spicy Pupusas: Add a pinch of cayenne pepper or a dash of your favorite hot sauce to the bean and cheese filling.
- Pupusas Revueltas: Add cooked and crumbled pork to the bean and cheese filling for a traditional “revueltas” variation.
- Vegetable Pupusas: Include cooked spinach, zucchini, or mushrooms in your filling for a healthier and flavor-packed pupusa.
FAQs (Frequently Asked Questions)
Q: Why is my masa dough cracking?
A: This usually means the dough is too dry. Add a tablespoon of water at a time until it becomes more pliable.
Q: How can I prevent the filling from leaking out while cooking?
A: Make sure you seal the pupusas tightly and don’t overfill them. Gently pat them into shape, avoiding excessive pressure.
Q: Can I use a different type of cheese?
A: Absolutely! Queso Oaxaca, mozzarella, or even a mild cheddar cheese work well.
Q: How do I make curtido?
A: Curtido is a fermented cabbage slaw. There are many recipes available online, typically involving cabbage, carrots, vinegar, and spices.
Q: Can I bake these instead of frying them?
A: While traditionally fried, you can bake them at 375°F (190°C) for about 20-25 minutes, flipping halfway through, for a slightly healthier option. Brush with a little oil before baking.
Final Thoughts
Making pupusas might seem intimidating at first, but with a little practice, you’ll be whipping up these delicious treats in no time. Don’t be afraid to experiment with different fillings and toppings to create your own signature pupusa. And most importantly, share them with friends and family – because food, like memories, is best enjoyed together. So go ahead, dust off your apron, and bring a little bit of El Salvadorian sunshine into your kitchen!