
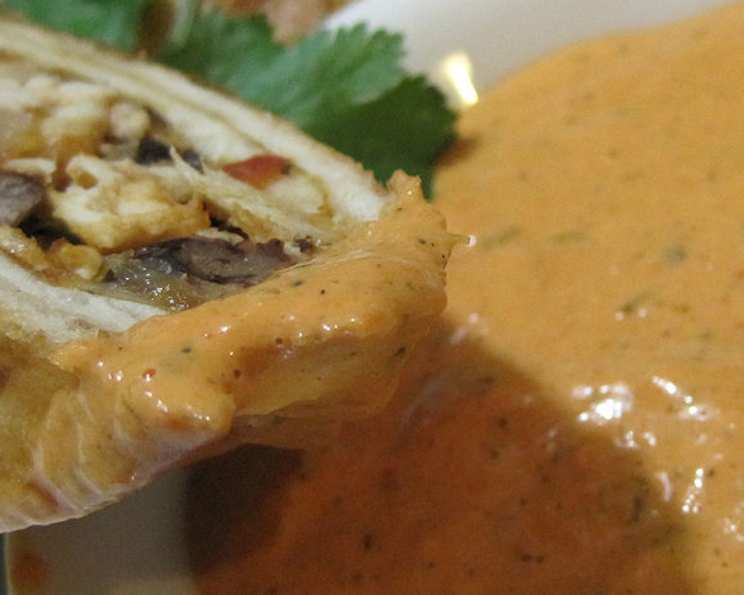
El Torito Red Pepper Dip: A Culinary Adventure
My first taste of this dip was a revelation, a moment etched in my memory. Picture this: a sunny afternoon, a plate of crispy flautas glistening under the light, and this vibrant, smoky red pepper dip sitting invitingly beside them. One bite, and I was hooked. The subtle heat, the creamy texture, the unexpected depth of flavor – it was a symphony on my palate. I knew I had to recreate this magic at home.
Recipe Overview
- Prep Time: 5 minutes
- Cook Time: 10 minutes
- Total Time: 15 minutes
- Servings: 6
- Yield: About 2 cups
- Dietary Type: Vegetarian
Ingredients
- 4 dried roasted Japanese chilies
- 6 ounces canned roasted red peppers
- 1 fresh garlic clove, peeled
- 1 teaspoon salad oil
- ½ cup mayonnaise
- Salt, to taste
- Black pepper, to taste
- 1 tablespoon barbecue sauce
- 6-8 drops Worcestershire sauce
Equipment Needed
- Blender
Instructions
- Begin by preparing your ingredients. Ensure the garlic clove is peeled and ready to be added to the blender.
- In a blender cup, combine the dried roasted Japanese chilies, canned roasted red peppers, fresh garlic clove, salad oil, mayonnaise, salt, black pepper, barbecue sauce, and Worcestershire sauce.
- Blend all the ingredients until the mixture forms a smooth purée.
- Taste the dip and adjust the seasoning as needed, adding more salt, black pepper, or barbecue sauce to suit your preference.
- Transfer the dip to a serving bowl and enjoy!
Expert Tips & Tricks
- Roasting the chilies is crucial for developing the deep, smoky flavor of the dip. If you can’t find dried roasted Japanese chilies, you can substitute with other mild, thin-skinned dried chilies. Roast them yourself in a dry pan or under the broiler until fragrant.
- For an extra layer of complexity, try adding a pinch of smoked paprika to the dip.
- If you prefer a spicier dip, increase the number of dried chilies. Remember that a little goes a long way!
- If the dip is too thick, add a tablespoon of water or olive oil at a time until you reach your desired consistency.
- To enhance the garlic flavor, you can roast the garlic clove before adding it to the blender. Simply wrap it in foil with a little olive oil and bake at 400°F (200°C) for 20-30 minutes, or until soft.
- Make the dip ahead of time! The flavors meld together beautifully as it sits.
Serving & Storage Suggestions
This El Torito Red Pepper Dip is incredibly versatile. Serve it with tortilla chips, vegetable sticks, or as a spread for sandwiches and wraps. It’s also a fantastic accompaniment to grilled meats and fish. This dip pairs exceptionally well with flautas, echoing my initial experience, or alongside quesadillas for an extra layer of flavorful richness.
Store any leftover dip in an airtight container in the refrigerator. It will stay fresh for up to 3-4 days. While it’s best enjoyed chilled, you can let it sit at room temperature for about 30 minutes before serving to allow the flavors to bloom. Freezing is not recommended, as the mayonnaise can separate upon thawing, altering the texture.
Nutritional Information
| Nutrient | Amount per Serving | % Daily Value |
|---|---|---|
| Calories | 85 kcal | 4% |
| Total Fat | 7.5 g | 9% |
| Saturated Fat | 1.1 g | 6% |
| Cholesterol | 5 mg | 2% |
| Sodium | 250 mg | 11% |
| Total Carbohydrate | 3 g | 1% |
| Dietary Fiber | 0.5 g | 2% |
| Sugars | 1 g | 2% |
| Protein | 0.5 g | 1% |
Note: Nutritional information is an estimate and may vary based on specific ingredients used.
Variations & Substitutions
- Vegan Version: Substitute the mayonnaise with a vegan mayonnaise alternative. There are many delicious options available made from soy, cashew, or avocado.
- Spicier Dip: Add a pinch of cayenne pepper or a finely chopped jalapeño to the blender for a spicier kick.
- Smoked Paprika Variation: Instead of barbecue sauce, use 1 teaspoon of smoked paprika for a smoky, vibrant flavor.
- Herbaceous Twist: Add a tablespoon of chopped fresh cilantro or parsley to the dip for a fresh, herbaceous flavor.
- Creamier Texture: For a richer, creamier dip, blend in 2 ounces of cream cheese (or a vegan cream cheese alternative).
- Substitute for Japanese Chilies: If Japanese chilies are unavailable, ancho chilies or guajillo chilies make good alternatives. Soak them in hot water for about 30 minutes to soften before adding to the blender.
FAQs (Frequently Asked Questions)
Q: Can I use fresh red peppers instead of canned?
A: Yes, but be sure to roast them first! Roasting is essential for developing the sweet, smoky flavor that characterizes this dip. Roast until the skins are blackened, then peel, seed, and add to the blender.
Q: How long will this dip last in the refrigerator?
A: Properly stored in an airtight container, the dip will stay fresh in the refrigerator for 3-4 days.
Q: Can I make this dip without the barbecue sauce?
A: Absolutely! The barbecue sauce adds a touch of sweetness and tang, but you can omit it or substitute with a different flavor enhancer like a pinch of brown sugar or a splash of apple cider vinegar.
Q: Is it necessary to dry roast the Japanese chilies before blending?
A: It is not necessary, roasting the chilies is essential for flavor development. The original recipe dries the chilies, but this step is not strictly required to achieve a great flavor. The original recipe states that it doesn’t think drying is necessary.
Q: Can I use a food processor instead of a blender?
A: Yes, a food processor will work, but you might need to scrape down the sides more frequently to ensure all the ingredients are evenly processed. The texture might be slightly chunkier than with a blender.
Final Thoughts
Now it’s your turn to embark on this culinary adventure! The El Torito Red Pepper Dip is more than just a recipe; it’s an invitation to explore flavors and create memories. Don’t be afraid to experiment with the variations and substitutions to make it your own. Whether you’re serving it at a party, enjoying it as a snack, or adding it to your favorite meal, I hope this dip brings you as much joy as it has brought me. Gather your ingredients, fire up your blender, and prepare to be amazed! Please share your creations and experiences with me; I’m excited to hear how you’ve made this recipe your own!