
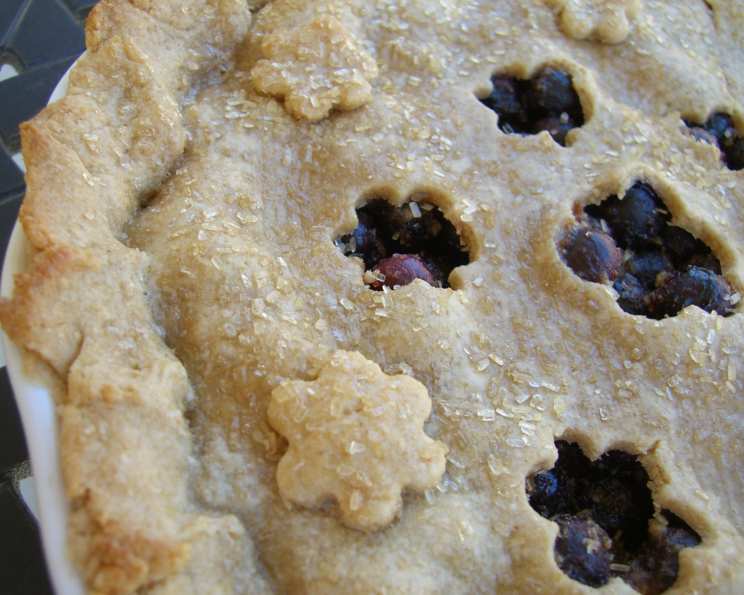
The Sweet Symphony of Electric Mixer Sweet Butter Pie Crust
There’s something magical about the scent of a baking pie crust, especially one made with sweet butter. As a child, I remember my grandmother, apron dusted with flour, humming softly as she effortlessly transformed simple ingredients into golden-brown masterpieces. Her secret, she always said, was love… and a reliable electric mixer. The rhythmic whir of the mixer, the delicate balance of sweet and savory, and the comforting aroma wafting from the oven – these are the memories that this recipe evokes, a taste of home in every flaky bite.
Recipe Overview
- Prep Time: 20 minutes
- Cook Time: 20-30 minutes (depending on use)
- Total Time: 40-50 minutes (plus chilling/freezing)
- Servings: Varies based on pie
- Yield: Two 12-inch rounds (one 9-inch double-crust pie)
- Dietary Type: Not specified (contains dairy and gluten)
Ingredients
- ½ cup cold butter (1 stick), cut into ½-inch cubes
- 2 cups flour
- ¼ cup sugar
- ¼ teaspoon salt
- 4 tablespoons ice water (this amount may vary)
Equipment Needed
- Stand mixer with paddle attachment (or large bowl and pastry cutter)
- Rolling pin
- Work surface (preferably cool, like marble or granite)
- 9-inch pie pan
- Parchment paper, wax paper, or aluminum foil
- Pie weights (dry beans, rice, or stainless-steel pie weights)
- Pot lid or cardboard circle (for trimming)
Instructions
-
Begin by preparing your butter. Cut the cold butter into ½-inch cubes. This is crucial for creating flaky layers. Keep the butter as cold as possible until ready to use.
-
In the bowl of a stand mixer fitted with the paddle attachment (or in a large bowl if mixing by hand), combine the flour, sugar, and salt. Mix on low speed for just a second or two to blend the dry ingredients together. This ensures even distribution of the sugar and salt, contributing to the crust’s overall flavor and texture.
-
Add the cubed butter to the dry ingredients. With the mixer running on low speed (or by hand using two knives or a pastry cutter), work the mixture until it becomes crumbly. The largest pieces of butter should be no bigger than a pea (about ¼ inch). The goal is to coat the flour particles with butter, creating pockets of fat that will melt during baking and produce flaky layers.
-
With the mixer still running on low, begin sprinkling in the ice water one tablespoon at a time. Try to distribute the water evenly over the flour and butter mixture. Continue mixing the dough as you slowly add water.
-
The key to a perfect pie crust is adding just enough water until the dough just pulls together into a shaggy mass. Be careful not to overwork the dough or add too much water, as this will develop the gluten in the flour, resulting in a tough crust. If you add too much water, it can also cause the pastry to shrink in the pie pan during baking.
-
Once the dough has come together, divide it in half. Pat each half into a thick, flattened ball. This makes it easier to roll out the dough evenly.
-
Lightly flour your work surface. Tap one of the dough balls down with four or five taps of the rolling pin. Begin rolling from the center of the dough outward. Stop applying pressure about ¼ inch from the edge of the dough to prevent it from becoming too thin at the edges.
-
Lift the dough and turn it by a quarter. Repeat the rolling process until the dough is at least 12 inches in diameter. Be sure to re-flour the work surface as needed to prevent the dough from sticking.
-
Use a pot lid or a circle of cardboard as a template to trim the dough into a 12-inch round. This should give you a 1 ½-inch margin all around your 9-inch pie pan. Trimming the dough ensures a neat and even crust.
-
Fold the dough in half, slide the outspread fingers of both hands under the dough, and gently lift it. Transfer it to the pie pan.
-
Unfold the dough and ease it into the bottom of the pie pan without stretching it. Stretching the dough can cause it to shrink during baking.
-
Roll out the other dough ball and cut a second 12-inch round to be used as the top crust.
-
Freeze the completed shell completely before baking. This step is crucial for preventing the crust from shrinking during baking. The cold temperature helps to solidify the butter, which in turn creates a flakier crust.
-
Bake as directed for your pie recipe if using for a two-crust pie. Alternatively, if blind-baking the crust (for pies with pre-cooked fillings), preheat your oven to 350°F (175°C).
-
When the pie crust is sufficiently chilled (preferably frozen solid), line it with parchment paper, wax paper, or aluminum foil. Fill it at least two-thirds full with pie weights (dry beans, rice, or stainless-steel pie weights). The pie weights prevent the crust from puffing up during baking.
-
Bake the crust with weights for 20 minutes. Remove from the oven, cool for a few minutes, and carefully remove the pie weights.
-
Poke small holes in the bottom of the pie crust with a fork to prevent it from puffing up again. Return the crust to the oven (without the weights) and bake for an additional 10 minutes, or until the crust is golden brown.
-
Cool the crust completely before filling. You may need to tent the edges of the pie with aluminum foil during baking to prevent them from getting too dried out and burnt.
Expert Tips & Tricks
- Keep everything cold: The colder the butter and water, the flakier the crust will be. Consider chilling your flour and mixing bowl as well.
- Don’t overmix: Overmixing develops the gluten in the flour, resulting in a tough crust. Mix only until the dough just comes together.
- Rest the dough: After mixing, wrap the dough in plastic wrap and refrigerate it for at least 30 minutes before rolling. This allows the gluten to relax, making the dough easier to work with.
- Blind baking insurance: For extra insurance against a soggy bottom crust when blind baking, brush the bottom of the baked crust with a lightly beaten egg white before filling. Bake for a couple more minutes to set the egg wash.
Serving & Storage Suggestions
Serve the pie immediately after filling or chilling, depending on the filling. A slice of this pie crust pairs perfectly with a scoop of vanilla ice cream or a dollop of whipped cream.
To store leftover pie, cover it loosely with plastic wrap or foil and refrigerate for up to 3 days. You can also freeze baked (filled or unfilled) pie for up to 2 months. To reheat frozen pie, thaw it in the refrigerator overnight and then bake in a preheated oven at 350°F (175°C) until warmed through.
Nutritional Information
Please note that these values are estimates and will vary depending on specific ingredients and portion sizes.
| Nutrient | Amount per Serving | % Daily Value |
|---|---|---|
| Calories | 320 kcal | 16% |
| Total Fat | 16 g | 25% |
| Saturated Fat | 10 g | 50% |
| Cholesterol | 40 mg | 13% |
| Sodium | 230 mg | 10% |
| Total Carbohydrate | 40 g | 13% |
| Dietary Fiber | 1 g | 4% |
| Sugars | 8 g | 16% |
| Protein | 5 g | 10% |
Variations & Substitutions
- Gluten-Free Crust: Substitute the all-purpose flour with a gluten-free all-purpose baking blend. You may need to add a binder like xanthan gum for best results.
- Vegan Crust: Replace the butter with a vegan butter substitute. Ensure the substitute is very cold.
- Different Flavors: Add a teaspoon of vanilla extract, lemon zest, or orange zest to the dough for a hint of flavor.
- Herbed Crust: For savory pies, add a teaspoon of dried herbs like thyme, rosemary, or sage to the dough.
FAQs (Frequently Asked Questions)
Q: Why is my pie crust shrinking during baking?
A: Pie crust shrinks primarily because the gluten in the flour has been overworked or because the dough wasn’t chilled adequately. Ensure you’re not overmixing, use cold ingredients, and always chill or freeze the crust before baking.
Q: Can I make this dough ahead of time?
A: Absolutely! The dough can be made up to 2 days in advance. Wrap it tightly in plastic wrap and store it in the refrigerator. You can also freeze the dough for up to 2 months.
Q: What if I don’t have pie weights?
A: Dry beans or rice work perfectly as pie weights. Just line the crust with parchment paper or foil first to prevent the beans or rice from sticking. You can reuse these beans or rice for blind-baking pie crusts in the future.
Q: My crust is browning too quickly. What should I do?
A: Tent the edges of the pie with aluminum foil to prevent them from burning. You can also lower the oven temperature slightly.
Q: Can I use a food processor instead of a stand mixer?
A: Yes, you can use a food processor. Pulse the ingredients until the mixture resembles coarse crumbs, then slowly add the ice water until the dough just comes together.
Final Thoughts
This electric mixer sweet butter pie crust is more than just a recipe; it’s an invitation to create something truly special. Whether you’re a seasoned baker or a kitchen novice, don’t be intimidated – the electric mixer makes the process surprisingly easy! Gather your ingredients, turn on your favorite music, and enjoy the simple pleasure of creating a delicious and beautiful pie crust. And don’t forget to share your creations – and your stories – with friends and family!