
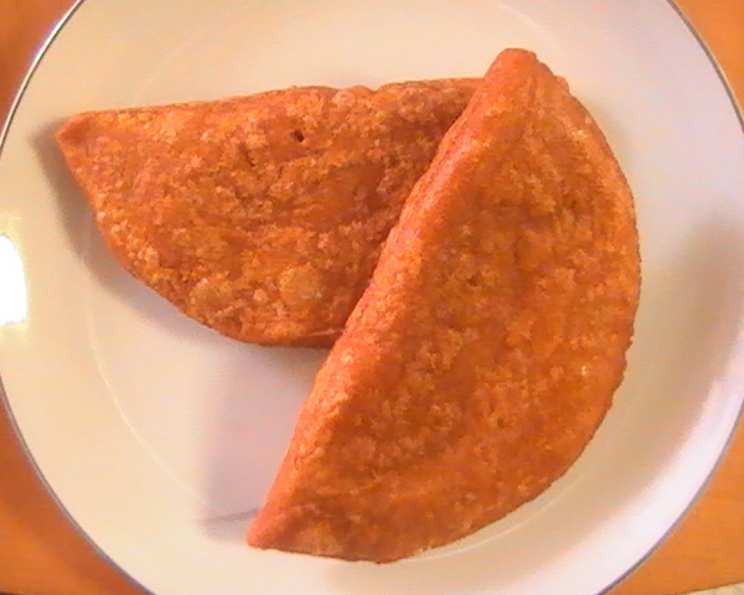
Enchiladas Potosinas: A Taste of San Luis Potosí
The aroma of toasted chiles always takes me back to my study abroad days in Mexico. I remember wandering through the vibrant markets of San Luis Potosí, the air thick with the scent of spices and freshly made masa. It was there I first encountered Enchiladas Potosinas, little pockets of cheesy goodness, their vibrant red hue hinting at the flavorful heat within. These aren’t your typical saucy enchiladas; they’re more like handheld quesadillas, a testament to the region’s unique culinary traditions. I was instantly captivated, and ever since, I’ve tried to recreate that authentic taste in my own kitchen.
Recipe Overview
- Prep Time: 45 minutes
- Cook Time: 45 minutes
- Total Time: 1 hour 30 minutes
- Servings: 12-16 Enchiladas
- Yield: 12-16 Enchiladas
- Dietary Type: Vegetarian
Ingredients
- 75 g dried ancho chiles, seeds and membranes removed
- 250 ml hot water
- 1 tablespoon lard
- 1 tablespoon oil
- 60 g onions, minced
- 155 g queso fresco, crumbled (or feta cheese)
- 500 g masa dough
- ½ teaspoon salt
- Oil (for frying)
Equipment Needed
- Comal or iron skillet
- Blender
- Small skillet
- Bowl
- Damp cloth
- Tortilla press
- Plastic wrap
Instructions
- Begin by preparing the ancho chiles. Heat a comal or iron skillet over medium heat. Place the chiles in the hot skillet, using a spatula to press them against it lightly. Turn them so that both sides begin to change color. This toasting process should take about 1-2 minutes. Be extremely careful not to burn them, as burnt chiles will impart a bitter flavor.
- Once toasted, soak the chiles in hot water for 25 minutes to rehydrate them. This will soften them for blending.
- After soaking, purée the chiles in a blender with ½ cup of the water in which they soaked, creating a smooth chile purée.
- Next, prepare the chile sauce. Melt the lard in a small skillet over medium heat. Add the chile purée and sauté for 5 minutes, allowing the flavors to meld. Set aside to cool slightly.
- In a separate small skillet, heat the oil over medium heat. Add the minced onion and sauté until transparent. Remove from the heat and set aside to cool slightly.
- Once the onions have cooled, stir in the crumbled queso fresco (or feta cheese). Add 1 tablespoon of the chile purée to the cheese mixture and stir well to combine. Set aside.
- Place the masa in a bowl. Add the remaining chile purée and the salt. Knead until all the ingredients are thoroughly combined, creating a vibrant red masa dough.
- Cover the masa dough with a damp cloth and let it rest for 20 minutes. This allows the masa to hydrate fully and become easier to work with.
- After the masa has rested, form it into small balls. The size will depend on how large you want your enchiladas, but about 2-3 tablespoons of masa per ball is a good starting point.
- Place each masa ball between two pieces of plastic wrap and use a tortilla press to flatten it into a circle, about 3 inches in diameter. If you don’t have a tortilla press, you can use a rolling pin, but be careful to keep the circles uniform.
- Remove the plastic wrap from the flattened masa circle. Spread the cheese mixture in the middle of each circle, leaving a narrow margin around the edge.
- Fold the masa circle in half to form a half-moon shape, encasing the cheese filling. Press the edges firmly to seal the enchilada, preventing the cheese from leaking out during cooking.
- Heat a comal or iron skillet over medium heat. Toast the enchiladas for 2 or 3 minutes on each side, or until the masa changes color and appears cooked. This step helps to set the masa and gives it a slightly toasted flavor.
- In a separate skillet, heat ½ inch (1 cm) of oil over medium heat. Once the oil is hot, carefully add the enchiladas, 2 or 3 at a time, and fry for 3 or 4 minutes on each side, until golden brown and crispy.
- Remove the fried enchiladas from the skillet and drain them on a wire rack or paper towels to remove excess oil.
Expert Tips & Tricks
- Chile Toasting: Keep a very close eye on the chiles as they toast. They can burn quickly, which will make the finished dish bitter.
- Masa Consistency: If your masa dough is too dry, add a little water, 1 tablespoon at a time, until it reaches a pliable consistency. If it’s too wet, add a little more masa harina.
- Cheese Leakage: To prevent cheese leakage during frying, ensure that the enchiladas are well-sealed. You can even use a fork to crimp the edges.
- Frying Temperature: The oil should be hot enough to cook the enchiladas quickly and evenly, but not so hot that they burn. Aim for a temperature of around 350°F (175°C).
- Make-Ahead Tip: The chile purée and cheese filling can be made ahead of time and stored in the refrigerator for up to 2 days.
Serving & Storage Suggestions
Serve Enchiladas Potosinas immediately while they’re still warm and crispy. Traditionally, they are served simply, often with just a sprinkle of crumbled queso fresco and a side of fresh salsa. They’re also delicious with a dollop of sour cream or guacamole.
Leftover enchiladas can be stored in the refrigerator for up to 3 days. To reheat, you can bake them in a preheated oven at 350°F (175°C) for about 10-15 minutes, or until heated through. You can also reheat them in a skillet over medium heat, but be careful not to burn them. While they can be frozen, the texture of the masa may change slightly upon thawing.
Nutritional Information
| Nutrient | Amount per Serving | % Daily Value |
|---|---|---|
| Calories | 200 kcal | 10% |
| Total Fat | 10g | 15% |
| Saturated Fat | 4g | 20% |
| Cholesterol | 20mg | 7% |
| Sodium | 300mg | 13% |
| Carbohydrates | 20g | 7% |
| Fiber | 3g | 12% |
| Sugar | 1g | – |
| Protein | 6g | 12% |
Note: Nutritional information is an estimate and may vary based on specific ingredients and portion sizes.
Variations & Substitutions
- Vegan Enchiladas: Substitute the queso fresco with a vegan cheese alternative. Use vegetable shortening instead of lard.
- Spicier Enchiladas: Add a dried chile de arbol to the ancho chiles for a spicier kick.
- Filling Variations: Experiment with different fillings, such as shredded chicken, potatoes, or beans.
- Gluten-Free: Ensure your masa harina is certified gluten-free. Most commercially available brands are naturally gluten-free, but always check the label.
FAQs (Frequently Asked Questions)
Q: Can I use store-bought tortillas instead of making the masa dough?
A: While you could, the unique flavor and texture of the masa dough, infused with the ancho chile, is what truly defines Enchiladas Potosinas. Store-bought tortillas will not provide the same authentic experience.
Q: What is masa harina, and where can I find it?
A: Masa harina is a finely ground corn flour treated with an alkaline solution (nixtamalization). It’s essential for making tortillas, tamales, and, in this case, Enchiladas Potosinas. You can find it in most supermarkets in the international foods section or at Latin American grocery stores.
Q: Can I bake these enchiladas instead of frying them?
A: While frying provides the characteristic crispy texture, you can bake them. Preheat your oven to 375°F (190°C), lightly brush the enchiladas with oil, and bake for about 20-25 minutes, or until heated through and lightly browned.
Q: How do I prevent the enchiladas from sticking to the comal or skillet?
A: Make sure your comal or skillet is properly heated before adding the enchiladas. You can also lightly grease it with a bit of oil.
Q: What kind of salsa goes well with Enchiladas Potosinas?
A: A simple salsa verde (green salsa) or a mild tomato salsa complements the richness of the enchiladas perfectly.
Final Thoughts
Enchiladas Potosinas are more than just a meal; they’re a culinary journey to the heart of San Luis Potosí. Don’t be intimidated by the process; the result is well worth the effort. The vibrant red masa, the cheesy filling, and the crispy texture combine to create a truly unforgettable experience. So, gather your ingredients, embrace the flavors of Mexico, and create your own little taste of San Luis Potosí in your kitchen. I encourage you to share your creations and variations – and don’t forget to let me know what you think!