
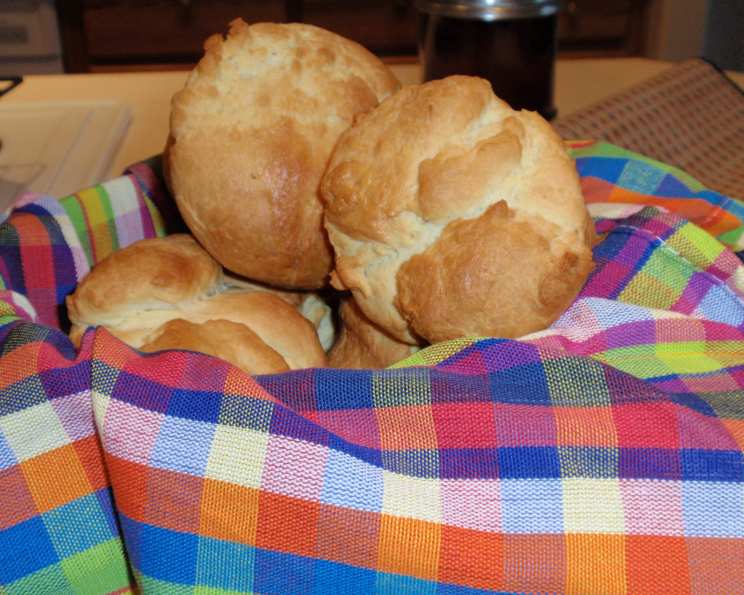
English Batter Buns: A Taste of Home
The aroma of warm, yeasty bread baking in the oven is a scent that instantly transports me back to my grandmother’s kitchen. She always had some sort of delicious treat emerging from her oven, and though she was known for her cinnamon rolls, I distinctly remember the soft, slightly sweet English Batter Buns that would occasionally grace our table. Their fluffy texture and golden-brown tops, glistening with melted butter, were simply irresistible. Every bite was a little piece of home, a memory I cherish and a flavor I love to recreate in my own kitchen.
Recipe Overview
- Prep Time: 35 minutes
- Cook Time: 10-15 minutes
- Total Time: 50-55 minutes (includes rising time)
- Servings: 12
- Yields: 12 Buns
- Dietary Type: Vegetarian
Ingredients
- 2 (.25 ounce) packages active dry yeast
- 1 cup milk, warm (110 to 115 degrees F)
- 1/2 cup shortening
- 2 tablespoons sugar
- 1 teaspoon salt
- 2 eggs, beaten
- 3 1/2 cups all-purpose flour
- 2 tablespoons butter, melted
Equipment Needed
- Large bowl
- Measuring cups and spoons
- Mixer (hand or stand)
- Spatula or spoon
- Plastic wrap or clean kitchen towel
- 12-cup muffin tin
- Pastry brush or spoon
Instructions
-
In a large bowl, dissolve the yeast in the warm milk. Ensure the milk isn’t too hot, as it can kill the yeast. Ideally, it should feel comfortably warm to the touch, like bathwater. Let it sit for about 5 minutes until it gets foamy. This indicates that the yeast is active and ready to go.
-
Add the shortening, sugar, salt, eggs, and 2 cups of the flour to the yeast mixture. Beat with a mixer on medium speed for 2 minutes. Make sure to scrape down the sides of the bowl occasionally to ensure everything is well combined.
-
Stir in the remaining 1 1/2 cups of flour until a smooth batter forms. The batter will be quite soft and slightly sticky, which is perfectly normal. Avoid adding more flour at this stage, as it can result in dry buns.
-
Cover the bowl with plastic wrap or a clean kitchen towel. Place the bowl in a warm place to rise until doubled in size, which should take about 30 minutes. A warm oven (turned off!) or a sunny spot can work well.
-
Once the dough has doubled, stir the batter vigorously for 25 strokes. This step is essential to redistribute the air and create a light and airy texture. The dough will remain slightly sticky.
-
Grease a 12-cup muffin tin thoroughly. Use either cooking spray or softened butter to prevent the buns from sticking.
-
Spoon the batter into the prepared muffin cups, filling each cup about two-thirds full. Since the batter is sticky, using two spoons—one to scoop and the other to scrape the batter into the cups—can make this process easier.
-
Tap the pan gently on the counter to settle the batter evenly in the cups. This will also help release any trapped air bubbles.
-
Cover the muffin tin with plastic wrap or a clean kitchen towel. Let the batter rise again until it reaches the tops of the muffin cups, which will take about 20 minutes.
-
Bake in a preheated oven at 400 degrees F (200 degrees C) for 10-15 minutes, or until the buns are golden brown. Keep a close eye on them during the last few minutes of baking to prevent them from over-browning.
-
Remove the buns from the oven and immediately brush them with the melted butter. This will give them a beautiful shine and add a delicious richness.
-
Let the buns cool in the muffin tin for a few minutes before transferring them to a wire rack to cool completely. This will prevent them from becoming soggy.
Expert Tips & Tricks
- Yeast Proofing: Always check the expiration date of your yeast. To ensure your yeast is active, mix a small amount with warm water and a pinch of sugar. If it doesn’t foam within 5-10 minutes, it’s likely dead.
- Warm Place: A slightly warm (but not hot) environment is crucial for proper rising. A good trick is to turn your oven on to its lowest setting for a few minutes, then turn it off and place the bowl inside.
- Sticky Dough Handling: Don’t be tempted to add more flour to make the dough easier to handle. The stickiness is what gives the buns their soft, airy texture. Instead, use wet hands or oiled spoons when working with the dough.
- Even Baking: For consistent baking, make sure your oven is properly preheated and that the muffin tin is positioned in the center of the oven.
Serving & Storage Suggestions
These English Batter Buns are best served warm, either on their own or with a dollop of butter, jam, or honey. They make a lovely addition to any meal, from breakfast to dinner.
- Room Temperature: Store cooled buns in an airtight container at room temperature for up to 2 days.
- Refrigerator: For longer storage, keep them in the refrigerator for up to 5 days.
- Freezer: To freeze, wrap the cooled buns individually in plastic wrap, then place them in a freezer-safe bag. They can be frozen for up to 2 months.
- Reheating: Reheat refrigerated or frozen buns in a preheated oven at 350 degrees F (175 degrees C) for 5-10 minutes, or until warmed through. You can also microwave them for a few seconds, but be careful not to overcook them, as they can become tough.
Nutritional Information
Please note that these are approximate values and can vary based on specific ingredients and portion sizes.
| Nutrient | Amount per Serving | % Daily Value |
|---|---|---|
| Calories | 262 kcal | 13% |
| Total Fat | 12.4g | 19% |
| Saturated Fat | 4.1g | 20% |
| Cholesterol | 38.9mg | 13% |
| Sodium | 233.8mg | 10% |
| Total Carbohydrate | 31.4g | 11% |
| Dietary Fiber | 1.3g | 5% |
| Sugars | 2.2g | 4% |
| Protein | 6g | 12% |
Variations & Substitutions
- Sweet Buns: Add a teaspoon of vanilla extract to the batter for a touch of sweetness.
- Herbed Buns: Incorporate dried herbs like rosemary, thyme, or oregano for a savory twist. Add about 1-2 teaspoons of dried herbs to the batter.
- Cheese Buns: Add 1/2 cup of shredded cheese (cheddar, parmesan, or Gruyere) to the batter for a cheesy flavor.
- Dairy-Free Buns: Substitute the milk with your favorite plant-based milk, such as almond, soy, or oat milk. Use a dairy-free shortening or oil.
FAQs (Frequently Asked Questions)
Q: Why is my dough not rising?
A: Several factors can affect rising: expired yeast, water that’s too hot (killing the yeast), or a cold environment. Ensure your yeast is fresh, your water is at the right temperature, and provide a warm place for the dough to rise.
Q: Can I use bread flour instead of all-purpose flour?
A: Yes, you can, but the texture might be slightly different. Bread flour has a higher protein content, which could result in a slightly chewier bun.
Q: How do I prevent the buns from sticking to the muffin tin?
A: Thoroughly grease the muffin tin with cooking spray or softened butter. You can also use muffin liners for easy removal.
Q: Can I make these buns ahead of time?
A: Yes, you can prepare the dough ahead of time and store it in the refrigerator overnight. Let it come to room temperature before proceeding with the second rise and baking.
Q: What if I don’t have shortening?
A: You can substitute shortening with an equal amount of melted butter or vegetable oil, though this may slightly alter the texture and flavor.
Final Thoughts
These English Batter Buns are more than just a recipe; they’re a connection to a cherished past, a simple pleasure that brings warmth and comfort to any occasion. I encourage you to try this recipe and experience the joy of baking these delightful buns. Don’t be afraid to experiment with variations and make them your own. I’d love to hear your feedback and any creative twists you add to the recipe. Serve them alongside a hearty soup or stew for a complete and satisfying meal. Happy baking!