
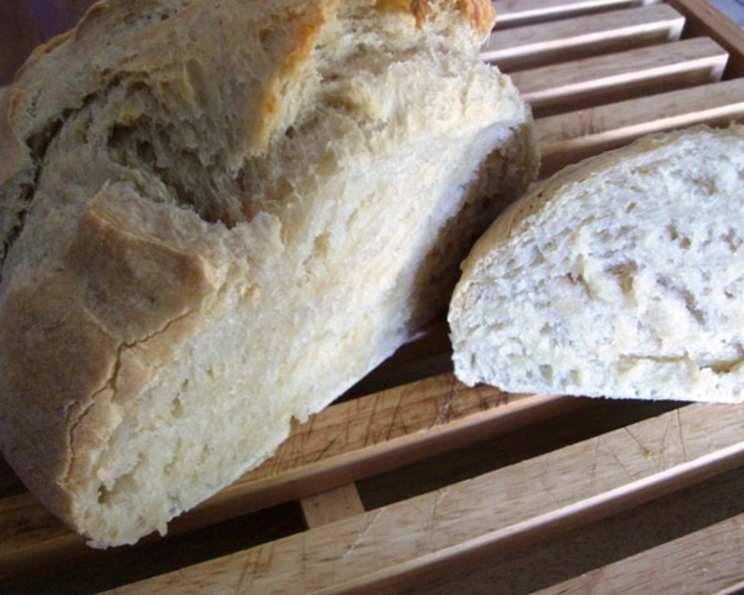
Enjoy No-Knead, Fridge-Friendly Dough: Bread in 5 Minutes
I still remember the aroma of my grandmother’s kitchen, a comforting blend of warm yeast and flour that permeated every corner of her home. She baked bread every Sunday, a ritual as comforting as it was delicious. I would sit at her worn, wooden table, eagerly anticipating the first slice, slathered with butter and a sprinkle of sea salt. I always thought her bread-making was an unattainable art, a skill reserved for culinary wizards. That was until I discovered this no-knead, fridge-friendly recipe. It’s brought back those beautiful memories and filled my kitchen with the same irresistible scent, but with a fraction of the effort.
Recipe Overview:
- Prep Time: 20 minutes
- Rise Time: 2-5 hours
- Cook Time: 30 minutes
- Total Time: 3 hours (minimum)
- Yield: 4 one-pound loaves
- Dietary Type: Vegetarian
Ingredients:
- 3 cups lukewarm water (about 100°F)
- 1 1/2 tablespoons granulated yeast
- 1 1/2 tablespoons kosher salt (or other coarse salt)
- 6 1/2 cups all-purpose white flour (or white whole wheat flour, no need to sift)
- Cornmeal, for dusting
Equipment Needed:
- 5-quart bowl
- Wooden spoon
- Lid (not airtight) or plastic wrap
- Pizza peel or baking sheet
- Serrated knife
- Pizza stone or baking sheet
- Broiler pan
- Wire cooling rack
Instructions:
- In a spacious, 5-quart bowl, combine the lukewarm water, granulated yeast, and kosher salt.
- Add all the flour to the bowl. Using a sturdy wooden spoon, mix the ingredients together until they are uniformly moist. It’s important to note that no kneading is required, and you don’t need to overmix once the ingredients are wet. This will result in a loose and fairly wet dough.
- Cover the bowl with a lid (make sure it’s not airtight) or plastic wrap. If using plastic wrap, poke several holes in it to allow the dough to breathe.
- Allow the dough mixture to rise at room temperature until it begins to collapse. This usually takes around 2 hours, but it can take up to 5 hours depending on the room temperature.
- After the initial rising period, the dough is ready to be baked immediately, or you can tightly cover it and refrigerate it for up to 14 days. Refrigerating the dough for at least 3 hours will make it easier to handle.
- When you’re ready to bake, prepare a pizza peel by generously sprinkling it with cornmeal. If you don’t have a pizza peel, you can use the back of a baking sheet, also sprinkled with cornmeal. This step is essential to prevent the bread from sticking during transfer to the oven.
- Uncover the dough in the bowl and lightly sprinkle the surface with flour.
- Pull up and cut off a 1-pound (grapefruit-size) piece of dough using a serrated knife. Immediately recover the remaining dough in the bowl and return it to the refrigerator for baking later.
- Hold the mass of dough in your hands and add a little more flour as needed to prevent it from sticking to your hands.
- Create a smooth ball of dough by gently pulling the sides down around to the bottom, rotating the dough as you go.
- While stretching and shaping, most of the dusting flour will naturally fall off. The bottom of the loaf may appear to be a collection of bunched ends, but don’t worry, it will flatten out during resting and baking. This shaping process should only take about 1 minute.
- Place the shaped dough on the prepared pizza peel or overturned baking sheet.
- Allow the loaf to rest for about 40 minutes. It doesn’t need to be covered during this time. The dough may not rise significantly during resting; this is perfectly normal.
- Approximately 20 minutes before baking, place a pizza stone on the center rack of your oven. If you don’t have a pizza stone, you can use another baking sheet. Remove any upper racks from the oven.
- Place a broiler pan on a rack below the pizza stone or directly on the floor of the oven.
- Preheat your oven to 450°F (232°C).
- When the dough has rested for 40 minutes, lightly dust the top of the loaf with flour.
- Using a serrated knife, carefully slash a ¼-inch-deep cross or tic-tac-toe pattern into the top of the loaf. This allows steam to escape during baking and helps the bread rise properly.
- Carefully slide the loaf off the pizza peel or overturned baking sheet and onto the preheated pizza stone in the oven.
- Quickly but carefully pour 1 cup of hot water into the broiler tray and immediately close the oven door. The steam created by the hot water will contribute to a crusty exterior.
- Bake for approximately 30 minutes, or until the crust is nicely browned and the bread feels firm to the touch.
- Allow the bread to cool completely, preferably on a wire cooling rack, before slicing and serving. This helps prevent a gummy texture.
Expert Tips & Tricks:
- For an even crispier crust, try adding a tablespoon of vinegar to the water you pour into the broiler pan.
- If the top of the bread is browning too quickly, you can tent it loosely with aluminum foil during the last 10-15 minutes of baking.
- Experiment with different flours! Try a blend of all-purpose and bread flour for a chewier texture, or add a bit of rye flour for a more complex flavor.
- Don’t skip the resting period! It allows the gluten to relax, resulting in a more tender crumb.
Serving & Storage Suggestions:
Serve this bread warm with a generous smear of butter, alongside a hearty soup, or as part of a delicious sandwich. It pairs beautifully with olive oil and balsamic vinegar for dipping.
Store leftover bread at room temperature in a bread box or loosely wrapped in plastic wrap for up to 2-3 days. For longer storage, wrap tightly and freeze for up to 2 months. Thaw completely before reheating. To refresh day-old bread, lightly spritz it with water and bake in a preheated 350°F (175°C) oven for 5-10 minutes.
Nutritional Information:
| Nutrient | Amount per Serving (1/4 of recipe) | % Daily Value |
|---|---|---|
| Calories | 1005.3 kcal | N/A |
| Calories from Fat | 27 g | N/A |
| Total Fat | 3.1 g | 4% |
| Saturated Fat | 0.5 g | 2% |
| Cholesterol | 0 mg | 0% |
| Sodium | 3503.8 mg | 145% |
| Total Carbohydrate | 209.2 g | 69% |
| Dietary Fiber | 8.9 g | 35% |
| Sugars | 0.7 g | 2% |
| Protein | 30.4 g | 60% |
Note: Nutritional information is an estimate and may vary based on specific ingredients and preparation methods.
Variations & Substitutions:
- Herbed Bread: Add 2 tablespoons of chopped fresh herbs (rosemary, thyme, oregano) to the dough when mixing.
- Garlic Bread: Mix 2 cloves of minced garlic and 2 tablespoons of olive oil into the dough.
- Whole Wheat Bread: Substitute up to half of the all-purpose flour with whole wheat flour. You may need to add a bit more water to achieve the desired dough consistency.
- Seeded Bread: Sprinkle the top of the loaf with sesame seeds, poppy seeds, or sunflower seeds before baking.
- Cheese Bread: Add 1 cup of shredded cheese (cheddar, parmesan, or mozzarella) to the dough.
FAQs (Frequently Asked Questions):
Q: Can I use active dry yeast instead of instant yeast?
A: Yes, you can. Bloom the active dry yeast in the lukewarm water for 5-10 minutes before adding the salt and flour.
Q: My dough didn’t rise much during the initial rising period. What did I do wrong?
A: The most common reason for this is using water that is too hot or too cold, which can kill the yeast. Also, ensure your yeast is fresh.
Q: Can I freeze the dough instead of refrigerating it?
A: Yes, you can freeze the dough after the initial rising period. Thaw it in the refrigerator overnight before shaping and baking.
Q: My bread is too dense. What can I do to make it lighter?
A: Make sure you are not adding too much flour during the shaping process. Overworking the dough can lead to a dense loaf.
Q: Can I bake this bread in a Dutch oven?
A: Absolutely! Preheat the Dutch oven along with the oven, and carefully place the dough inside. Bake covered for 20 minutes, then uncovered for 10-15 minutes, or until golden brown.
Final Thoughts:
This no-knead bread recipe is a revelation, a testament to the fact that delicious, homemade bread doesn’t require hours of laborious kneading. Its simplicity is its strength, making it accessible to even the most novice bakers. Don’t be intimidated by the long instructions; each step is straightforward and rewarding. So, preheat your oven, gather your ingredients, and prepare to be amazed by the incredible aroma and taste of freshly baked bread that you made with just 5 minutes of active effort. Share your creations, experiment with variations, and most importantly, enjoy the process. Bon appétit!