
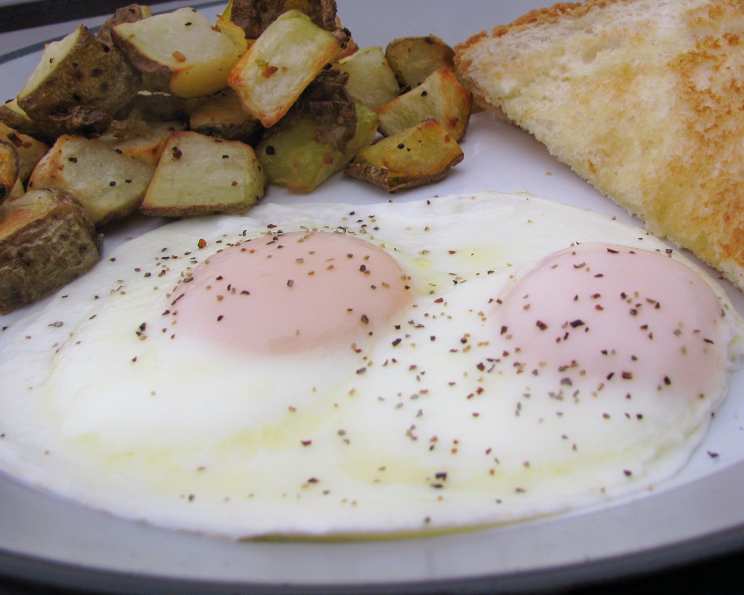
Even a Kid Can Do It: Perfect Fried Eggs
I still remember the day I truly learned to cook an egg. I was probably seven or eight, standing on a wobbly stool in my grandmother’s sunny kitchen. She showed me, with infinite patience, how to crack the shell just so, without getting any rogue bits of shell in the bowl. The real magic, though, was in the pan. She taught me the sizzle test – that gentle sound that meant the butter was hot enough to coax the egg into a delicate dance, resulting in a perfectly cooked white and a yolk that flowed like liquid gold. It was a revelation, and that simple fried egg became a symbol of independence and culinary possibility in my young mind. Now, I’m sharing those basics with you.
Recipe Overview
- Prep Time: 1 minute
- Cook Time: 2-3 minutes
- Total Time: 3-4 minutes
- Servings: 1
- Yield: 1 fried egg
- Dietary Type: Vegetarian, Gluten-Free, Dairy-Free (if using oil)
Ingredients
- 1 tablespoon margarine (or butter, or oil for dairy-free)
- 2 eggs
- 1 tablespoon water
Equipment Needed
- Nonstick frying pan with a tight-fitting lid
- Spatula
Instructions
-
Start by placing your nonstick frying pan on the stovetop. It’s crucial that your pan is nonstick to prevent the eggs from sticking and tearing. Make sure you have a lid handy that fits snugly on the pan. A tight seal is important for steaming the eggs later.
-
Add 1 tablespoon of margarine (or butter, or oil) to the pan. Turn the heat to medium to medium-high. The goal is to melt the fat evenly and create a sizzling surface without burning it.
-
Watch the margarine carefully. Once it’s melted and bubbly, it’s time to introduce the eggs.
-
Carefully break the eggs directly into the pan. Try to crack them close to the surface of the pan to prevent the yolks from breaking. If a bit of shell sneaks in, use a piece of the broken eggshell to scoop it out—the shell acts like a magnet!
-
Now, pay attention to the egg whites. As they cook, they will turn from translucent to opaque and good and white. This is your visual cue to move on to the next step. This typically takes a minute or two, depending on the heat.
-
Once the whites are mostly set, add 1 tablespoon of water to the pan. Pour the water next to the eggs, not directly on them, to prevent splattering.
-
Immediately cover the pan with the tight-fitting lid. This is where the magic happens. The water will turn to steam, gently cooking the tops of the eggs and setting the yolks without having to flip them.
-
Give the pan a gentle shake to loosen the eggs from the bottom. This helps prevent sticking and makes it easier to slide them onto a plate. Be careful not to shake too vigorously, or you might break the yolks.
-
Continue cooking until the yolks reach your desired doneness. This will take anywhere from 30 seconds to a minute or two, depending on how runny you like your yolks. For a completely runny yolk, cook for less time. For a firmer yolk, cook longer. Lift the lid occasionally to check the progress.
-
Once the eggs are cooked to your liking, carefully slide them out of the pan onto your plate. Use a spatula to help release them if needed.
Expert Tips & Tricks
- Low and Slow: While the recipe calls for medium to medium-high heat, don’t be afraid to lower the heat slightly if the margarine is browning too quickly. A slower cook will result in more tender whites.
- Don’t Overcrowd the Pan: This recipe is for one serving (two eggs). If you’re cooking for a crowd, cook the eggs in batches to avoid overcrowding the pan, which can lower the temperature and result in uneven cooking.
- Perfectly Round Eggs: For picture-perfect round eggs, crack each egg into a small bowl before gently sliding it into the pan. This helps contain the shape as it cooks.
- Seasoning is Key: Don’t forget to season your eggs with salt and pepper (or your favorite spices) immediately after they’re cooked. A sprinkle of fresh herbs like chives or parsley adds a pop of freshness.
- Rescue a Broken Yolk: If a yolk breaks while you’re cracking the egg, don’t despair! It will still taste delicious. Simply continue with the recipe as directed.
Serving & Storage Suggestions
Serve your perfectly fried eggs immediately while they are still warm. They are fantastic on toast, bagels, or English muffins. Add some crispy bacon, sausage, or avocado for a more substantial meal. Fried eggs are also delicious on top of salads, rice bowls, or even burgers.
Leftover fried eggs are best enjoyed immediately, but if you must store them, place them in an airtight container and refrigerate for up to 24 hours. Reheating is not recommended, as the yolks will become rubbery. It’s best to only cook what you can eat in one sitting.
Nutritional Information
| Nutrient | Amount per Serving | % Daily Value |
|---|---|---|
| Calories | 244 kcal | 12% |
| Total Fat | 21g | 32% |
| Saturated Fat | 6g | 28% |
| Cholesterol | 372mg | 124% |
| Sodium | 275mg | 12% |
| Total Carbohydrate | 1g | 0% |
| Dietary Fiber | 0g | 0% |
| Sugars | 0g | 0% |
| Protein | 13g | 26% |
Note: Nutritional information is an estimate and may vary based on specific ingredients and cooking methods.
Variations & Substitutions
- Dairy-Free: Substitute the margarine with olive oil, coconut oil, or avocado oil.
- Spice It Up: Add a pinch of red pepper flakes to the pan while the margarine is melting for a little heat.
- Herbaceous Eggs: Sprinkle fresh herbs like chopped chives, parsley, or dill over the eggs after they are cooked.
- Cheesy Eggs: Sprinkle shredded cheese (cheddar, mozzarella, or your favorite) over the eggs during the last minute of cooking, while they are covered with the lid.
- Mediterranean Style: Saute some chopped tomatoes, onions, and garlic in olive oil before adding the eggs.
FAQs (Frequently Asked Questions)
Q: Why is it important to use a nonstick pan?
A: A nonstick pan prevents the eggs from sticking and tearing, ensuring they slide easily onto your plate.
Q: What if I don’t have a lid for my frying pan?
A: You can use a baking sheet or a larger plate as a makeshift lid, but make sure it covers the pan as completely as possible.
Q: How do I know when the eggs are cooked enough?
A: The whites should be fully set and opaque, and the yolks should be cooked to your desired doneness. Use a spatula to gently nudge the yolks—if they jiggle slightly, they are still runny.
Q: Can I use butter instead of margarine?
A: Yes, butter works perfectly well in this recipe. It will add a richer flavor.
Q: My yolks always break when I crack the eggs. What am I doing wrong?
A: Try cracking the eggs on a flat surface rather than the edge of the pan. Also, crack them gently and close to the surface of the pan to avoid damaging the yolks.
Final Thoughts
There you have it – perfect fried eggs, even a kid can do it! This simple recipe is a foundation for so many delicious meals. Don’t be afraid to experiment with different seasonings and toppings to create your own signature fried egg. Gather your ingredients, put on some music, and enjoy the process. And most importantly, share your creations with those you love! Happy cooking!