
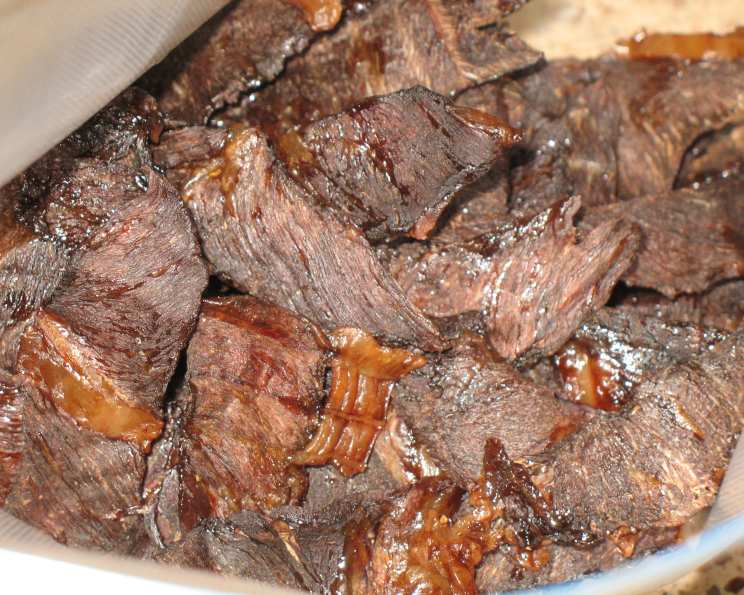
Excellent Beef Jerky: A Homemade Classic
The scent of jerky being slowly coaxed to perfection in the oven always takes me back to childhood camping trips. My grandfather, a man of few words but immense culinary wisdom, would meticulously prepare batches of jerky before every excursion. The rich, savory aroma would fill his garage, a promise of long hikes, crackling campfires, and stories told under a blanket of stars. That jerky, a testament to patience and simple ingredients, remains one of my most cherished food memories. Now, I strive to recreate that same nostalgic flavor with this time-tested recipe.
Recipe Overview
- Prep Time: 20 minutes
- Cook Time: 3 hours
- Total Time: 27 hours, 20 minutes (includes marinating)
- Servings: Approximately 50 pieces
- Yield: Approximately 1 pound
- Dietary Type: High Protein
Ingredients
- 1 lb flank steak
- 1 teaspoon seasoning salt
- ½ teaspoon garlic powder
- ½ teaspoon onion powder
- ¼ teaspoon pepper
- ⅓ cup La Choy soy sauce
- ⅓ cup Worcestershire sauce
- 2 tablespoons liquid smoke
Equipment Needed
- Large plastic bag or container
- Paper towels
- Oven rack
- Aluminum foil
- Airtight container or jar
Instructions
-
Begin by preparing the flank steak. Pat it completely dry with paper towels. This step is crucial for proper moisture evaporation during the drying process.
-
Using a sharp knife, slice the flank steak into thin strips, approximately ¼ inch thick, across the grain. Cutting against the grain ensures a more tender final product. This also helps prevent tough jerky.
-
In a large plastic bag (a gallon-sized freezer bag works well) or a non-reactive container, combine the marinade ingredients: seasoning salt, garlic powder, onion powder, pepper, La Choy soy sauce, Worcestershire sauce, and liquid smoke. Whisk or shake to combine them.
-
Add the sliced flank steak to the marinade. Ensure that each piece of meat is thoroughly coated. Massage the marinade into the meat to maximize flavor absorption.
-
Seal the bag or cover the container, removing as much air as possible. Refrigerate for at least 24 hours, or preferably overnight. The longer the meat marinates, the more intense the flavor will be. Turning the bag or stirring the meat occasionally will help ensure even marination.
-
After marinating, remove the flank steak from the refrigerator. Drain the meat from the marinade and lay the strips on several layers of paper towels. Thoroughly blot the meat dry, removing as much excess moisture as possible. This step is critical for achieving a good jerky texture. The drier the meat is before cooking, the better the final result will be.
-
Preheat your oven to 140°F (60°C). This low temperature is essential for slowly drying the meat rather than cooking it. Use an oven thermometer to verify the temperature, as oven temperatures can vary.
-
Place the meat strips directly on the oven rack. Ensure the strips are spaced evenly apart to allow for proper air circulation. Avoid overcrowding the rack, as this can impede the drying process.
-
Line the bottom of your oven with a piece of aluminum foil to catch any drippings. This will help prevent a smoky oven and make cleanup easier.
-
Cook the jerky at 140°F (60°C) for 3 hours. The exact cooking time may vary depending on the thickness of the meat strips and your oven.
-
After 3 hours, check the jerky for doneness. It should be dry, slightly pliable, and leathery in texture. It should crack slightly when bent but not break completely. If the jerky is still too soft or moist, continue cooking for another 30-60 minutes, checking frequently.
-
Once the jerky is done, remove it from the oven and let it cool completely on a wire rack. This allows air to circulate and prevents moisture from building up.
-
After the jerky is completely cooled, transfer it to an airtight container or jar.
-
Refrigerate the jerky in the airtight container overnight. This allows the flavors to further meld and ensures any residual moisture is distributed evenly.
Expert Tips & Tricks
- For a spicier jerky, add a pinch of red pepper flakes or a dash of hot sauce to the marinade.
- If you don’t have liquid smoke, you can omit it, but it adds a distinctive smoky flavor that enhances the jerky.
- For easier slicing, partially freeze the flank steak for about 30 minutes before slicing. This will make it firmer and easier to cut into uniform strips.
- If you want to use a dehydrator instead of an oven, follow the manufacturer’s instructions for jerky, typically around 160°F (71°C) for 4-6 hours.
- Experiment with different marinades! Try adding brown sugar for a sweeter jerky, or ginger and sesame oil for an Asian-inspired flavor.
Serving & Storage Suggestions
Serve your homemade beef jerky as a high-protein snack, perfect for hiking, camping, or simply enjoying on the go. It also makes a great addition to charcuterie boards or gift baskets.
Store the jerky in an airtight container in the refrigerator for up to 2 weeks. For longer storage, you can freeze the jerky for up to 2-3 months. Thaw it in the refrigerator before serving. While properly dried and stored jerky can last at room temperature for a few days, refrigeration is recommended to maintain optimal freshness and prevent spoilage.
Nutritional Information
| Nutrient | Amount per Serving | % Daily Value |
|---|---|---|
| Calories | 18 kcal | 1% |
| Total Fat | 0.8g | 1% |
| Saturated Fat | 0.3g | 1% |
| Cholesterol | 3.7mg | 1% |
| Sodium | 130mg | 5% |
| Total Carbohydrate | 0.5g | 0% |
| Dietary Fiber | 0g | 0% |
| Sugars | 0.2g | 0% |
| Protein | 2.1g | 4% |
Note: Nutritional information is an estimate and may vary based on specific ingredients and portion sizes.
Variations & Substitutions
- Gluten-Free: Ensure your soy sauce and Worcestershire sauce are gluten-free. Tamari is a great gluten-free alternative to soy sauce.
- Spicy Jerky: Add cayenne pepper, Sriracha, or chili flakes to the marinade. Adjust the amount to your preferred spice level.
- Sweet and Savory: Incorporate brown sugar, honey, or maple syrup into the marinade for a touch of sweetness.
- Different Meats: While this recipe calls for flank steak, you can also use other lean cuts of beef, such as top round or bottom round.
FAQs (Frequently Asked Questions)
Q: Why is it important to slice the meat against the grain?
A: Slicing against the grain shortens the muscle fibers, resulting in a more tender and easier-to-chew jerky.
Q: Can I use a different type of soy sauce?
A: Yes, but be mindful of the sodium content. Low-sodium soy sauce may require adjusting the amount of seasoning salt.
Q: How do I know when the jerky is done?
A: The jerky should be dry, leathery, and slightly pliable. It should crack when bent but not break completely.
Q: Can I make this recipe without liquid smoke?
A: Yes, but the jerky will lack the signature smoky flavor. You can try adding smoked paprika for a similar effect.
Q: How long will the jerky last?
A: Properly stored in an airtight container in the refrigerator, the jerky will last for up to 2 weeks. For longer storage, freeze for up to 3 months.
Final Thoughts
Making your own beef jerky is a rewarding experience that allows you to customize the flavors to your liking. This recipe provides a solid foundation, but feel free to experiment with different spices and seasonings to create your own signature blend. Don’t be intimidated by the seemingly long process – the hands-on time is minimal, and the end result is well worth the effort. Gather your ingredients, embrace the aroma, and enjoy the satisfaction of crafting a delicious and wholesome snack that’s far superior to anything you can find on store shelves. I encourage you to give this recipe a try and share your creations and feedback. Perhaps you’ll even pair it with a hoppy craft beer for the ultimate snacking experience!