
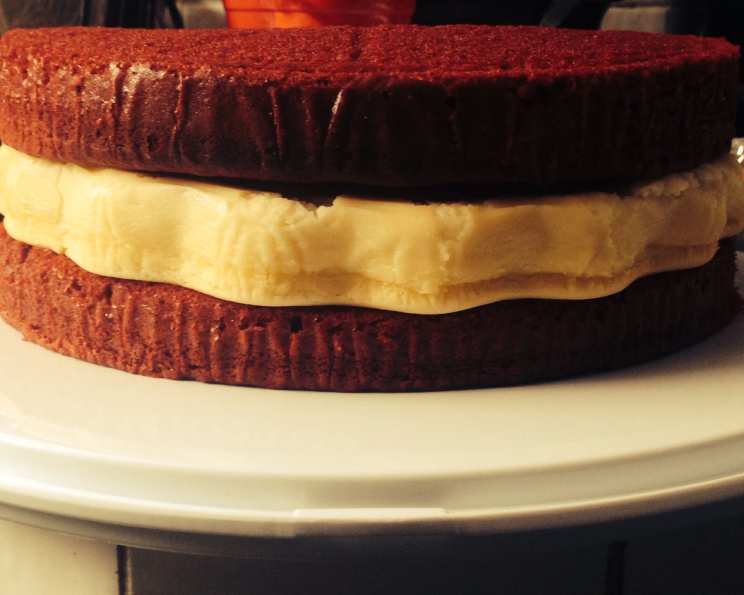
The Ultimate Extra Moist Red Velvet Cake
The first time I tasted Red Velvet cake, I was at my grandmother’s 80th birthday party. Amidst the sea of floral dresses and warm hugs, there it sat: a towering beauty, its crimson layers peeking through a cloud of cream cheese frosting. One bite, and I was hooked. The tender crumb, the subtle chocolate notes, and that irresistible tang – it was pure cake perfection. Since then, I’ve been on a quest to recreate that magic, and after countless attempts, I’m thrilled to share my version of an extra moist Red Velvet cake that rivals even Grandma’s.
Recipe Overview
- Prep Time: 30 minutes
- Cook Time: 35-40 minutes
- Total Time: 1 hour 5 minutes
- Servings: 12
- Yield: One 3-layer cake
- Dietary Type: Not specified
Ingredients
- 2 1⁄2 cups of all-purpose unbleached flour
- 3 semi-sweet chocolate squares (or 1/2 cup cocoa powder)
- 1 teaspoon baking soda
- 1⁄2 teaspoon salt
- 1 cup butter, at room temperature
- 2 cups granulated sugar
- 4 eggs
- 1 ounce red food coloring
- 2 teaspoons vanilla extract
- 1⁄2 teaspoon butter flavoring
- 1⁄2 cup buttermilk
- 1 cup sour cream
Equipment Needed
- Three 9-inch round cake pans
- Electric mixer (stand or hand-held)
- Mixing bowls
- Sifter
- Measuring cups and spoons
- Rubber spatula
- Wooden skewer or toothpick
- Cooling rack
Instructions
-
Begin by preheating your oven to 350°F (175°C). Thoroughly grease and lightly flour three 9-inch round cake pans. This ensures the cakes release easily after baking.
-
In a medium bowl, sift together the flour, salt, and baking soda. This step is crucial for a light and airy texture. If you’re opting for cocoa powder instead of chocolate squares, sift it in with the dry ingredients as well.
-
If you’re using semi-sweet chocolate squares, melt them with 1 tablespoon of milk in a heatproof bowl set over a simmering pot of water (double boiler) or in the microwave in short intervals, stirring until smooth. Be careful not to overheat the chocolate. Set aside to cool slightly. It’s important the chocolate isn’t too hot when added to the batter.
-
In a large mixing bowl, cream together the butter and sugar using an electric mixer on medium speed for approximately 5 minutes. This step is vital for incorporating air into the batter, resulting in a tender crumb. The mixture should be light and fluffy.
-
Add the eggs one at a time, beating well after each addition until the mixture is smooth and fully combined. Make sure to scrape down the sides of the bowl as needed to ensure everything is evenly incorporated.
-
Now, add the red food coloring, sour cream, buttermilk, vanilla extract, butter flavoring, and the melted chocolate squares (if using). Mix on low speed until just combined. Be careful not to overmix at this stage, as it can develop the gluten in the flour and result in a tough cake.
-
Gradually add the flour mixture to the wet ingredients on low speed, mixing until just combined. Avoid overmixing; a few streaks of flour are okay.
-
Divide the batter evenly among the three prepared cake pans. A kitchen scale can be helpful for ensuring even layers.
-
Bake in the preheated oven for 35 to 40 minutes, or until a wooden skewer or toothpick inserted into the center comes out clean. The cake should spring back lightly when touched.
-
Let the cakes cool in the pans for about 10 minutes before inverting them onto a wire rack to cool completely. This prevents the cakes from sticking and allows them to cool evenly.
-
Once the cakes are completely cool, you can frost them with your favorite cream cheese frosting (recipe not included).
Expert Tips & Tricks
- Room Temperature Matters: Ensure your butter, eggs, and sour cream are at room temperature for optimal emulsification, leading to a smoother batter and a more tender cake.
- Buttermilk Substitute: If you don’t have buttermilk, you can make a quick substitute by adding 1 1/2 teaspoons of white vinegar or lemon juice to a 1/2 cup of milk. Let it sit for 5 minutes before using.
- Don’t Overbake: Overbaking is the enemy of moist cake. Start checking for doneness around 30 minutes and adjust the baking time accordingly.
- Level the Layers: If your cake layers are uneven, use a serrated knife to trim the tops before frosting for a more professional-looking cake.
- Cake Strips: Use cake strips wrapped around the cake pans to ensure even baking and prevent doming.
- Cocoa Powder Choice: Dutch-processed cocoa powder will give a darker color and milder flavor compared to natural cocoa powder.
Serving & Storage Suggestions
Serve your Red Velvet cake chilled or at room temperature. It pairs beautifully with a classic cream cheese frosting, but you can also experiment with other frostings like Swiss meringue buttercream or even a simple vanilla glaze.
To store leftovers, tightly wrap the cake in plastic wrap or place it in an airtight container. It will keep at room temperature for up to 2 days, in the refrigerator for up to 5 days, or in the freezer for up to 2 months. If freezing, wrap individual slices tightly to prevent freezer burn. Thaw frozen cake in the refrigerator overnight before serving.
Nutritional Information
Note: Nutritional information is an estimate and may vary based on specific ingredients and serving size.
| Nutrient | Amount per Serving | % Daily Value |
|---|---|---|
| Calories | 426 kcal | 21% |
| Total Fat | 21.1g | 32% |
| Saturated Fat | 12.5g | 63% |
| Cholesterol | 113mg | 38% |
| Sodium | 387.5mg | 16% |
| Total Carbohydrate | 54.5g | 18% |
| Dietary Fiber | 0.7g | 3% |
| Sugars | 34.7g | N/A |
| Protein | 5.7g | 11% |
Variations & Substitutions
- Gluten-Free: Substitute the all-purpose flour with a high-quality gluten-free all-purpose flour blend. You may need to add a binder like xanthan gum to help with the texture.
- Vegan: Replace the butter with vegan butter, the eggs with flax eggs (1 tablespoon of ground flaxseed mixed with 3 tablespoons of water per egg), the buttermilk with non-dairy milk mixed with vinegar or lemon juice, and the sour cream with a vegan sour cream alternative.
- Chocolate Intensity: Adjust the amount of cocoa powder or melted chocolate to control the intensity of the chocolate flavor.
- Frosting Flavors: Experiment with different flavorings in your cream cheese frosting, such as lemon zest, orange extract, or a hint of coffee.
- Nuts: Add chopped pecans or walnuts to the batter or frosting for added texture and flavor.
FAQs (Frequently Asked Questions)
Q: Why is Red Velvet cake red?
A: Traditionally, the red color came from the reaction between cocoa powder and acidic ingredients like buttermilk. Today, red food coloring is typically used to achieve the vibrant color.
Q: Can I use a different size cake pan?
A: Yes, but you may need to adjust the baking time. Smaller pans will require longer baking times, while larger pans will require shorter baking times.
Q: Why is my cake dry?
A: Overbaking is the most common cause of dry cake. Be sure to check for doneness regularly and avoid overmixing the batter.
Q: Can I make this cake ahead of time?
A: Yes, you can bake the cake layers ahead of time and store them tightly wrapped in the refrigerator or freezer until you’re ready to frost.
Q: What is the purpose of the vinegar and baking soda in Red Velvet cake?
A: The vinegar and baking soda create a chemical reaction that helps to leaven the cake and gives it its signature tang.
Final Thoughts
This Extra Moist Red Velvet Cake is more than just a recipe; it’s a journey back to cherished memories and a celebration of simple pleasures. I hope this recipe empowers you to create your own slice of happiness and share it with those you love. Don’t be afraid to experiment with variations and make it your own. And most importantly, have fun in the kitchen! I’d love to hear about your baking adventures and see your creations. Happy baking!